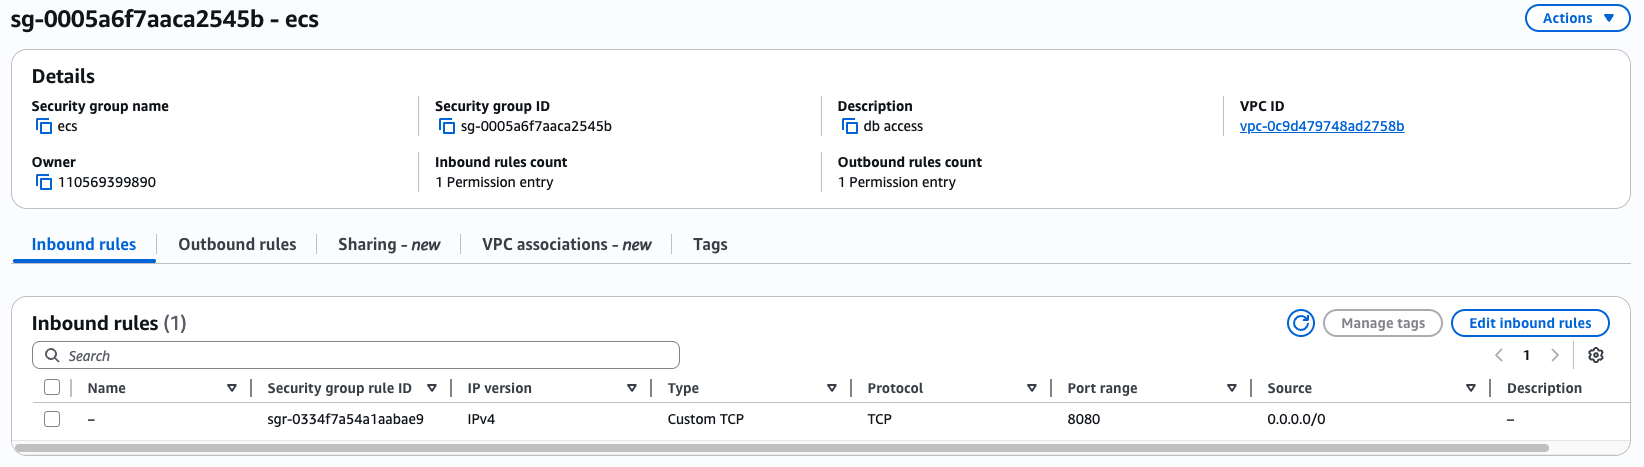
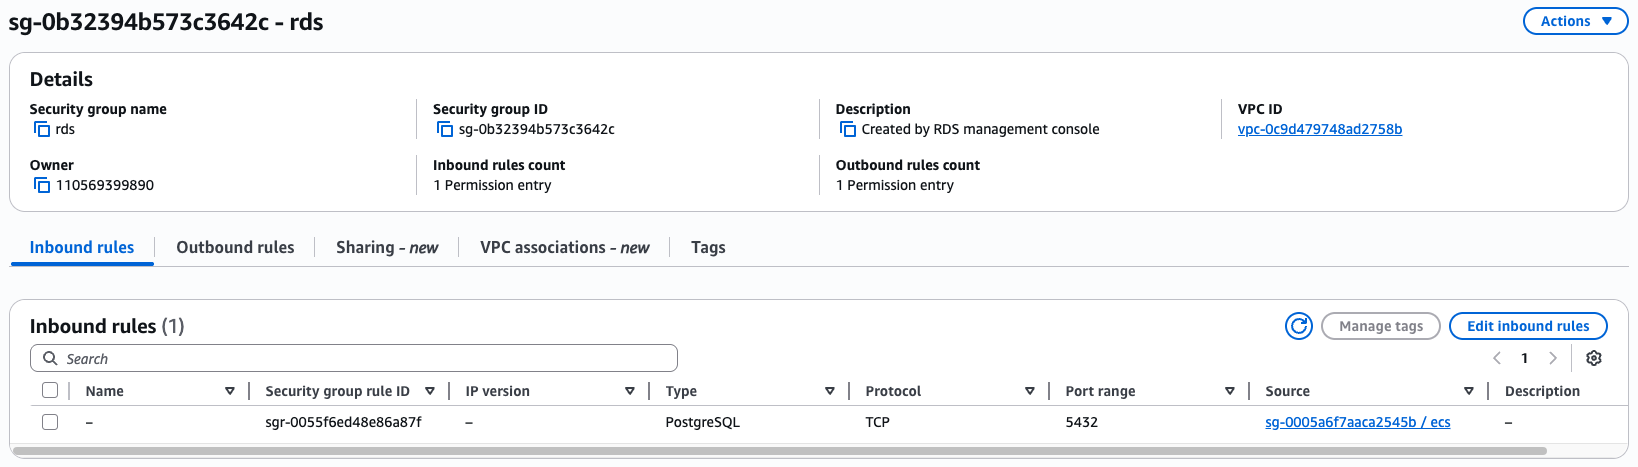
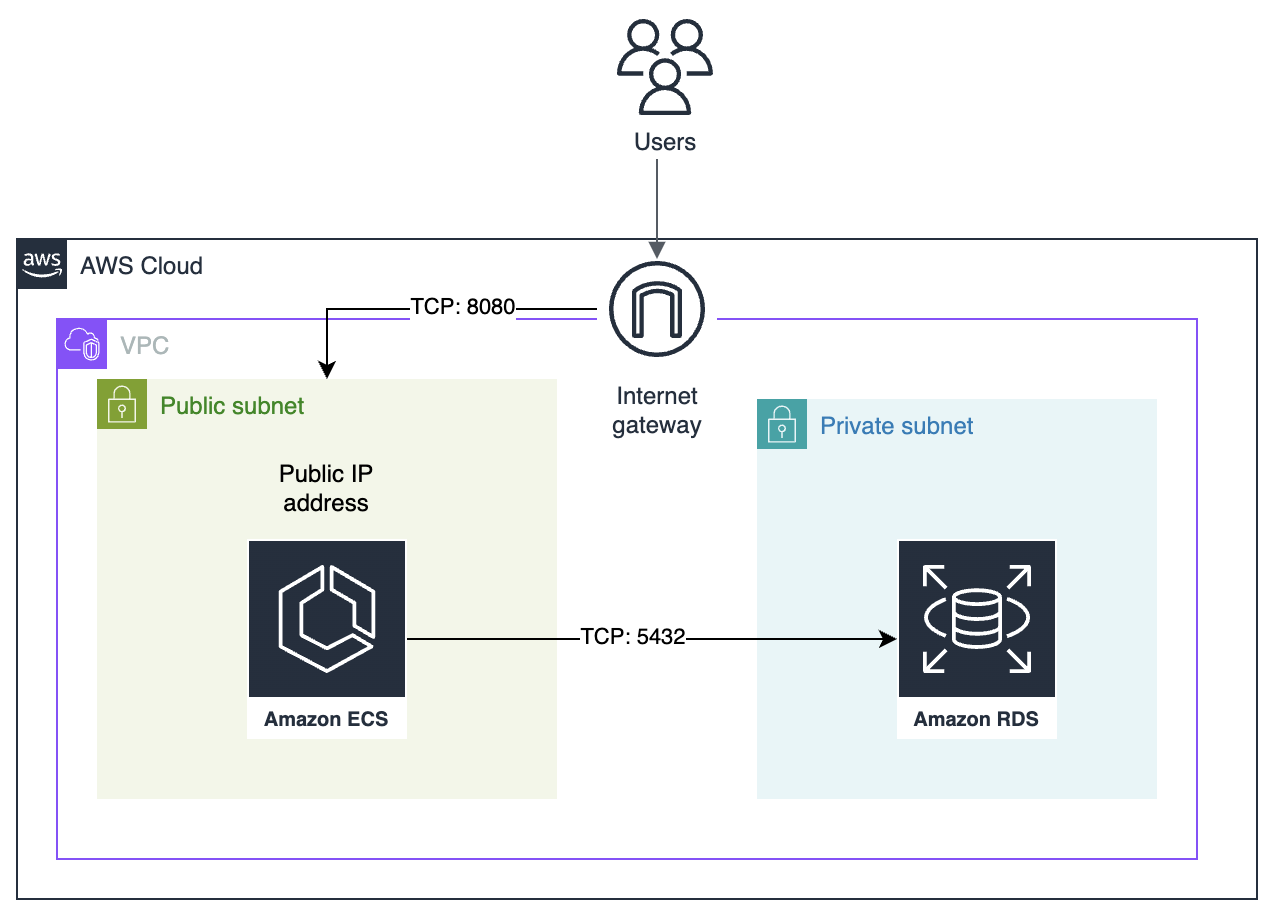
 You'll also need to create a private security group that allows access to port `5432` from the public security group to give Conduktor Console access to the RDS database.
 ### Step 1: Create a PostgreSQL database via Amazon RDS
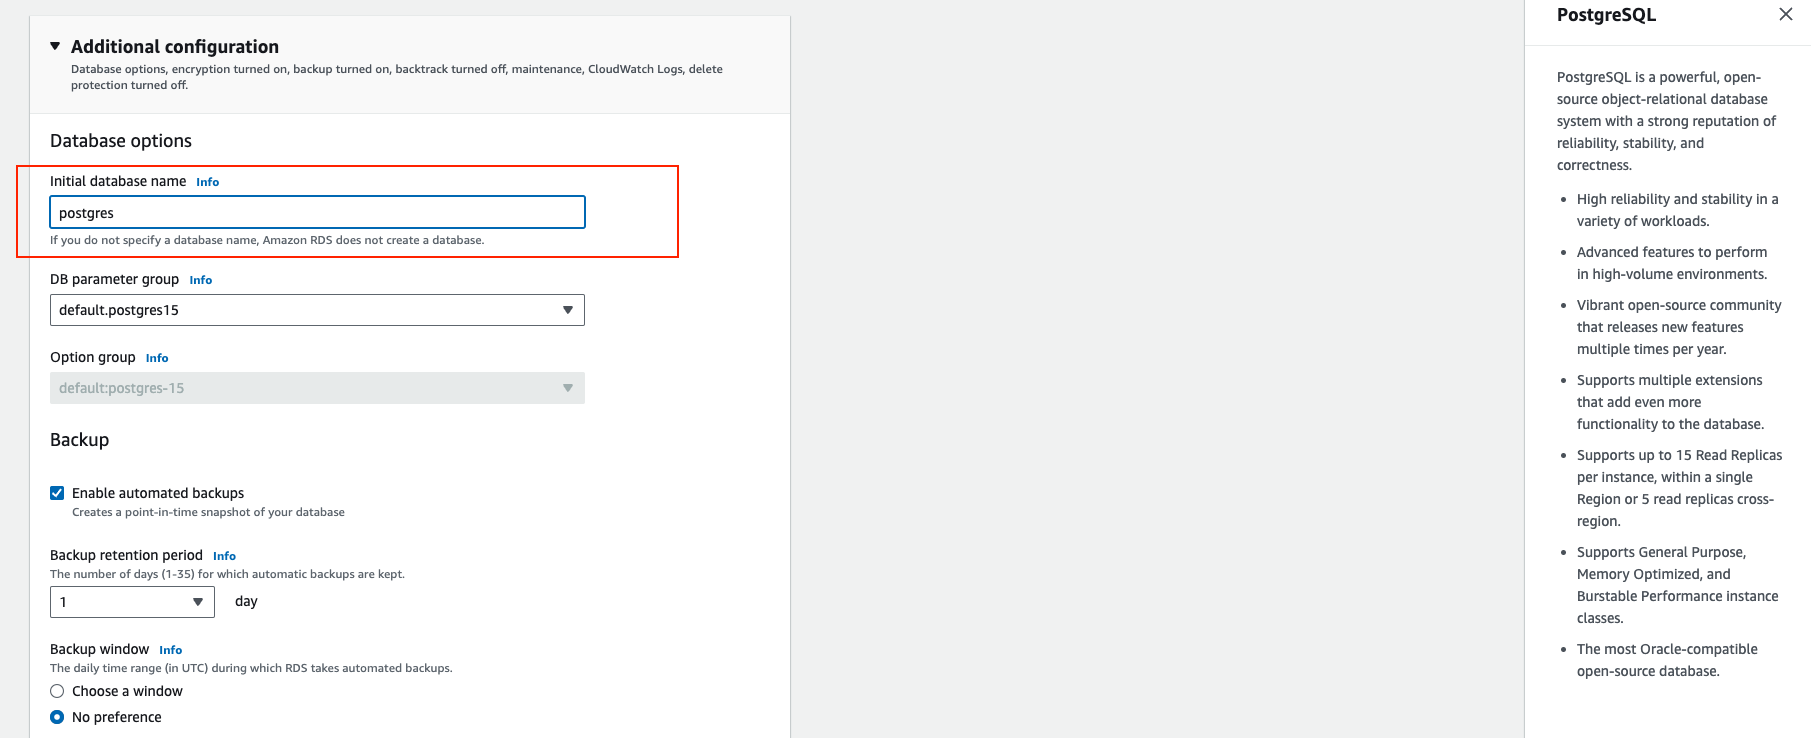
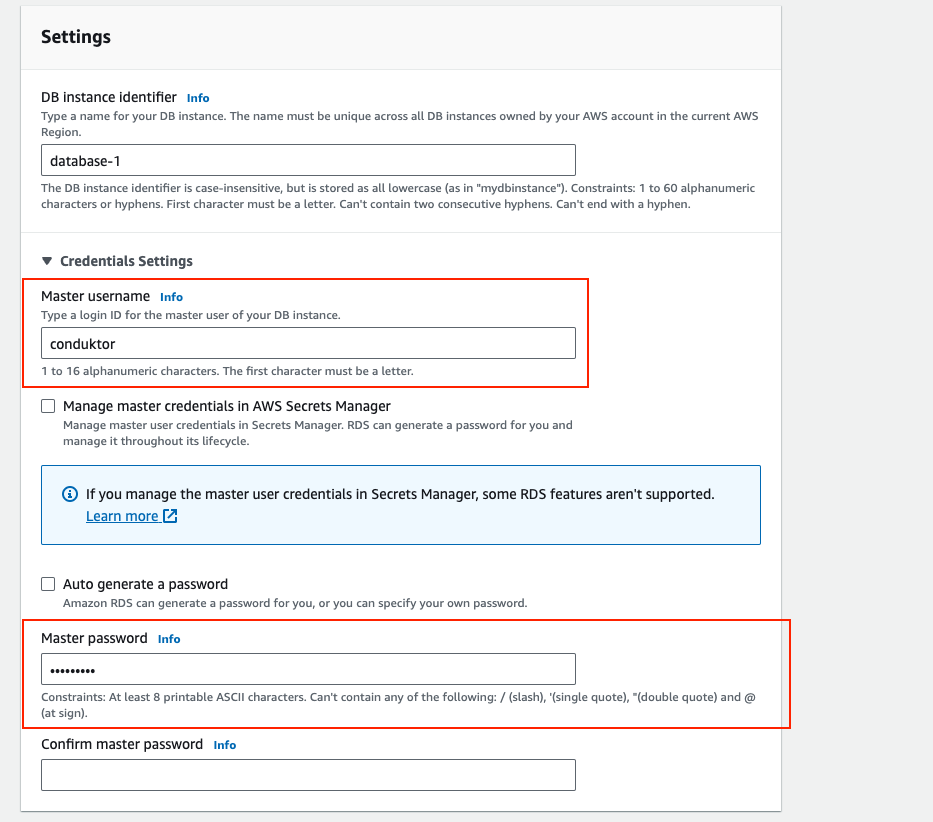 Under **Additional configuration**, configure:
* **Initial database name**: `postgres`
Under **Additional configuration**, configure:
* **Initial database name**: `postgres`
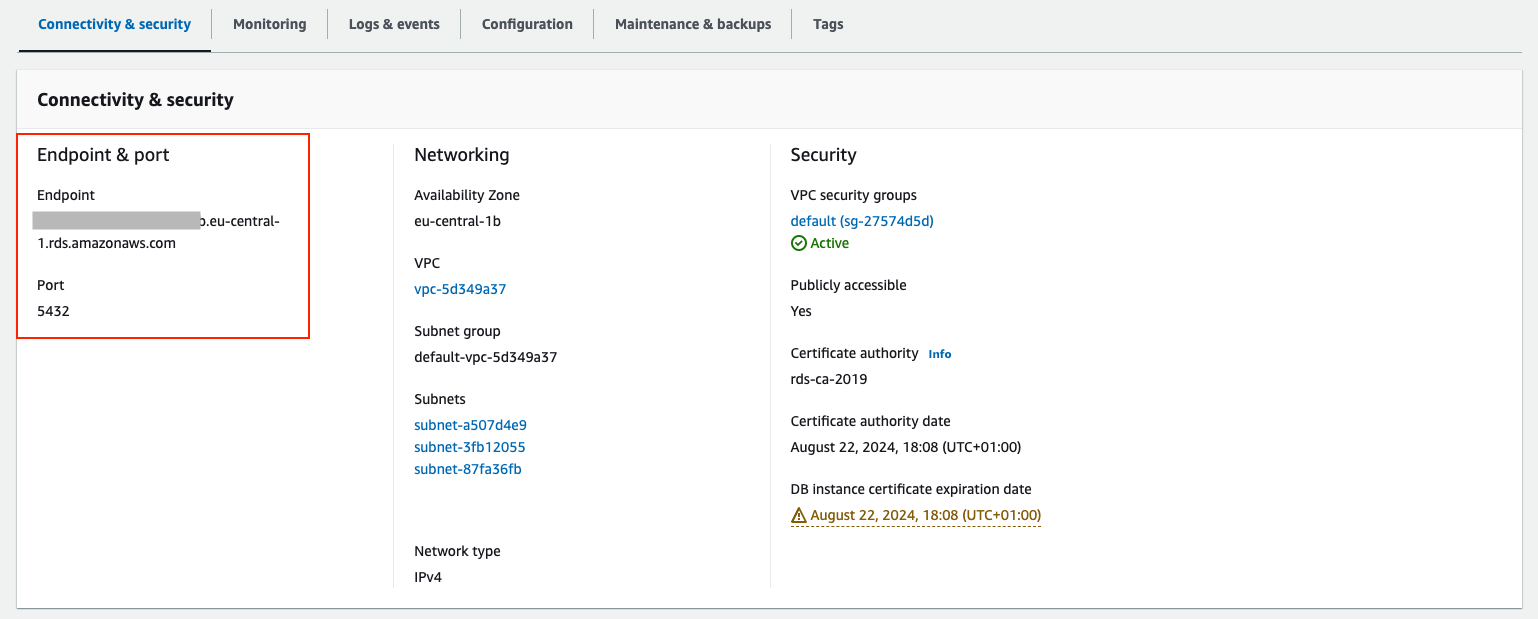
 Once your database instance is up and running (it takes a few minutes), click on your new database and copy the endpoint generated by AWS in the **Connectivity & Security** panel, e.g. `conduktor.xxx.eu-central-1.rds.amazonaws.com`.
 ### Step 2: Create a new Task definition on ECS
Now that we have our database, it's time to deploy Conduktor using Docker containers and ECS (Amazon Elastic Container Service).
Go to Amazon Elastic Container Service:
* Select **Task Definitions**
* Click on **Create new task definition**
In the **Infrastructure Requirements** section:
* Define the ECS family name as `conduktor`, this will be useful to update our deployment with newer versions of Conduktor.
* Specify the infrastructure requirements relevant to your deployment. As per system requirements, we recommend a minimum of **2x CPU cores** and **4GB of RAM**.
### Step 2.1: Add the core console container
In the **Container Details** section:
* Define the name of the container to `conduktor-console`
* Specify the Image URI and version for Conduktor Console. You should use the most recent major/minor version. E.g.: `conduktor/conduktor-console:
### Step 2: Create a new Task definition on ECS
Now that we have our database, it's time to deploy Conduktor using Docker containers and ECS (Amazon Elastic Container Service).
Go to Amazon Elastic Container Service:
* Select **Task Definitions**
* Click on **Create new task definition**
In the **Infrastructure Requirements** section:
* Define the ECS family name as `conduktor`, this will be useful to update our deployment with newer versions of Conduktor.
* Specify the infrastructure requirements relevant to your deployment. As per system requirements, we recommend a minimum of **2x CPU cores** and **4GB of RAM**.
### Step 2.1: Add the core console container
In the **Container Details** section:
* Define the name of the container to `conduktor-console`
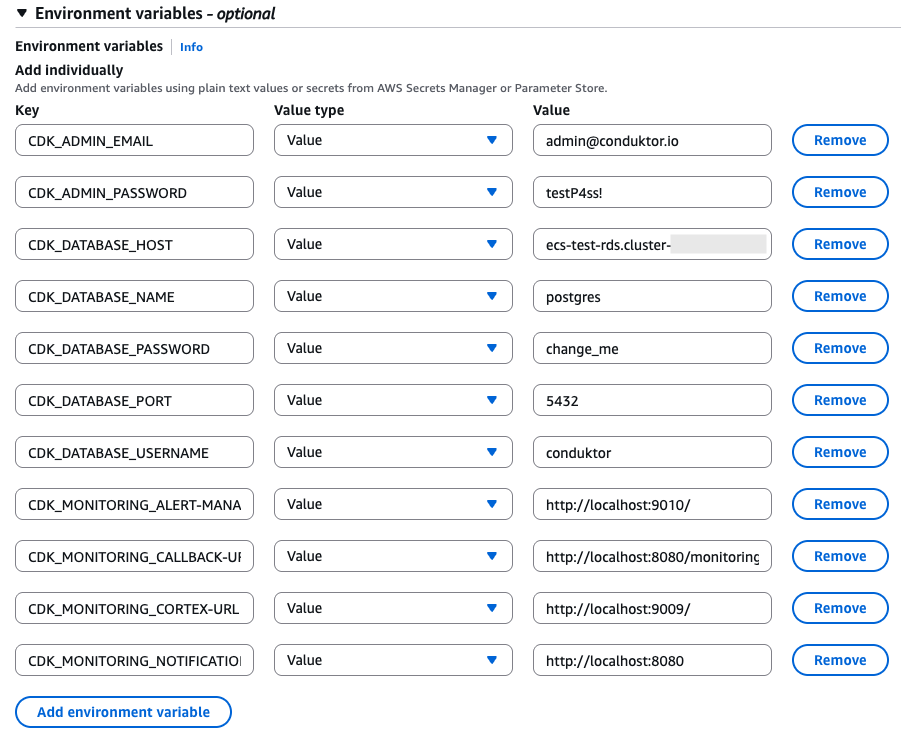
* Specify the Image URI and version for Conduktor Console. You should use the most recent major/minor version. E.g.: `conduktor/conduktor-console: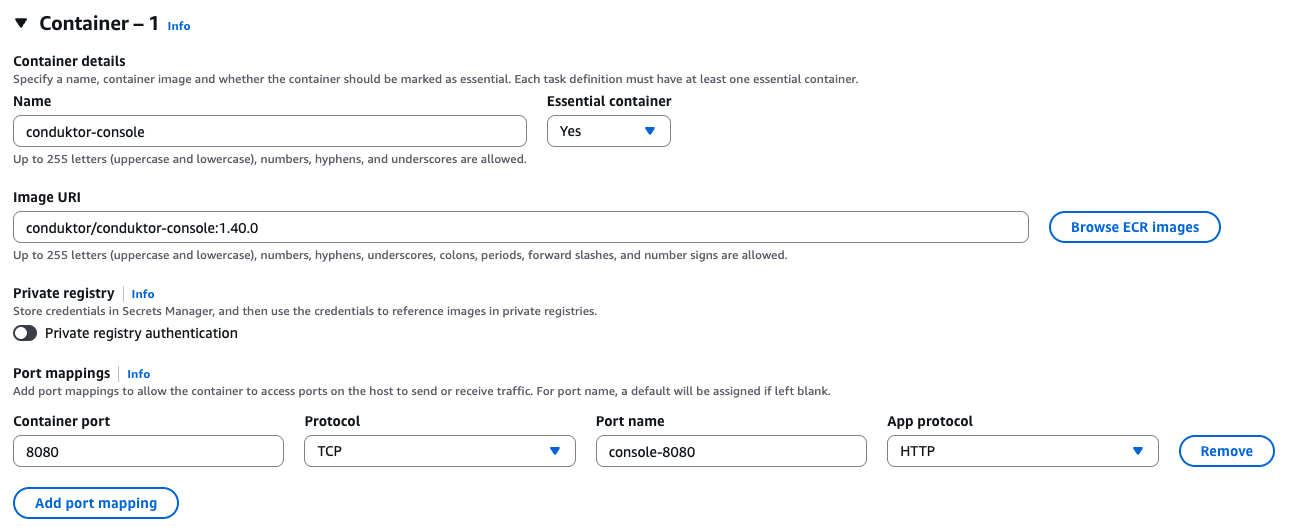 In the **Environment Variables** section, add the essential environment variables required to run Conduktor and connect to its PostgreSQL database on RDS.
* `CDK_ADMIN_EMAIL`: [yourname@yourcompany.com](mailto:yourname@yourcompany.com)
* `CDK_ADMIN_PASSWORD`: testP4ss!
* `CDK_DATABASE_HOST`: the endpoint you retrieved earlier, like conduktor-xxx.yyy.eu-central-1.rds.amazonaws.com
* `CDK_DATABASE_NAME`: postgres
* `CDK_DATABASE_PASSWORD`: change\_me
* `CDK_DATABASE_PORT`: 5432
* `CDK_DATABASE_USERNAME`: conduktor
* `CDK_MONITORING_ALERT-MANAGER-URL`: [http://localhost:9010/](http://localhost:9010/)
* `CDK_MONITORING_CALLBACK-URL`: [http://localhost:8080/monitoring/api/](http://localhost:8080/monitoring/api/)
* `CDK_MONITORING_CORTEX-URL`: [http://localhost:9009/](http://localhost:9009/)
* `CDK_MONITORING_NOTIFICATIONS-CALLBACK-URL`: [http://localhost:8080](http://localhost:8080)
* `CDK_LICENSE`: Enterprise license key (Exclude if you are using Free)
In the **Environment Variables** section, add the essential environment variables required to run Conduktor and connect to its PostgreSQL database on RDS.
* `CDK_ADMIN_EMAIL`: [yourname@yourcompany.com](mailto:yourname@yourcompany.com)
* `CDK_ADMIN_PASSWORD`: testP4ss!
* `CDK_DATABASE_HOST`: the endpoint you retrieved earlier, like conduktor-xxx.yyy.eu-central-1.rds.amazonaws.com
* `CDK_DATABASE_NAME`: postgres
* `CDK_DATABASE_PASSWORD`: change\_me
* `CDK_DATABASE_PORT`: 5432
* `CDK_DATABASE_USERNAME`: conduktor
* `CDK_MONITORING_ALERT-MANAGER-URL`: [http://localhost:9010/](http://localhost:9010/)
* `CDK_MONITORING_CALLBACK-URL`: [http://localhost:8080/monitoring/api/](http://localhost:8080/monitoring/api/)
* `CDK_MONITORING_CORTEX-URL`: [http://localhost:9009/](http://localhost:9009/)
* `CDK_MONITORING_NOTIFICATIONS-CALLBACK-URL`: [http://localhost:8080](http://localhost:8080)
* `CDK_LICENSE`: Enterprise license key (Exclude if you are using Free)
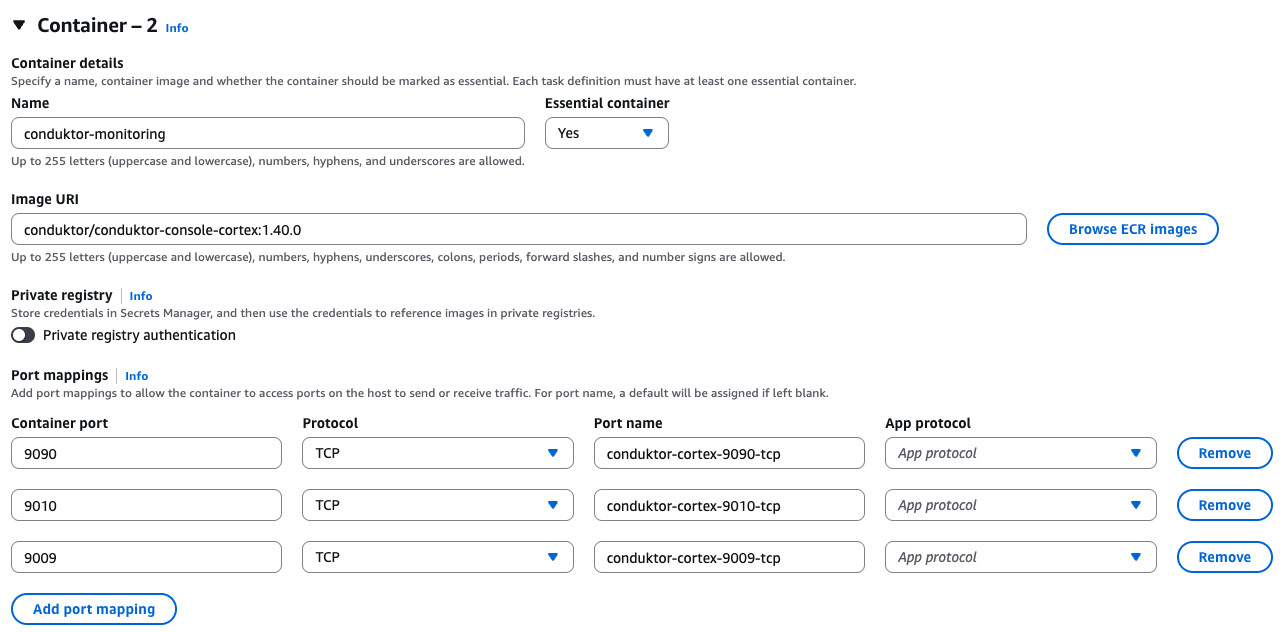 In the **Environment variables** section, add the required environment variable to link the monitoring container with the Console container.
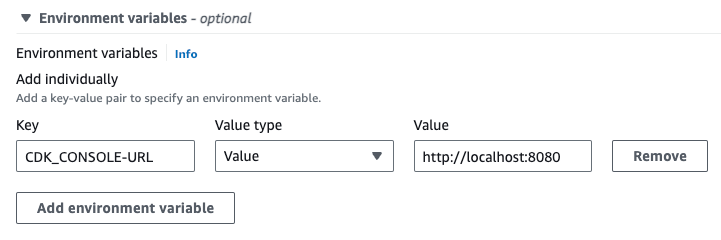
* `CDK_CONSOLE-URL`: [http://localhost:8080](http://localhost:8080)
In the **Environment variables** section, add the required environment variable to link the monitoring container with the Console container.
* `CDK_CONSOLE-URL`: [http://localhost:8080](http://localhost:8080)
 For production environments, you should also configure an external S3 bucket to store historical monitoring data.
We can now go down below and **Create** our task definition.
For production environments, you should also configure an external S3 bucket to store historical monitoring data.
We can now go down below and **Create** our task definition.
 Whenever you want to change something in your configuration, edit your task definition and create a new version containing your changes.
### Step 3: Create an ECS cluster and setup Conduktor service
We created a task definition, but it's still just a "template". Now, we need a cluster to deploy it. We'll use ECS with Fargate.
Go to **Settings** > **Clusters** and create a cluster (use the default options):
* **Name**: conduktor-ecs
* In the **Infrastructure** section, make sure AWS Fargate (serverless) is selected (default)
Create the cluster, it might take a few seconds.
We now have a cluster to deploy our container. Our last step is to create a Service that will reference the Task Definition defined in the previous step.
* Click on your new cluster `conduktor-ecs`
* Create a new **Service**
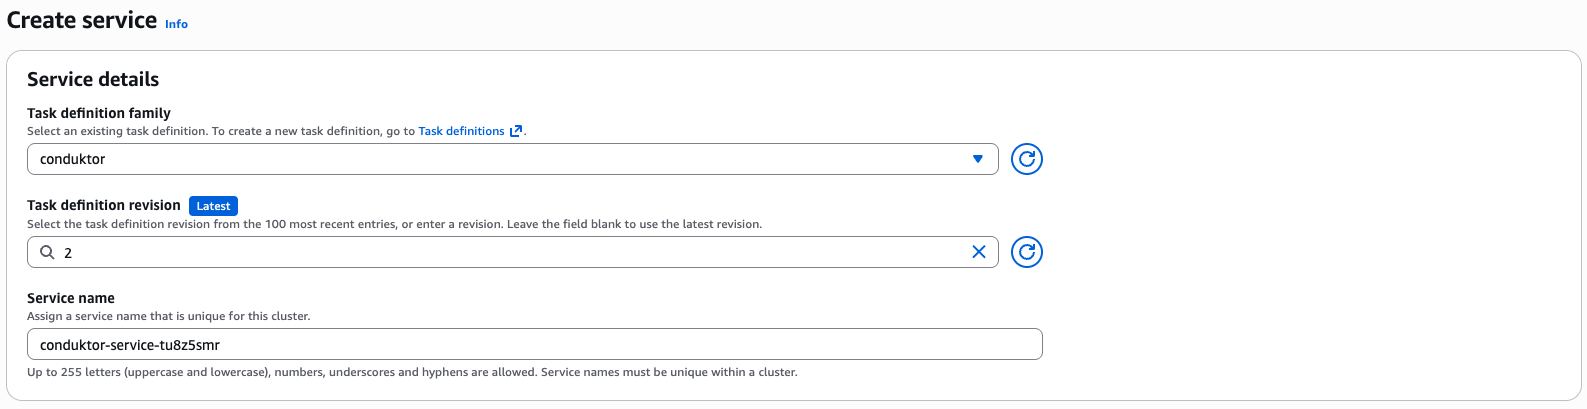
* In the **Service details**, **Family** dropdown select our task definition `conduktor`.
* Assign a unique name like Console to be able to identify it properly later on
Whenever you want to change something in your configuration, edit your task definition and create a new version containing your changes.
### Step 3: Create an ECS cluster and setup Conduktor service
We created a task definition, but it's still just a "template". Now, we need a cluster to deploy it. We'll use ECS with Fargate.
Go to **Settings** > **Clusters** and create a cluster (use the default options):
* **Name**: conduktor-ecs
* In the **Infrastructure** section, make sure AWS Fargate (serverless) is selected (default)
Create the cluster, it might take a few seconds.
We now have a cluster to deploy our container. Our last step is to create a Service that will reference the Task Definition defined in the previous step.
* Click on your new cluster `conduktor-ecs`
* Create a new **Service**
* In the **Service details**, **Family** dropdown select our task definition `conduktor`.
* Assign a unique name like Console to be able to identify it properly later on
 * Leave the **Environment** section default which uses Fargate.
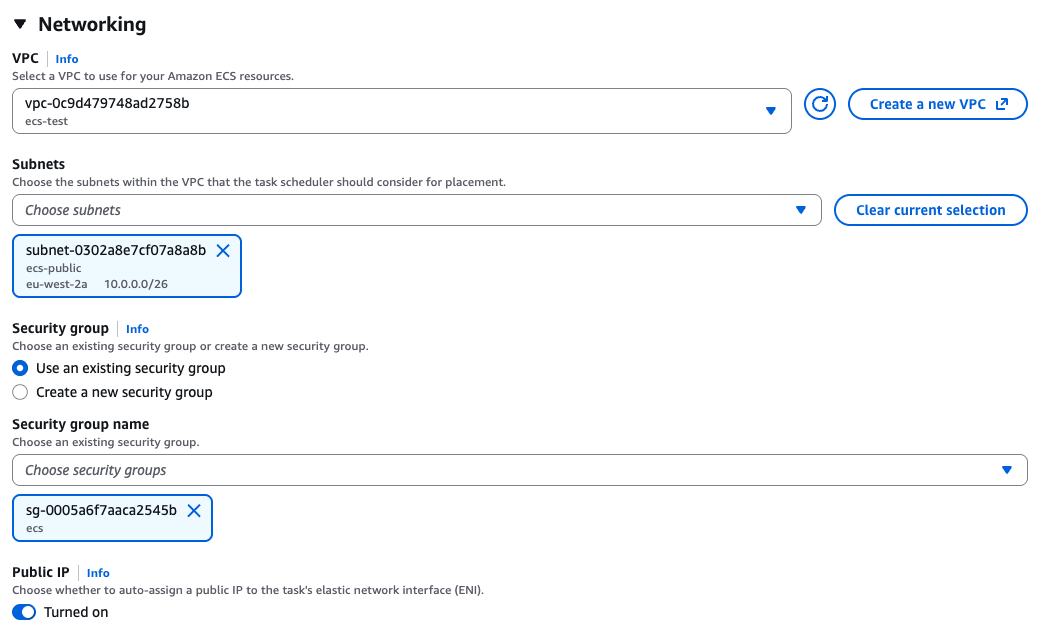
* In the **Networking** tab make sure to use the correct VPC and have it placed within the public subnet. Ensure that **Public IP** is enabled to give access to Console.
* Click **Create** in the bottom right corner.
* Leave the **Environment** section default which uses Fargate.
* In the **Networking** tab make sure to use the correct VPC and have it placed within the public subnet. Ensure that **Public IP** is enabled to give access to Console.
* Click **Create** in the bottom right corner.
 This will take a few minutes before the deployment is effective and Conduktor becomes available.
### Step 4: Access Conduktor and configure Kafka Clusters
From within the **Services > Tasks** screen, find the Container and navigate to the **Network bindings** tab.
This will take a few minutes before the deployment is effective and Conduktor becomes available.
### Step 4: Access Conduktor and configure Kafka Clusters
From within the **Services > Tasks** screen, find the Container and navigate to the **Network bindings** tab.
 Click on the **External** link to open the Console application.
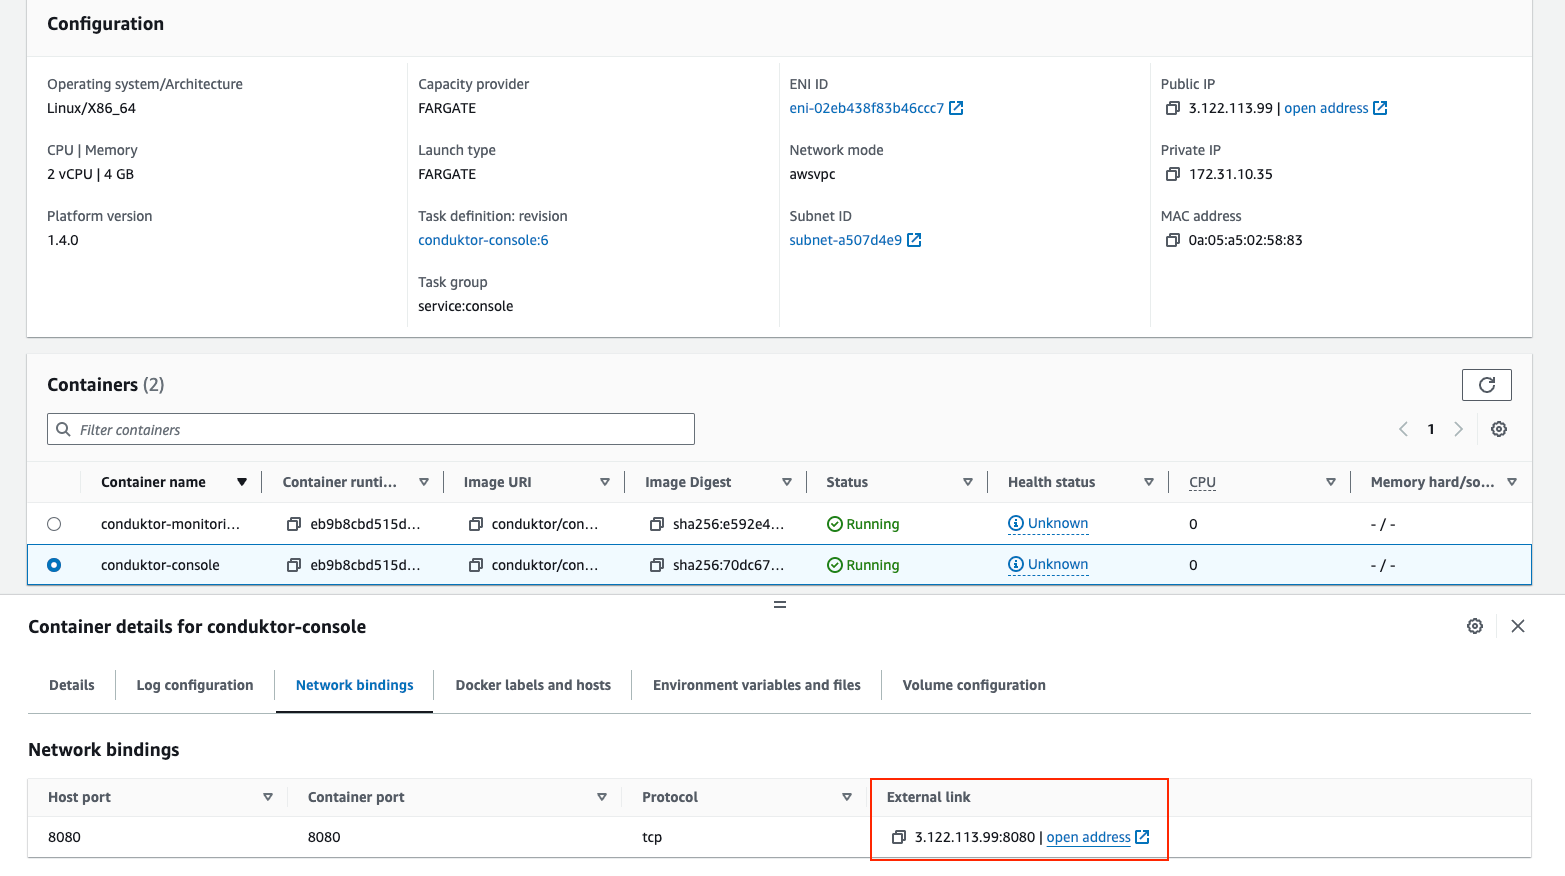 In our example, our application is running at `3.122.113.99:8080`.
You can now log in as admin with the credentials previously defined in the environment variables, e.g. `yourname@yourcompany.com` / `admin`.
In our example, our application is running at `3.122.113.99:8080`.
You can now log in as admin with the credentials previously defined in the environment variables, e.g. `yourname@yourcompany.com` / `admin`.
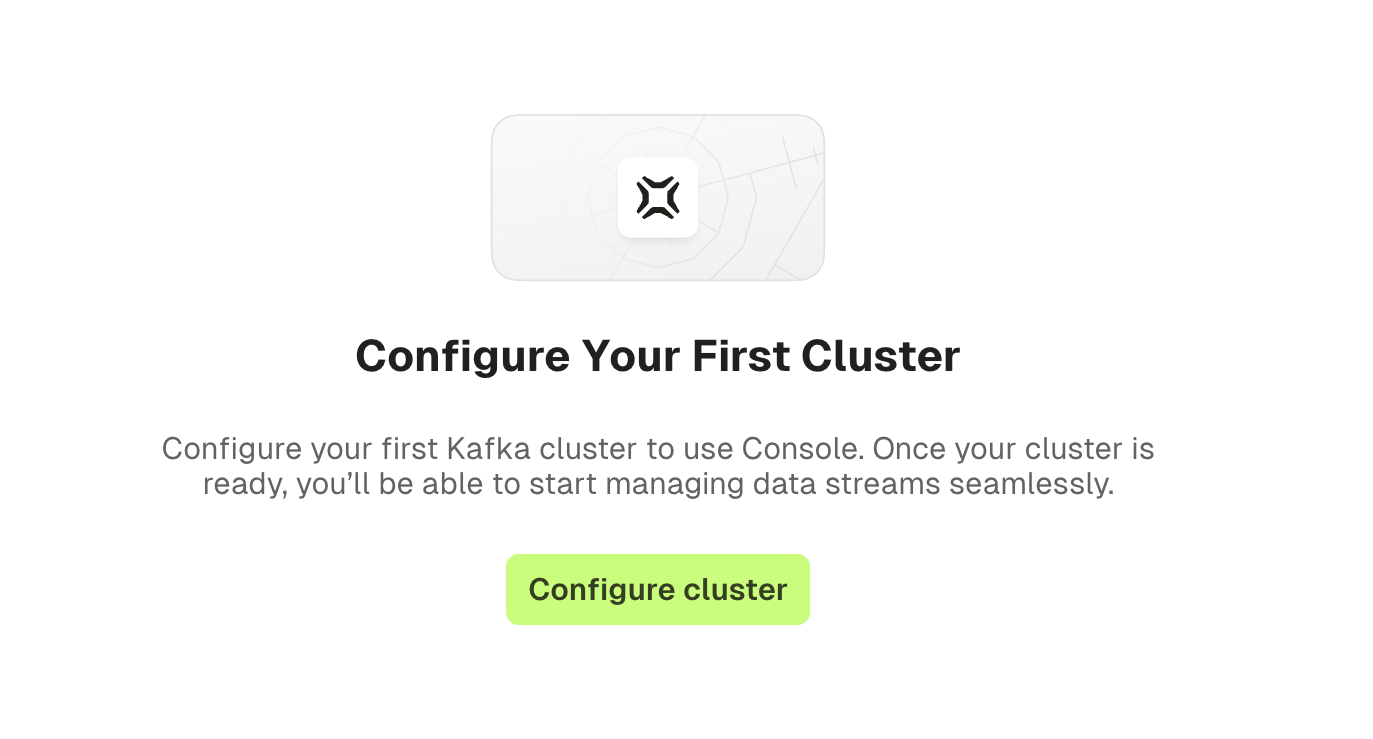 Select the **Configure clusters** option and start adding your Kafka cluster configurations.
### Step 5: Onboard your team
Now that you have an up-and-running deployment of Console, it's time to invite your team!
* Configure SSO to easily onboard users
* Configure local users, if you are not using SSO
### Troubleshoot
Select the **Configure clusters** option and start adding your Kafka cluster configurations.
### Step 5: Onboard your team
Now that you have an up-and-running deployment of Console, it's time to invite your team!
* Configure SSO to easily onboard users
* Configure local users, if you are not using SSO
### Troubleshoot
For example, in the **security group** attached to the console service, ensure there is an inbound rule (TCP) for port **8080**. In the **security group** attached to the RDS instance, ensure an inbound rule (Type = PostgreSQL) for port **5432**.
 ### Deployment steps
1. Visit the [Marketplace listing page](https://aws.amazon.com/marketplace/pp/prodview-xjv65ie5rjtxu)
### Deployment steps
1. Visit the [Marketplace listing page](https://aws.amazon.com/marketplace/pp/prodview-xjv65ie5rjtxu) 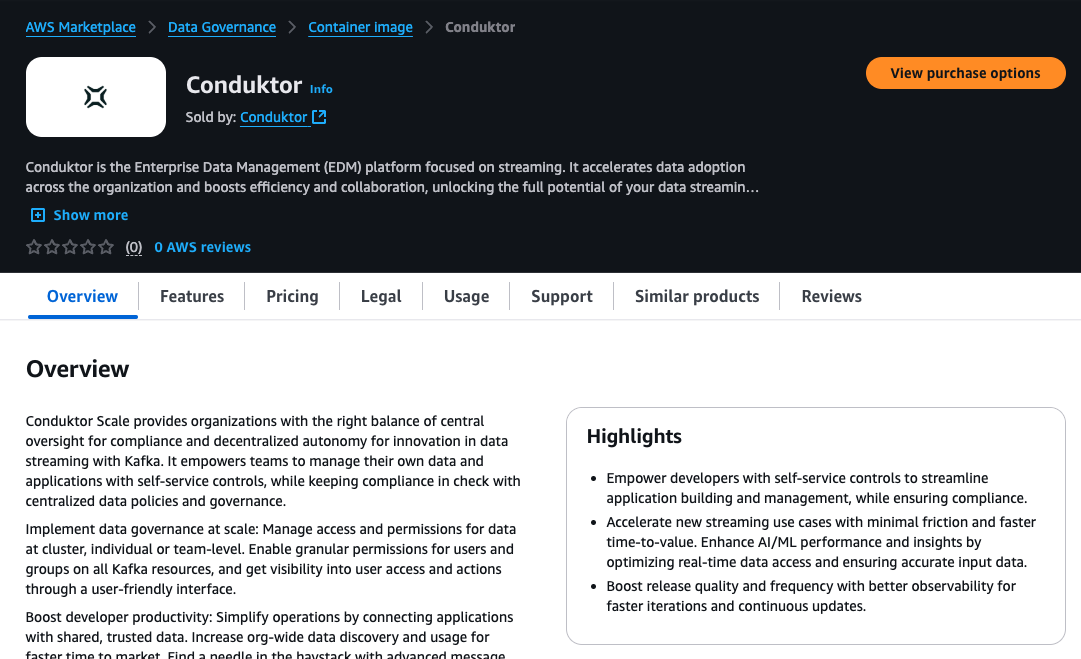 3. Accept the terms of service.
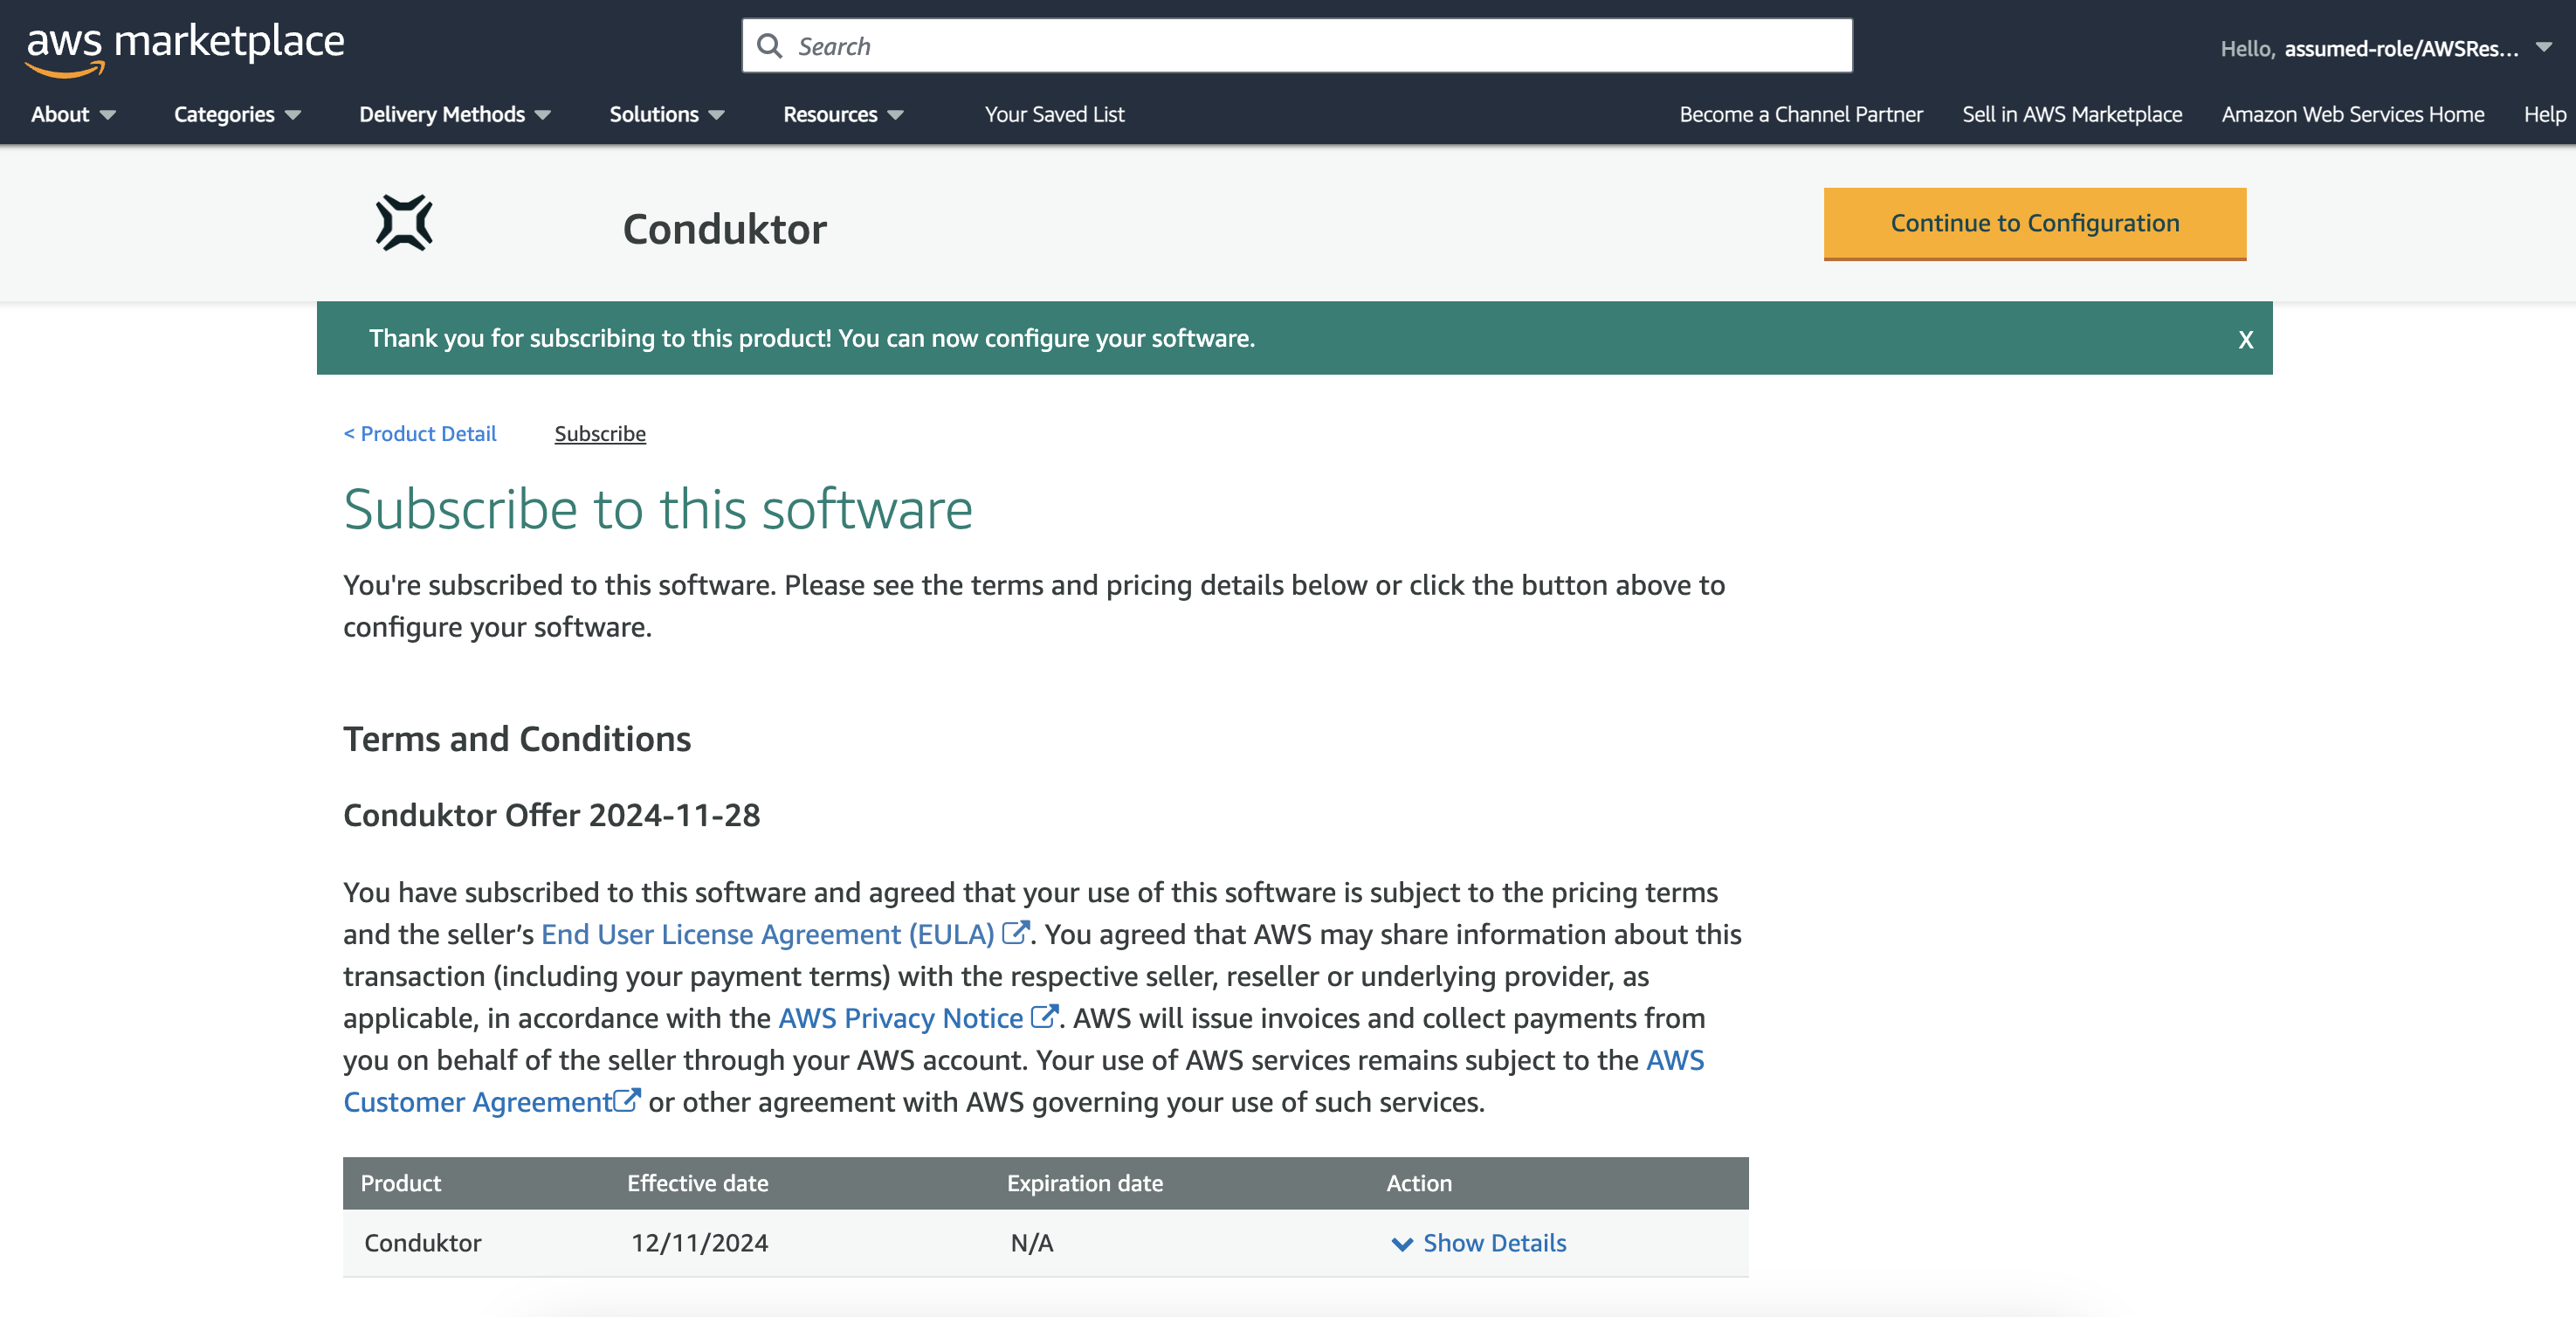
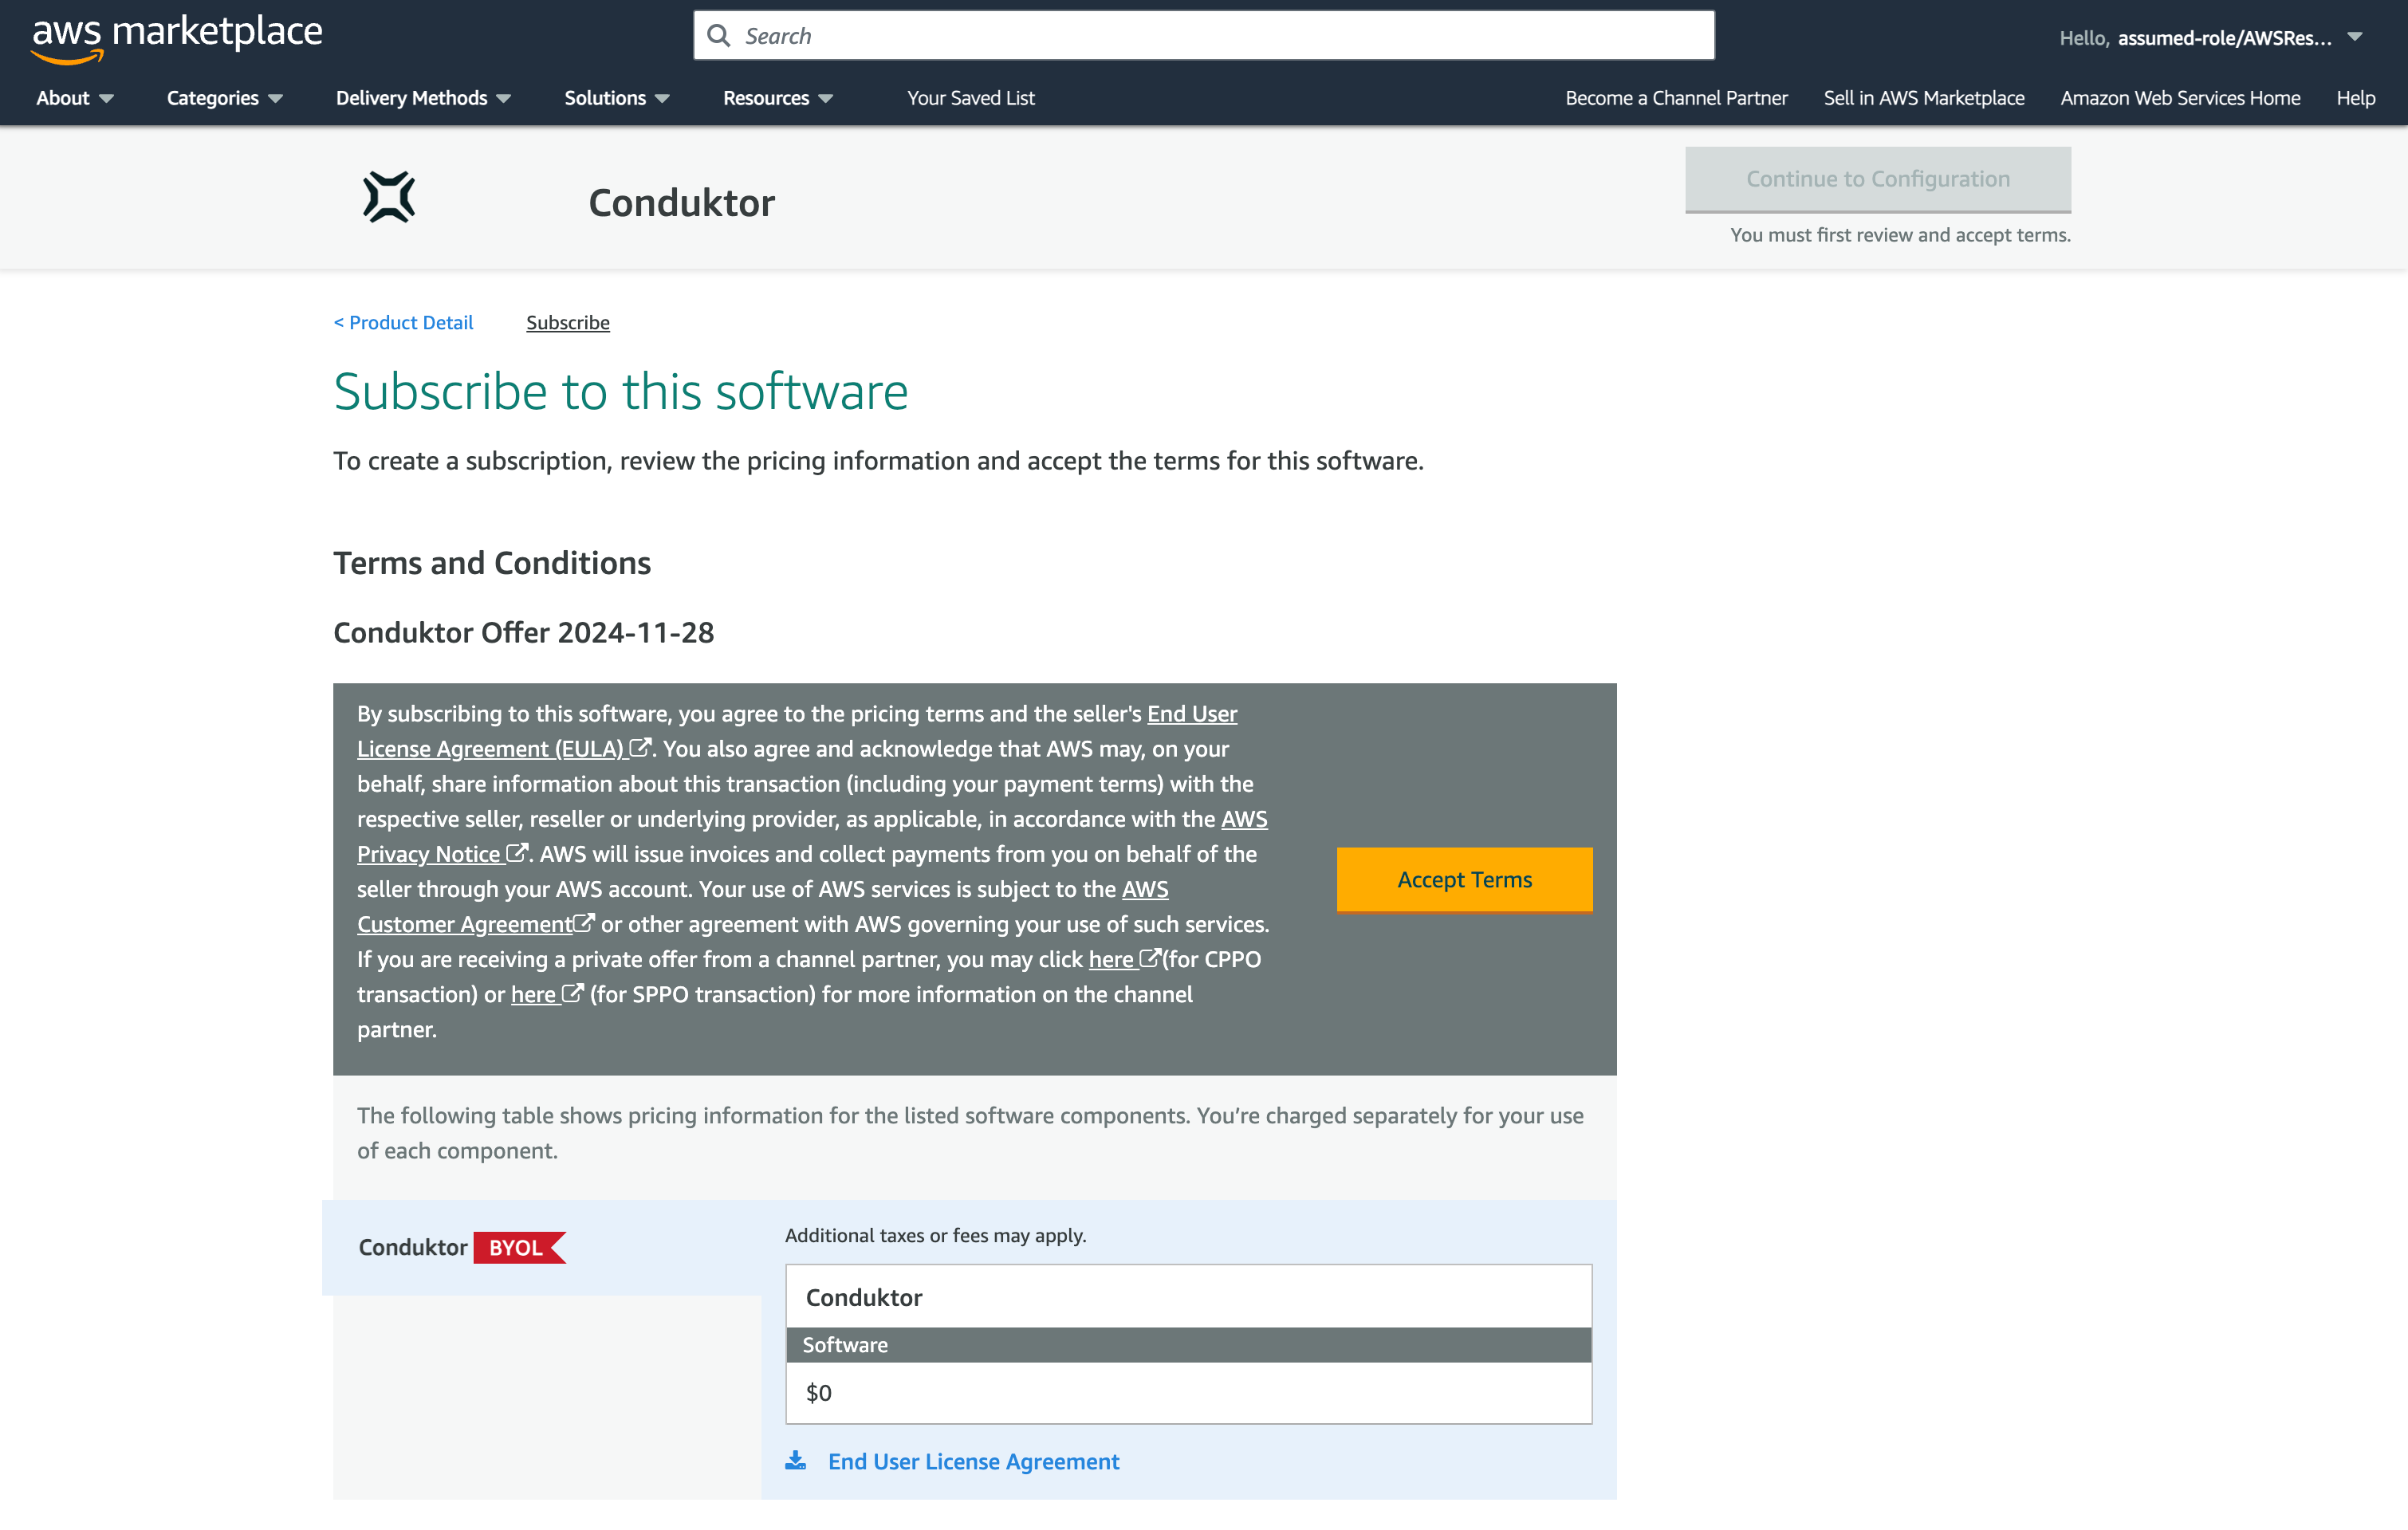 4. Select `Continue to Configuration`.
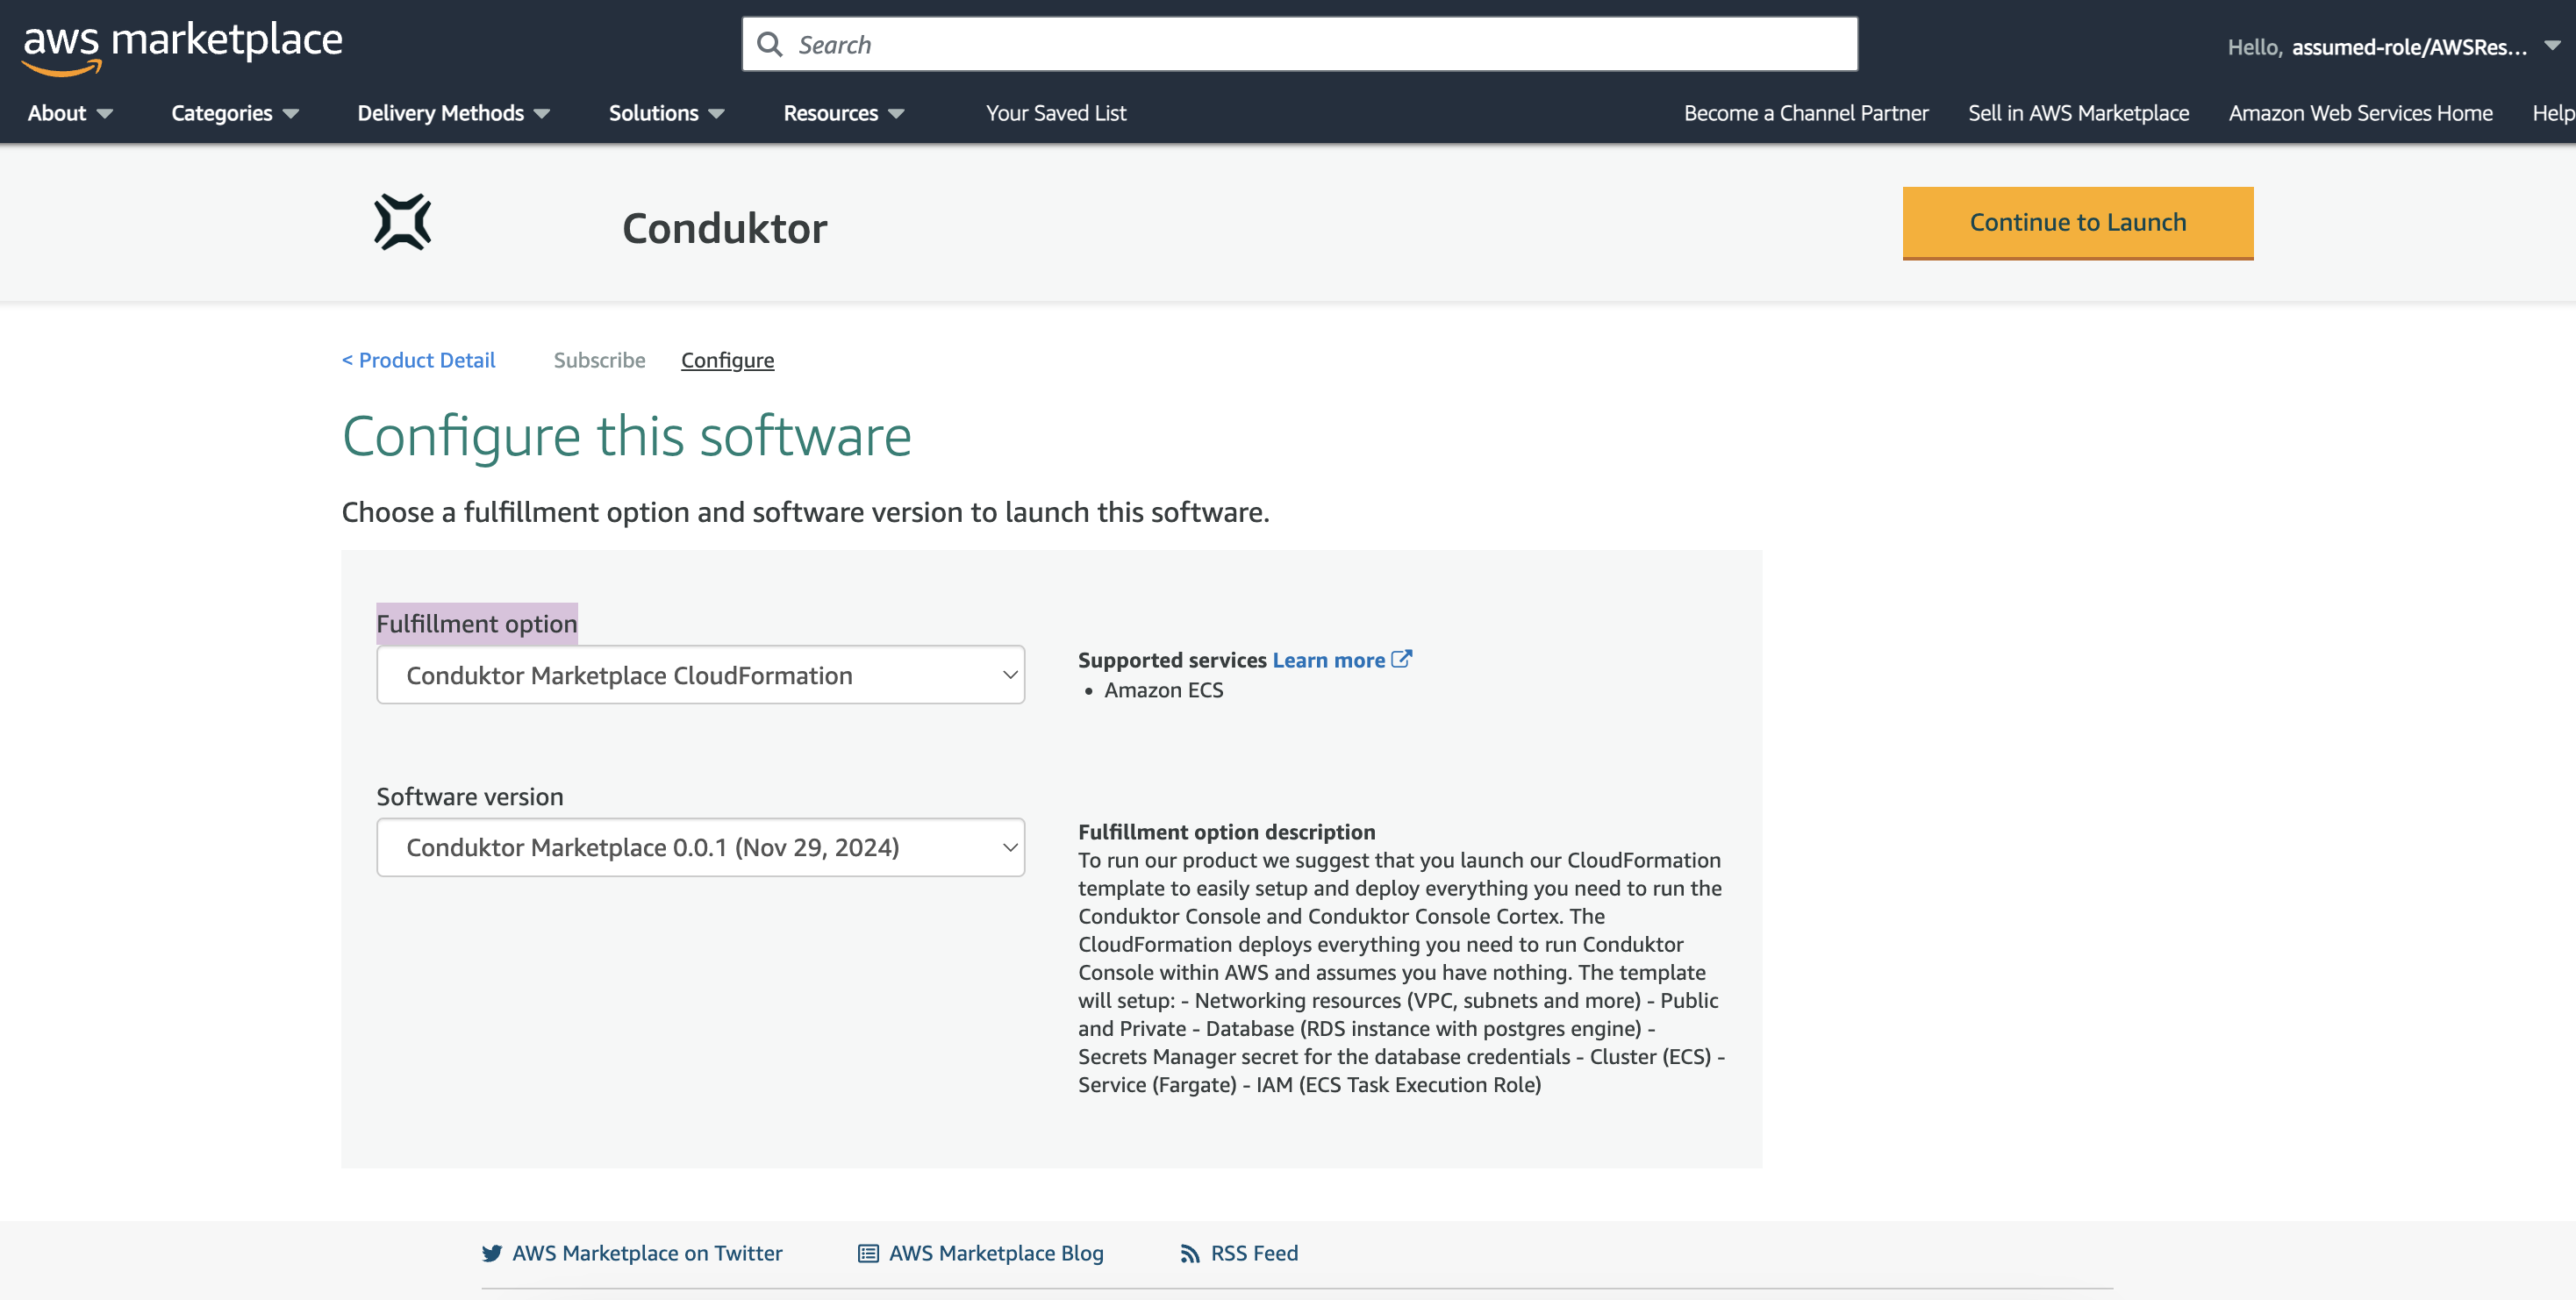
 5. `Continue to Launch`. There is only one supported Software Version and fulfillment option available.
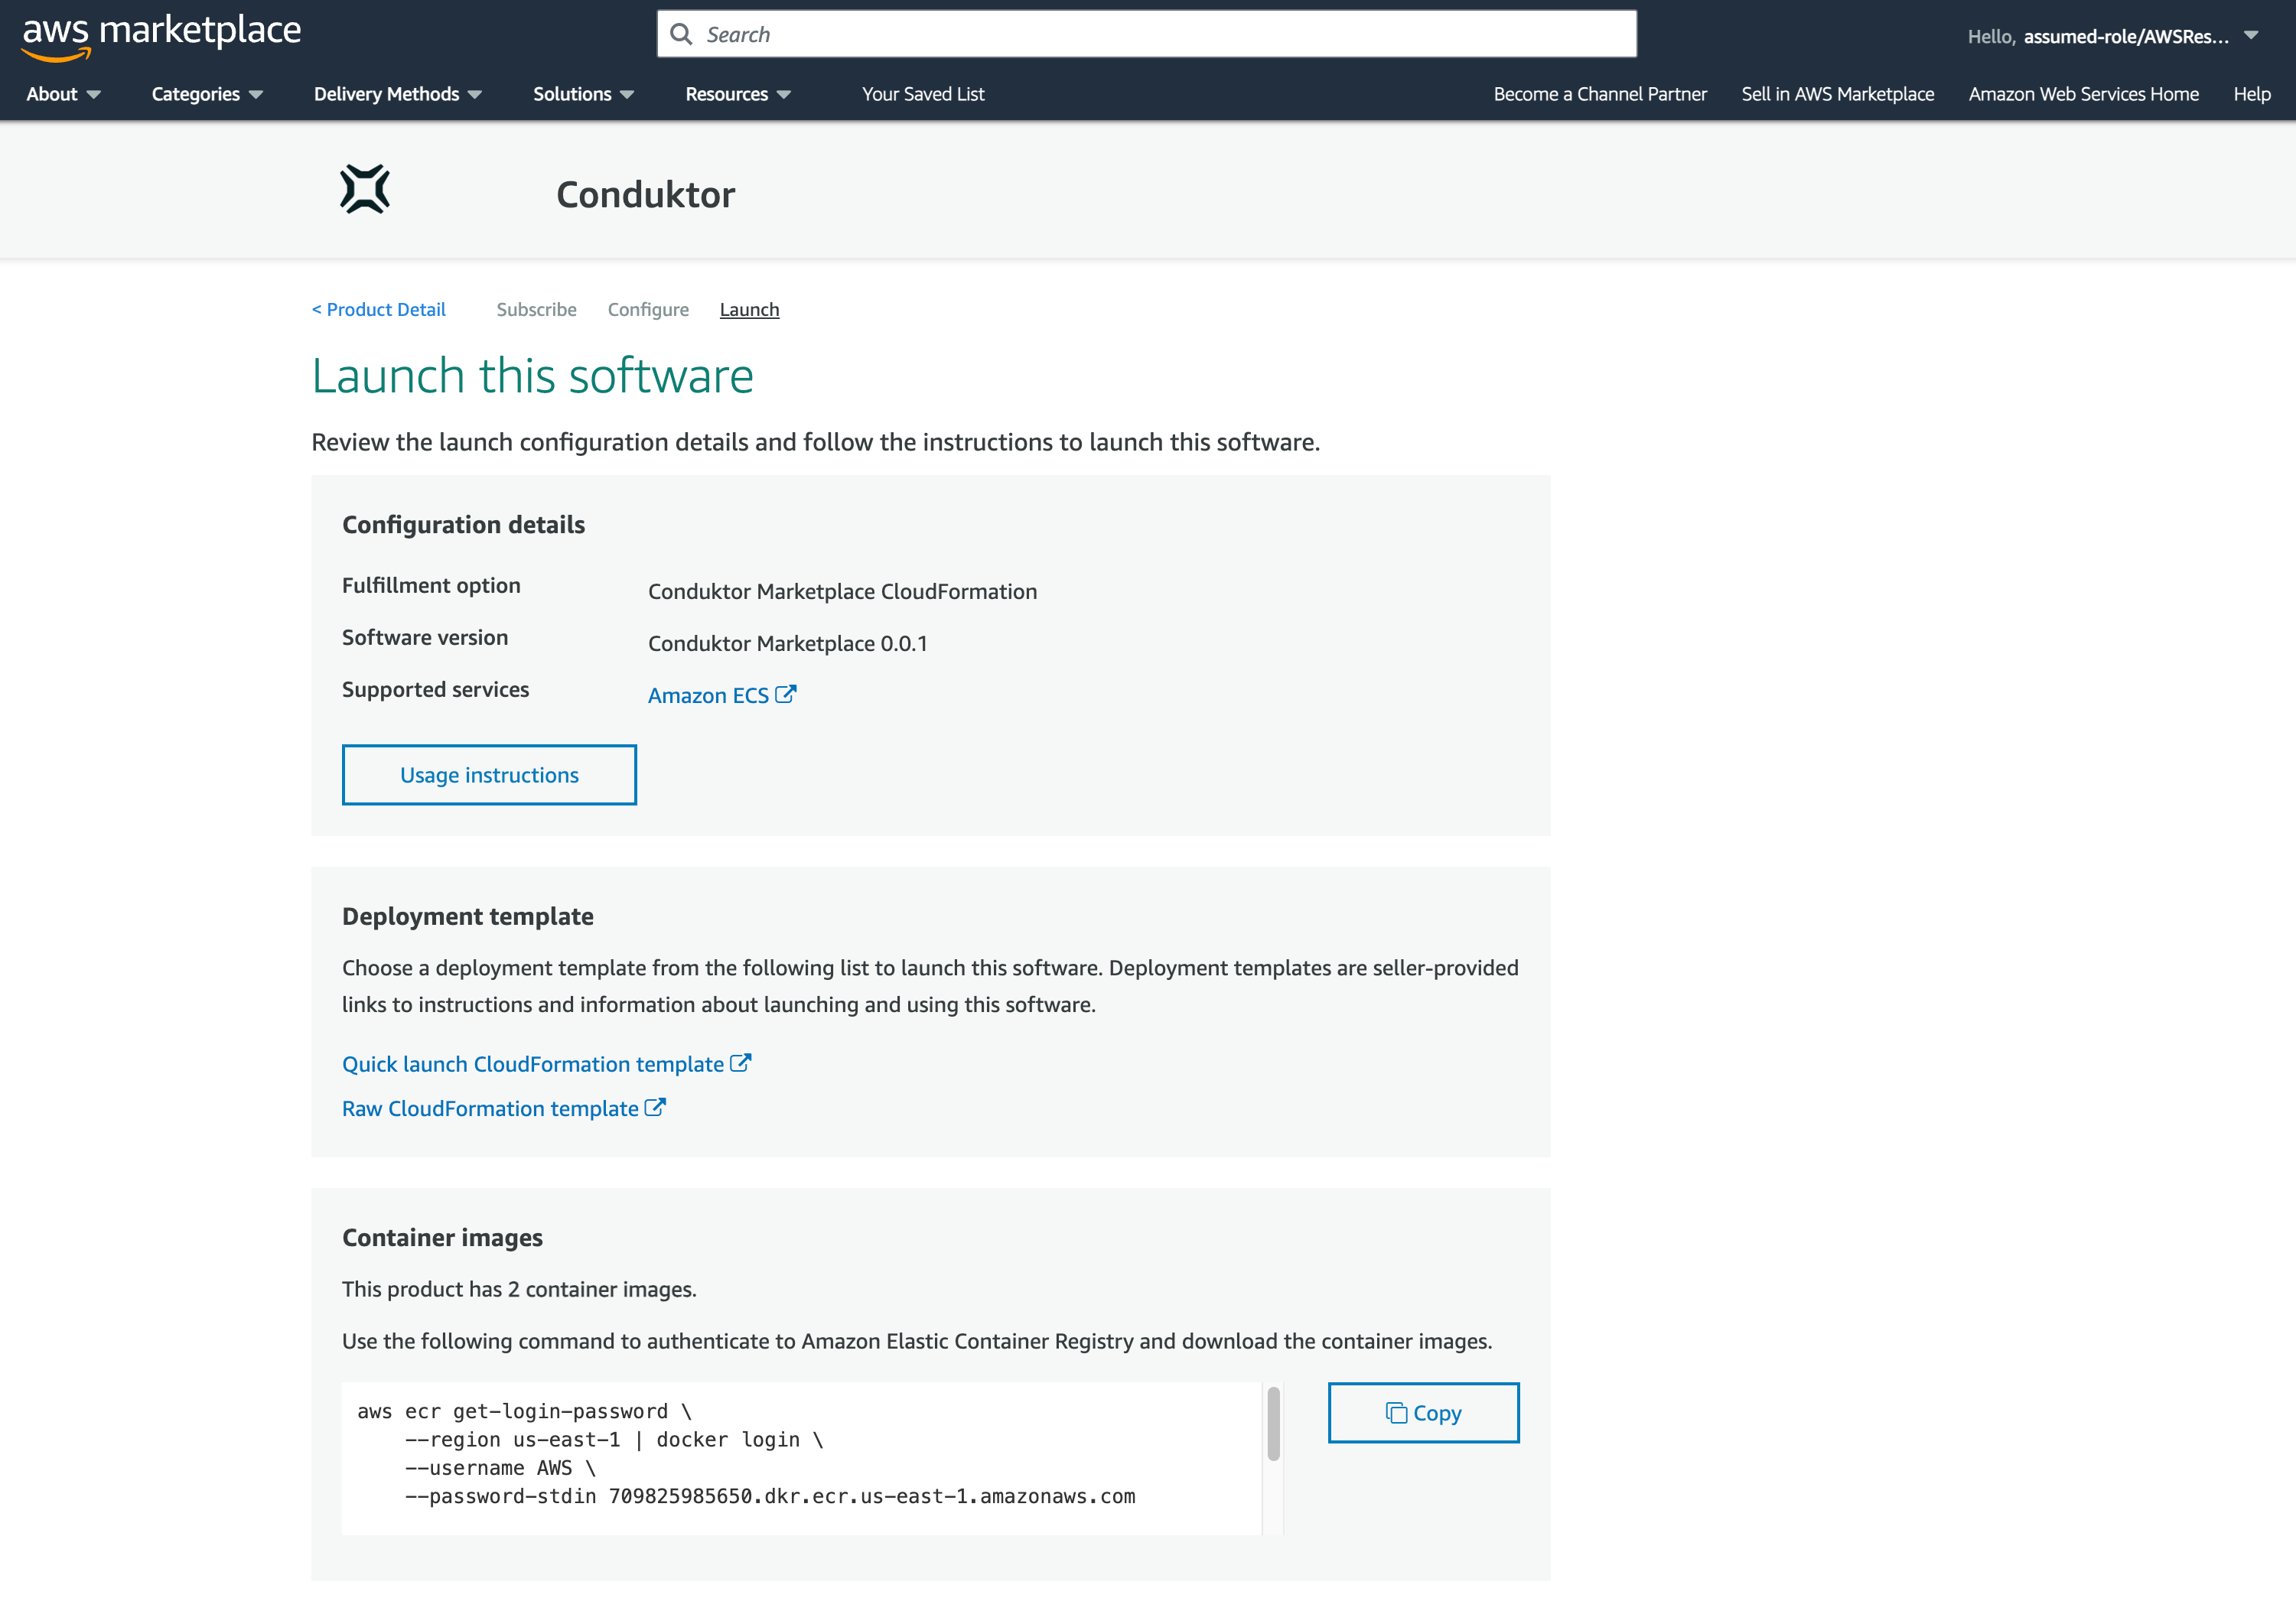
 6. You now can choose how you want to deploy the CloudFormation template. We offer a quicklink that will take you directly to the CloudFormation console with the template pre-filled on your last previously used region (What this guide will be covering). We also offer the raw CloudFormation template that you can download and deploy manually. Select `Quick launch CloudFormation template`.
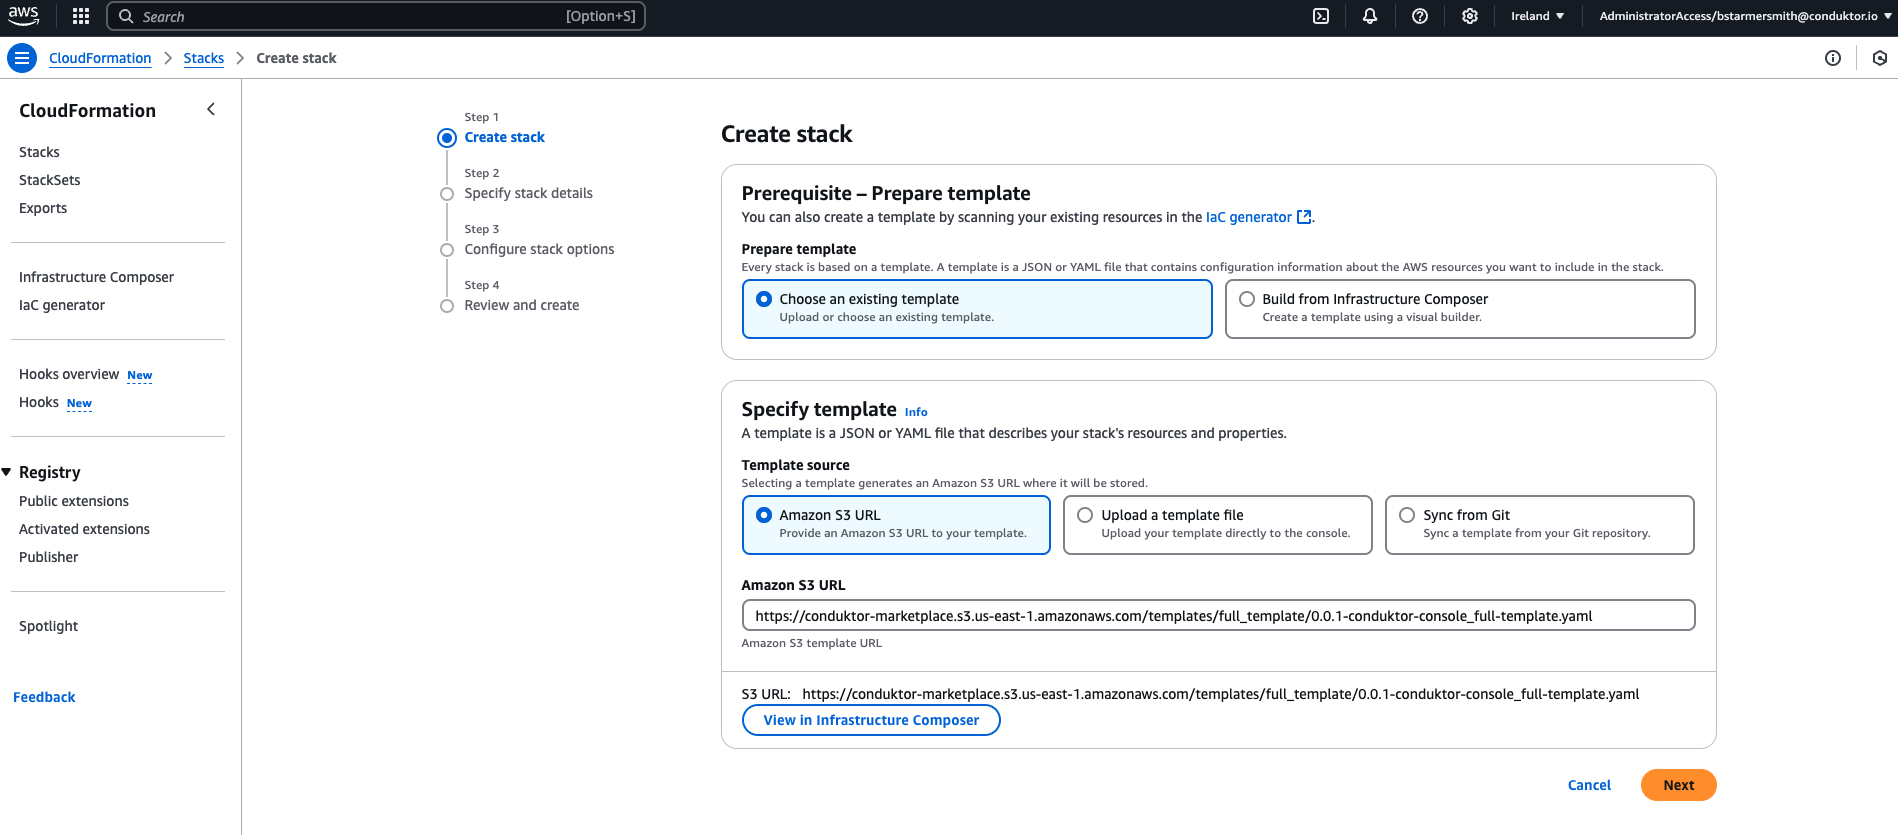
 7. This will open you up to the CloudFormation page with the template pre-filled. Press `Next`.
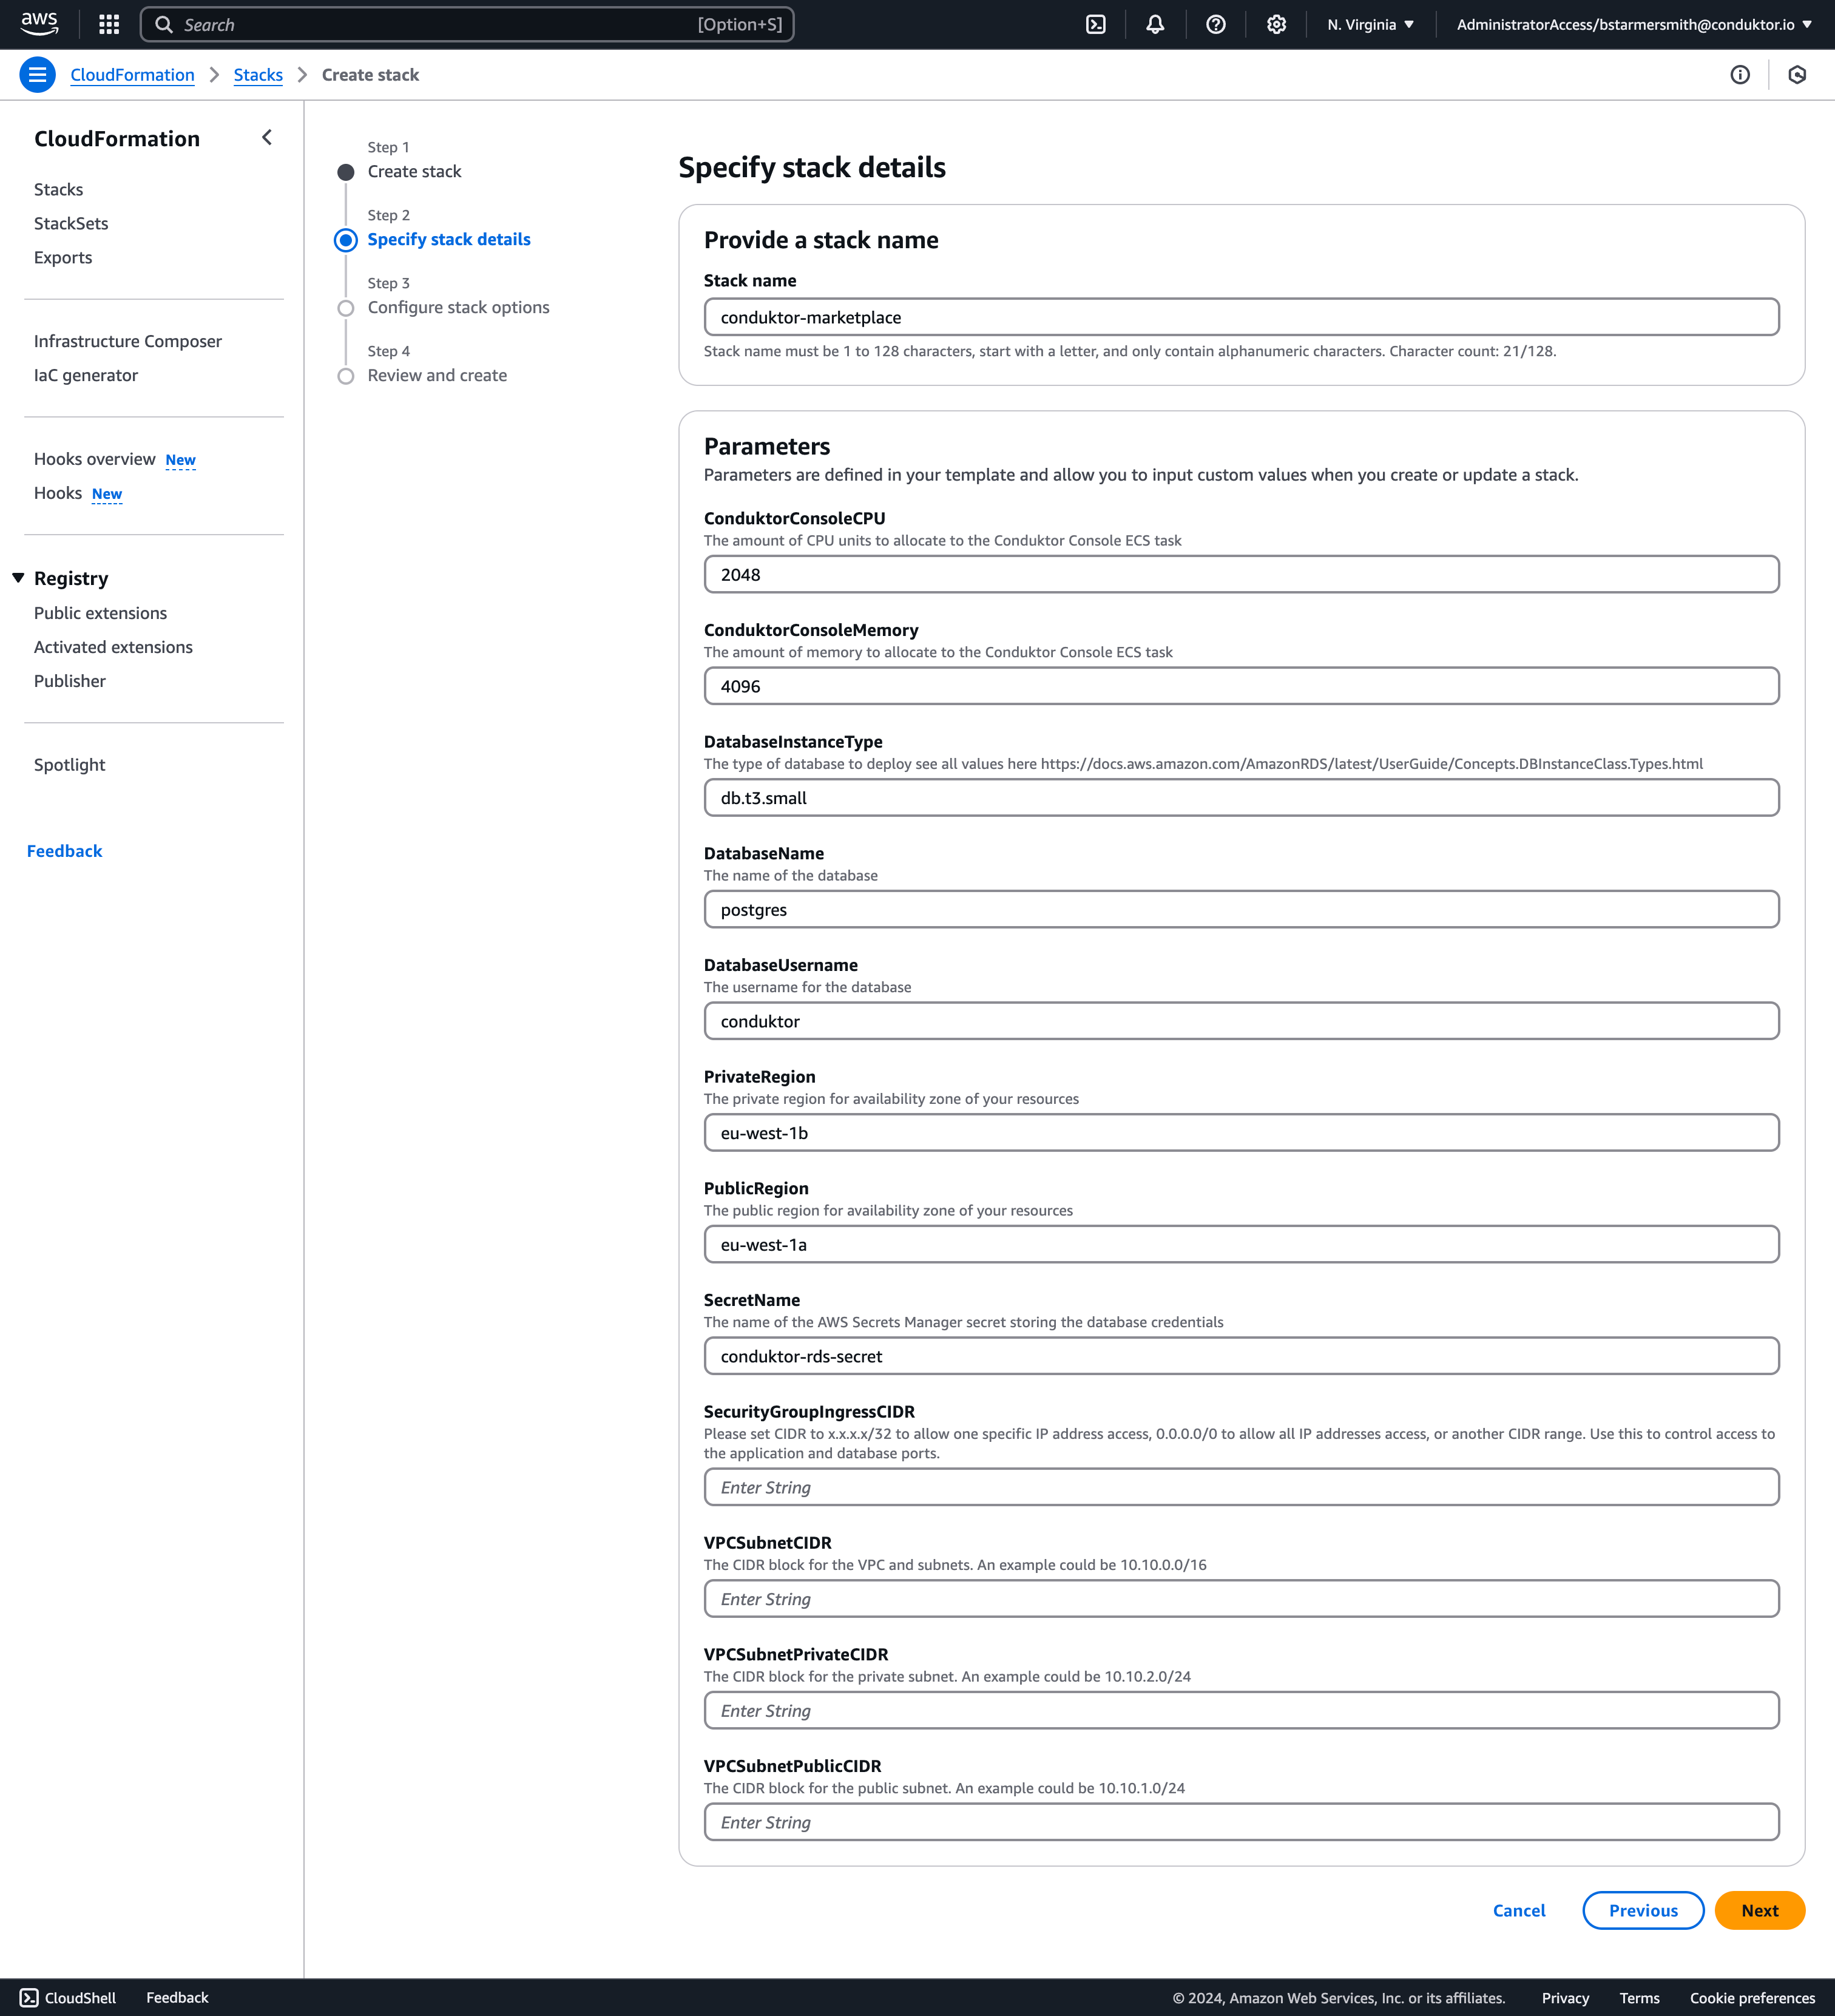
 8. You will then be given the option to change the stack name or any of the other default values from our template. You will need to provide values for the missing CIDR properties towards the bottom of the page. Once you are happy with the parameters, press `Next`.
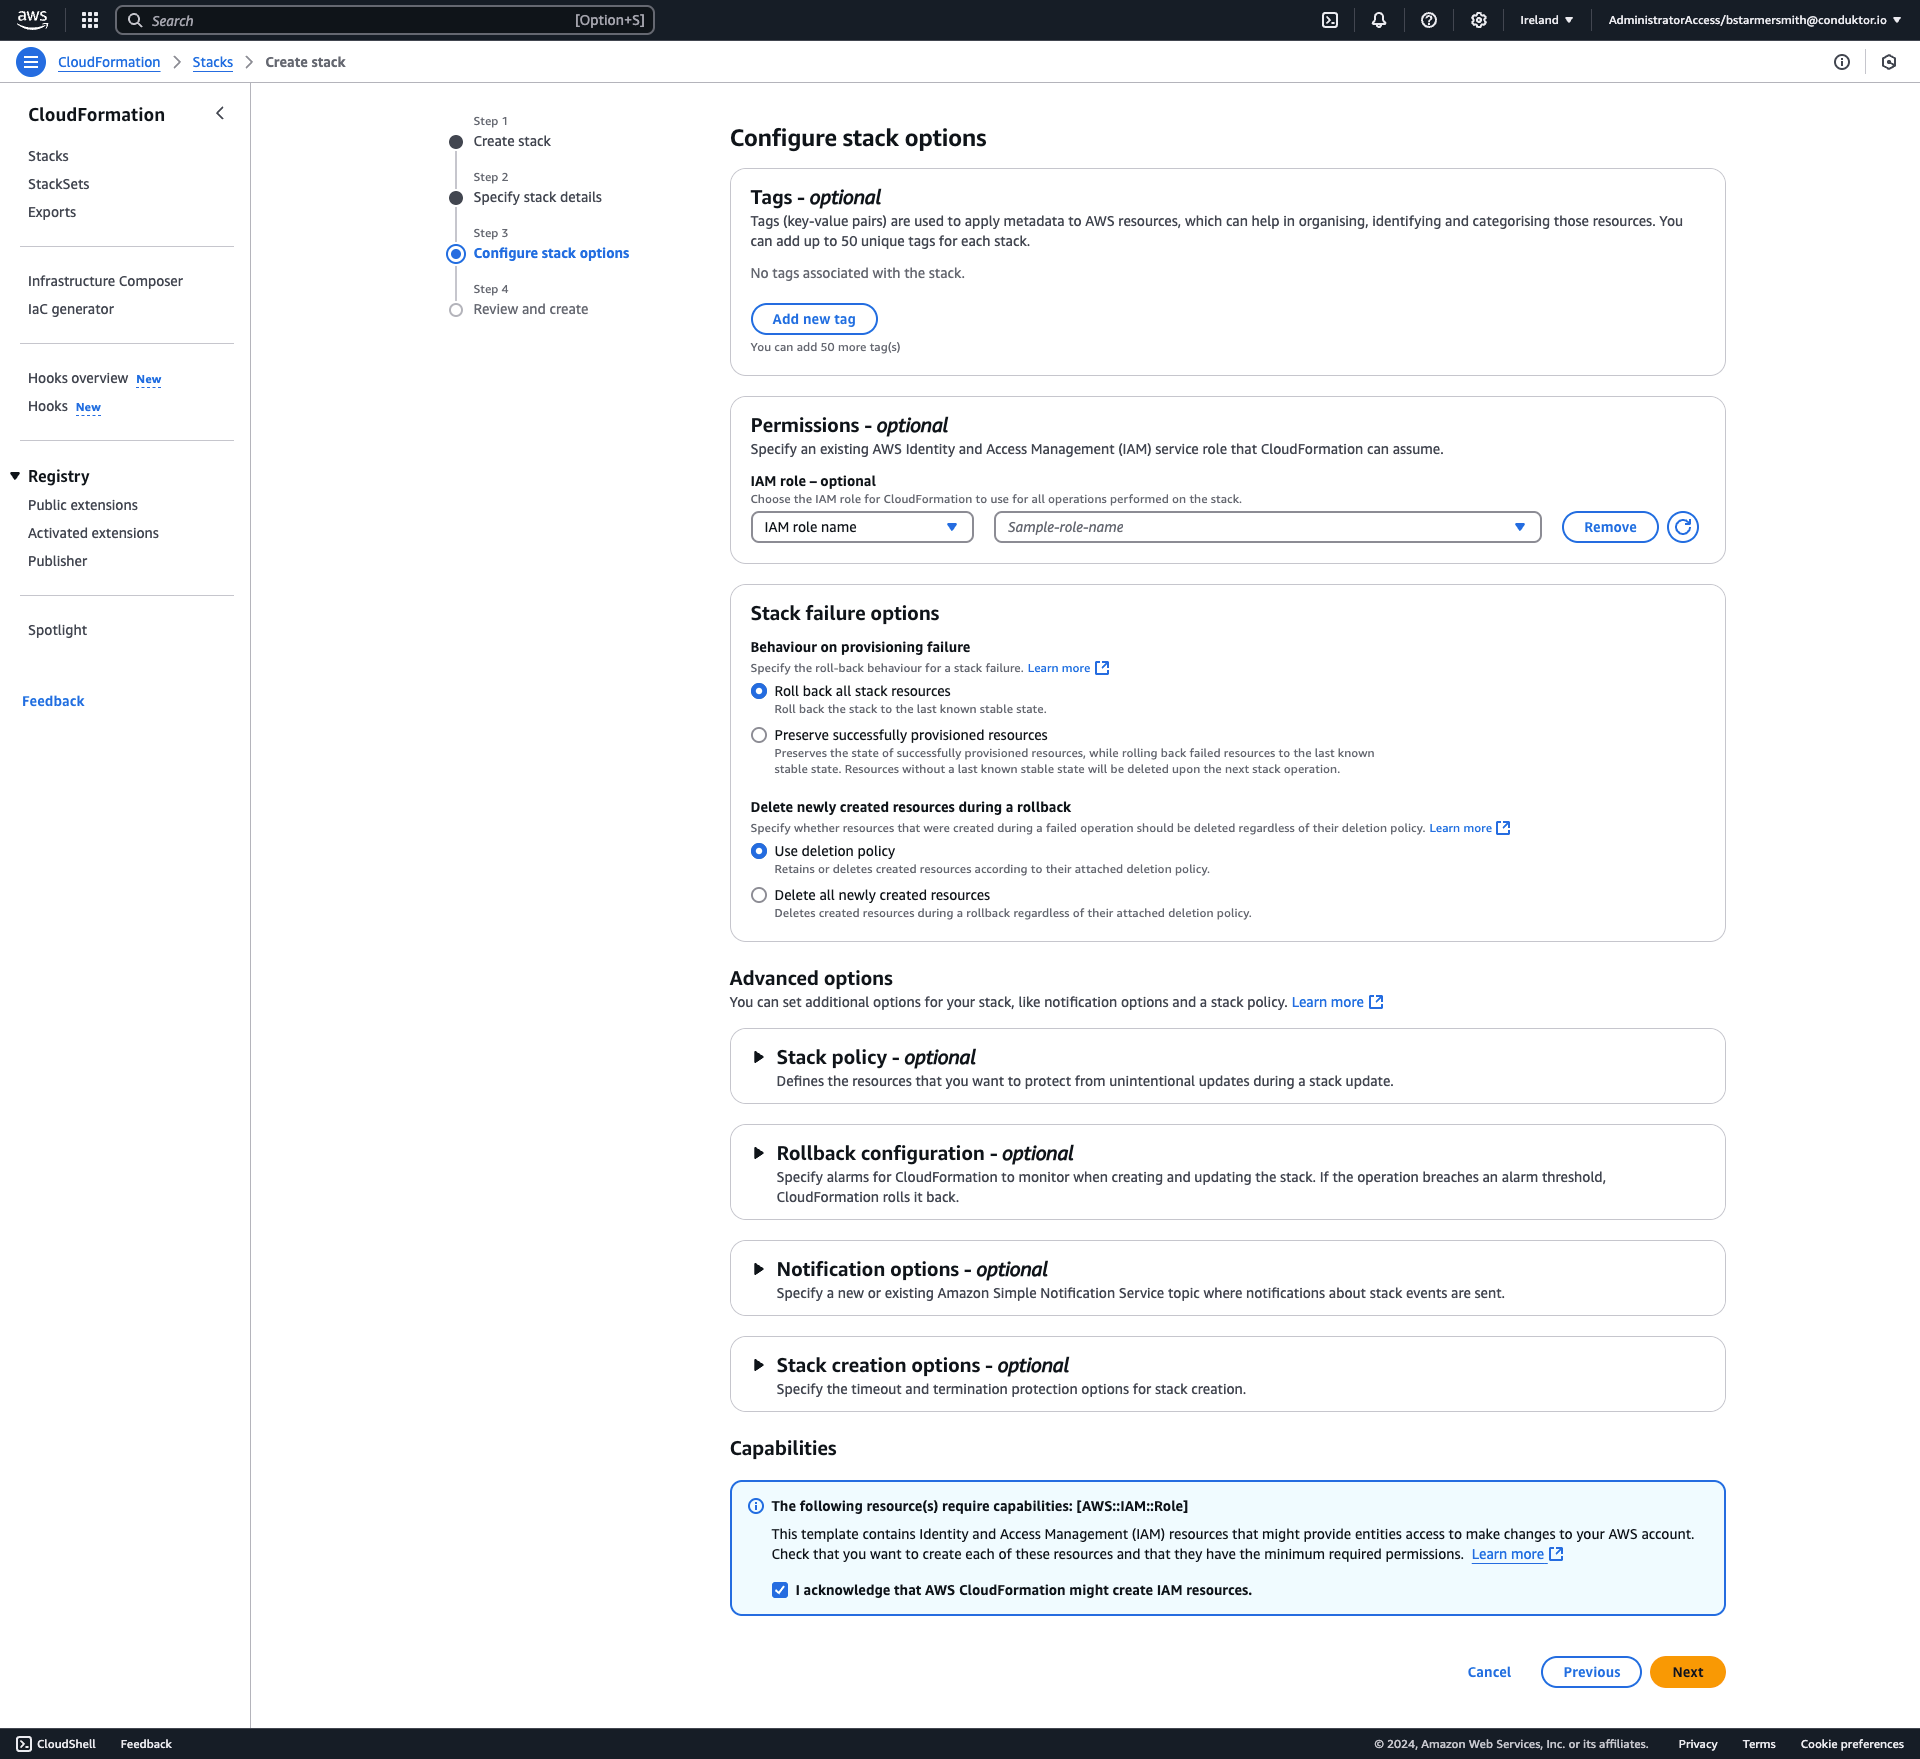
 9. Configure your stack options and acknowledge that the CloudFormation template will create IAM resources and click **Next**.
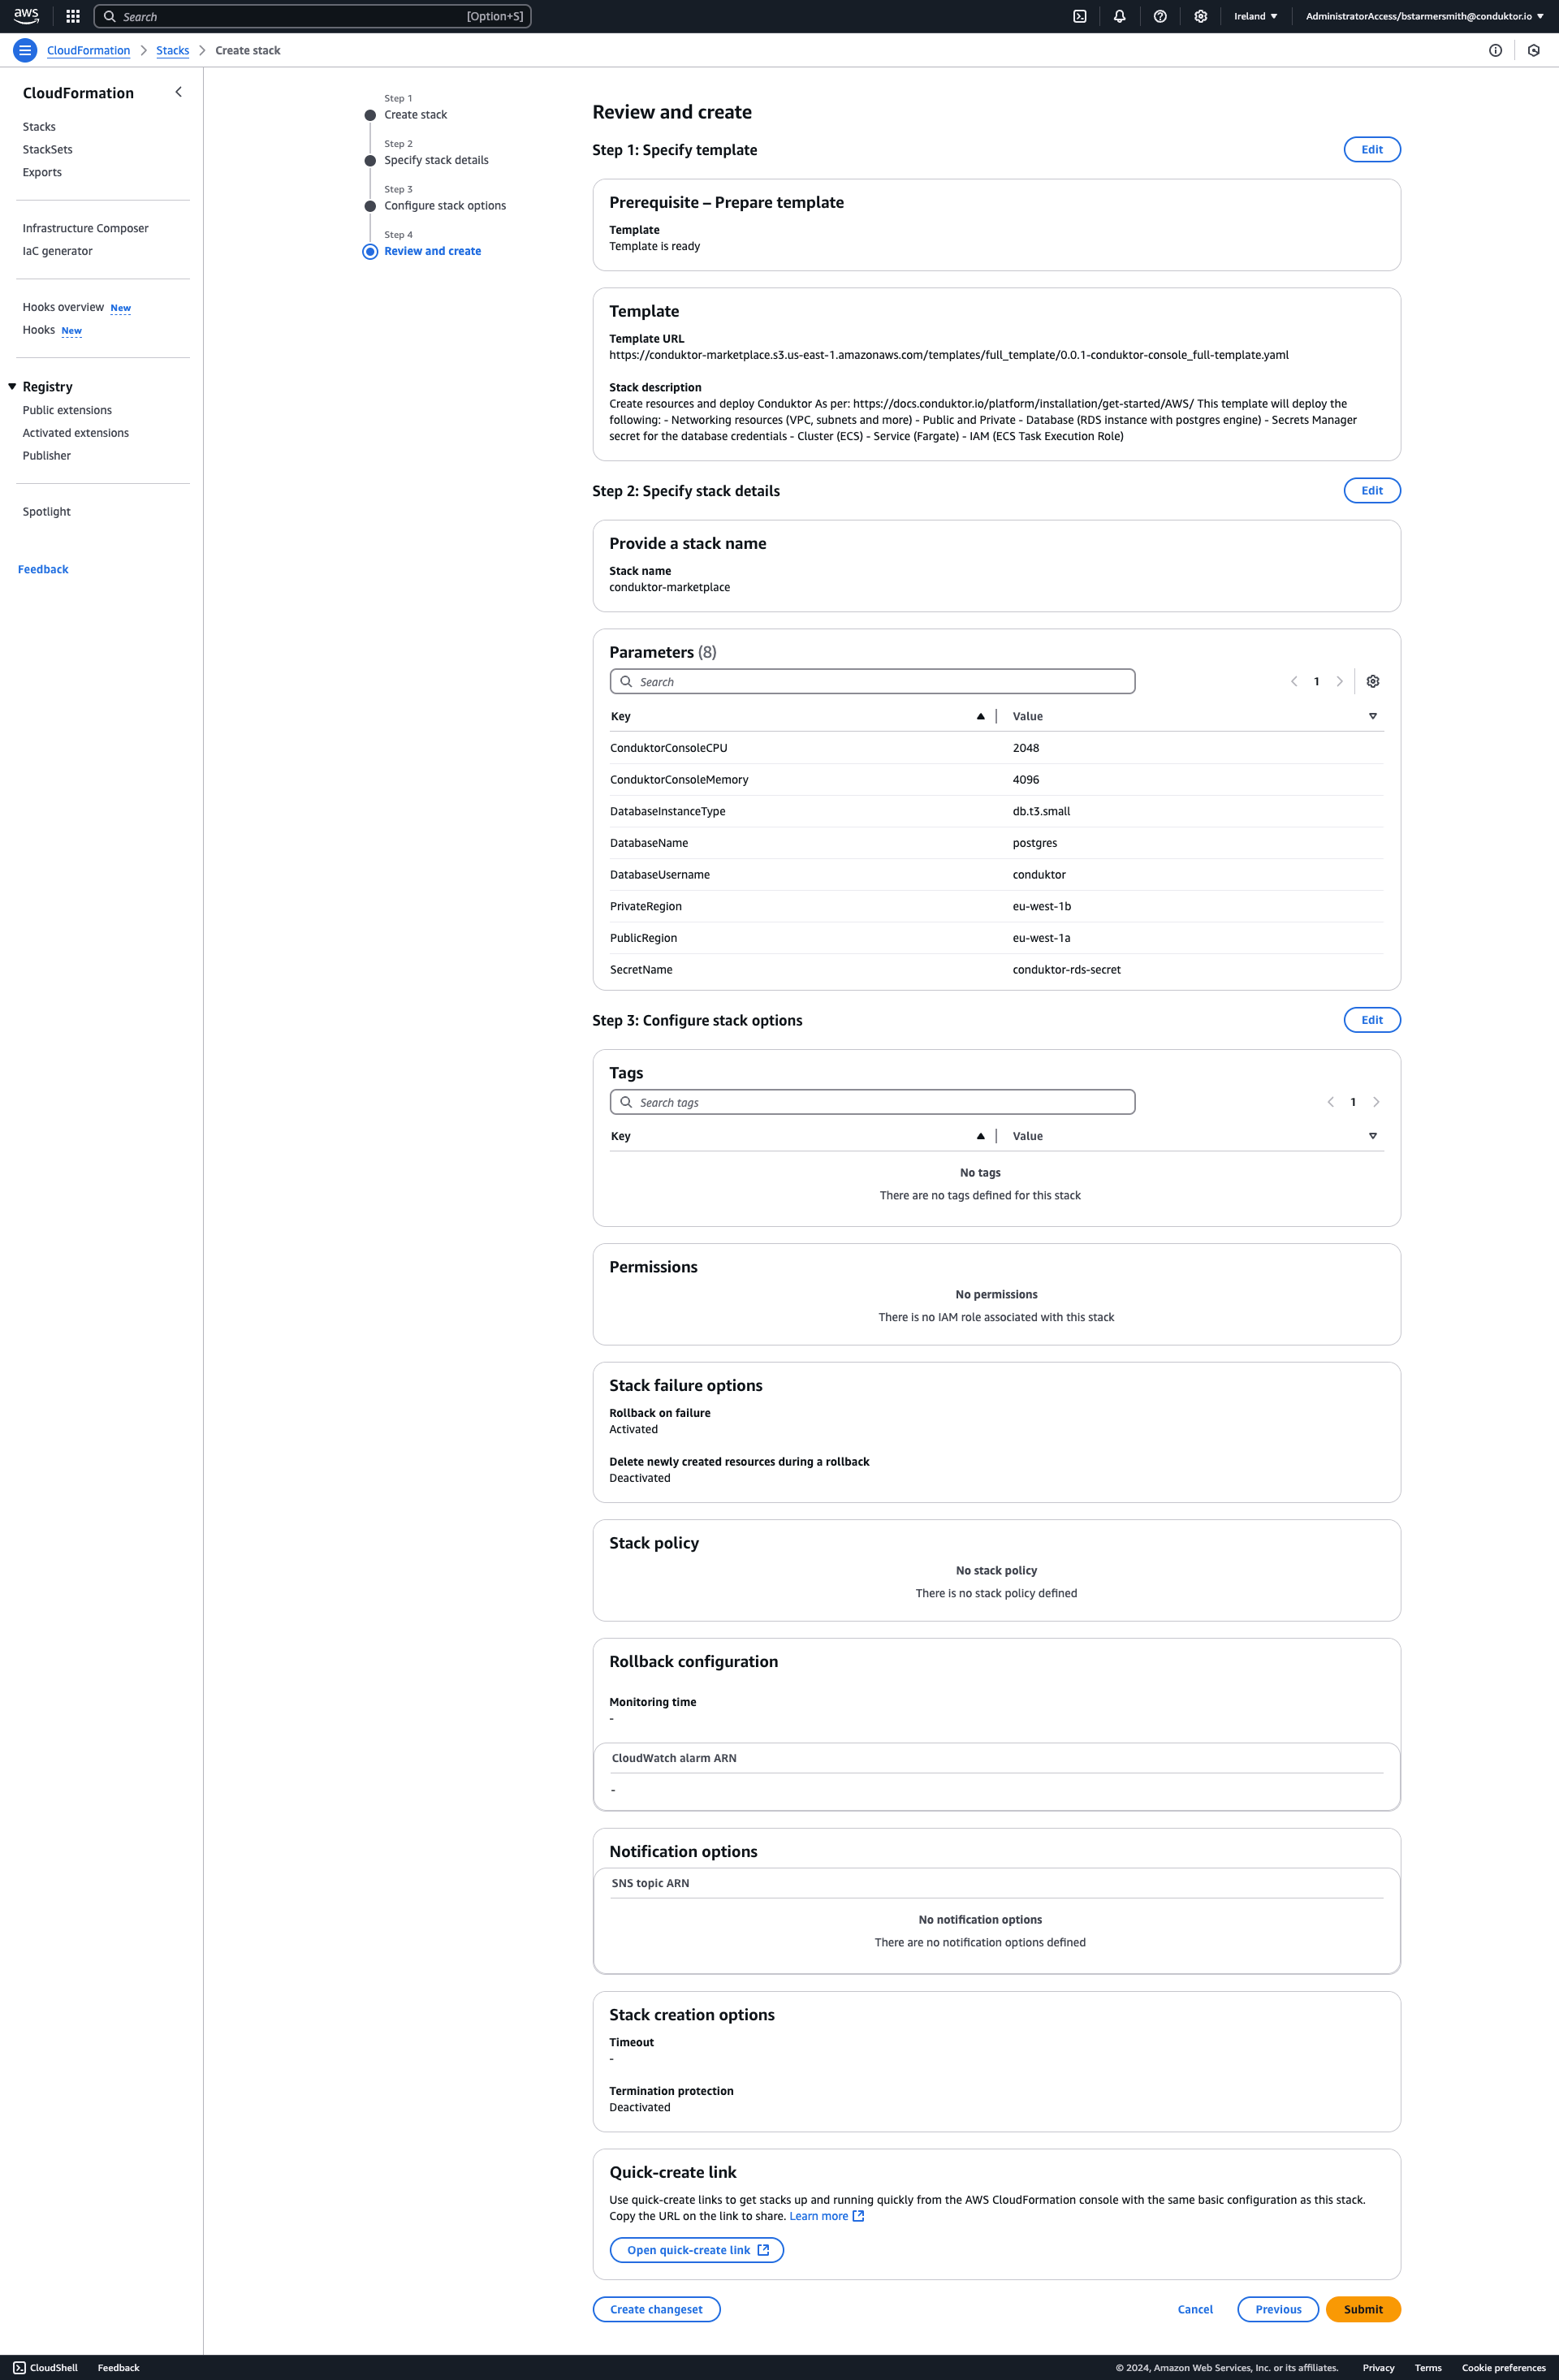
 10. You can then review the CloudFormation stack and then click **Submit**.
 11. Wait for all resources to be created. This may take some time, about 10 minutes depending how quickly AWS deploys RDS.
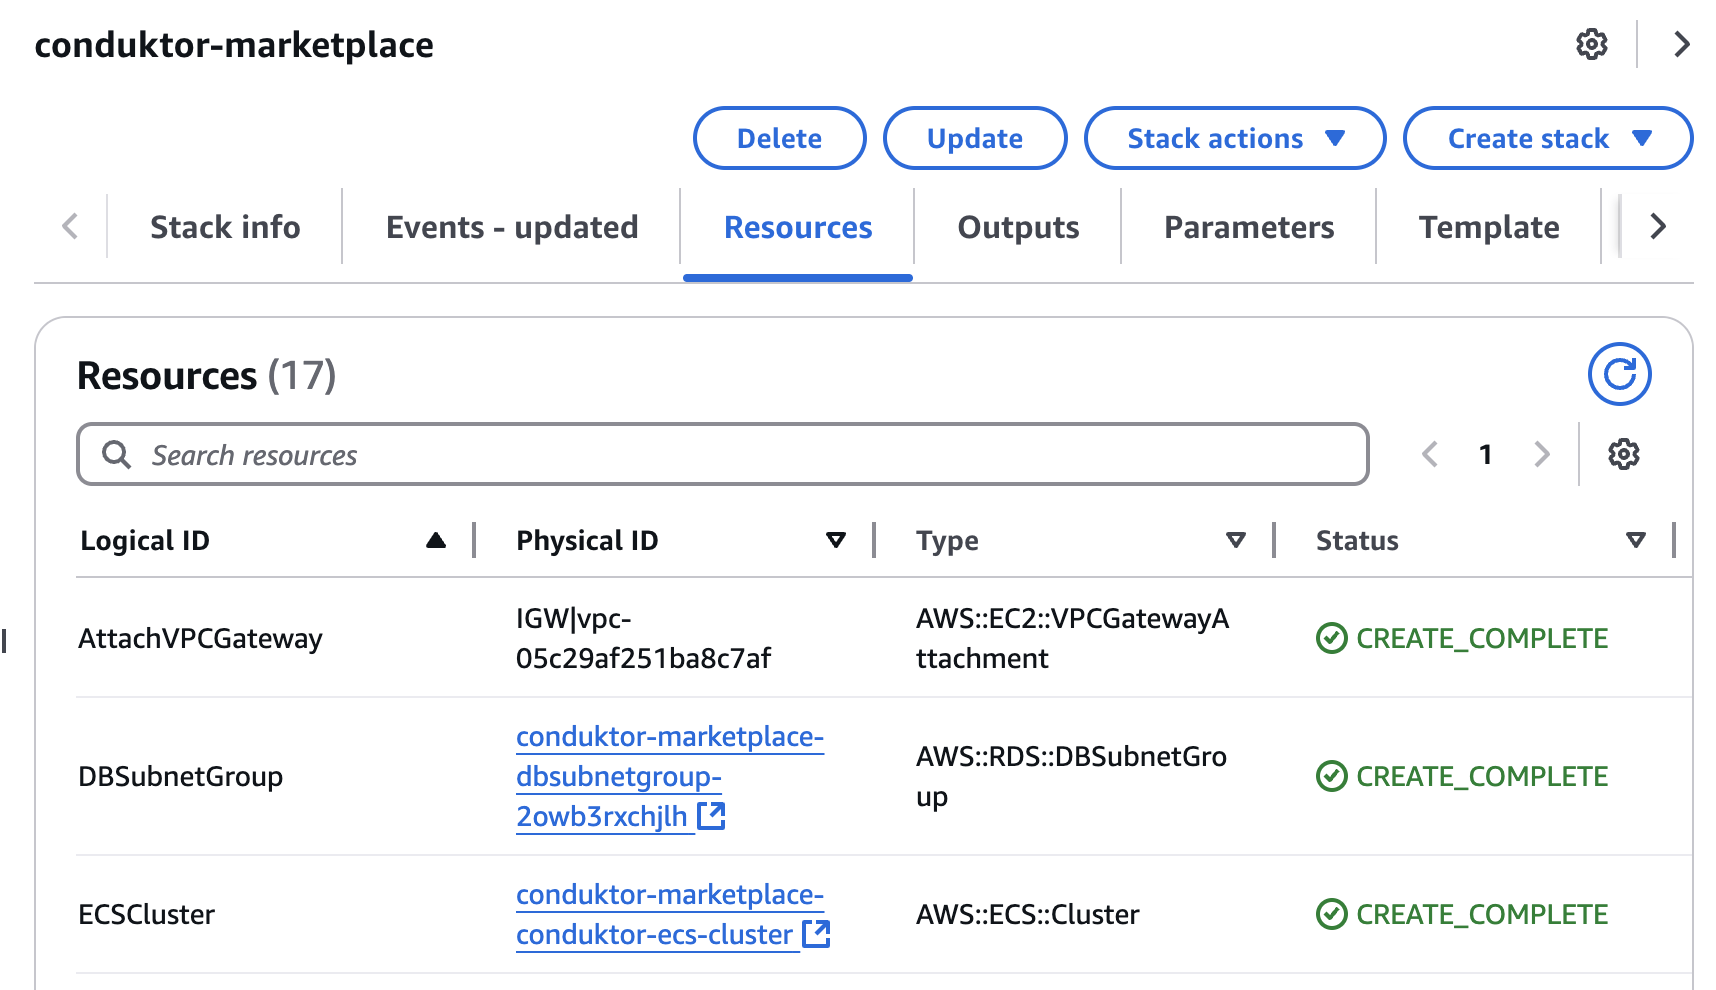
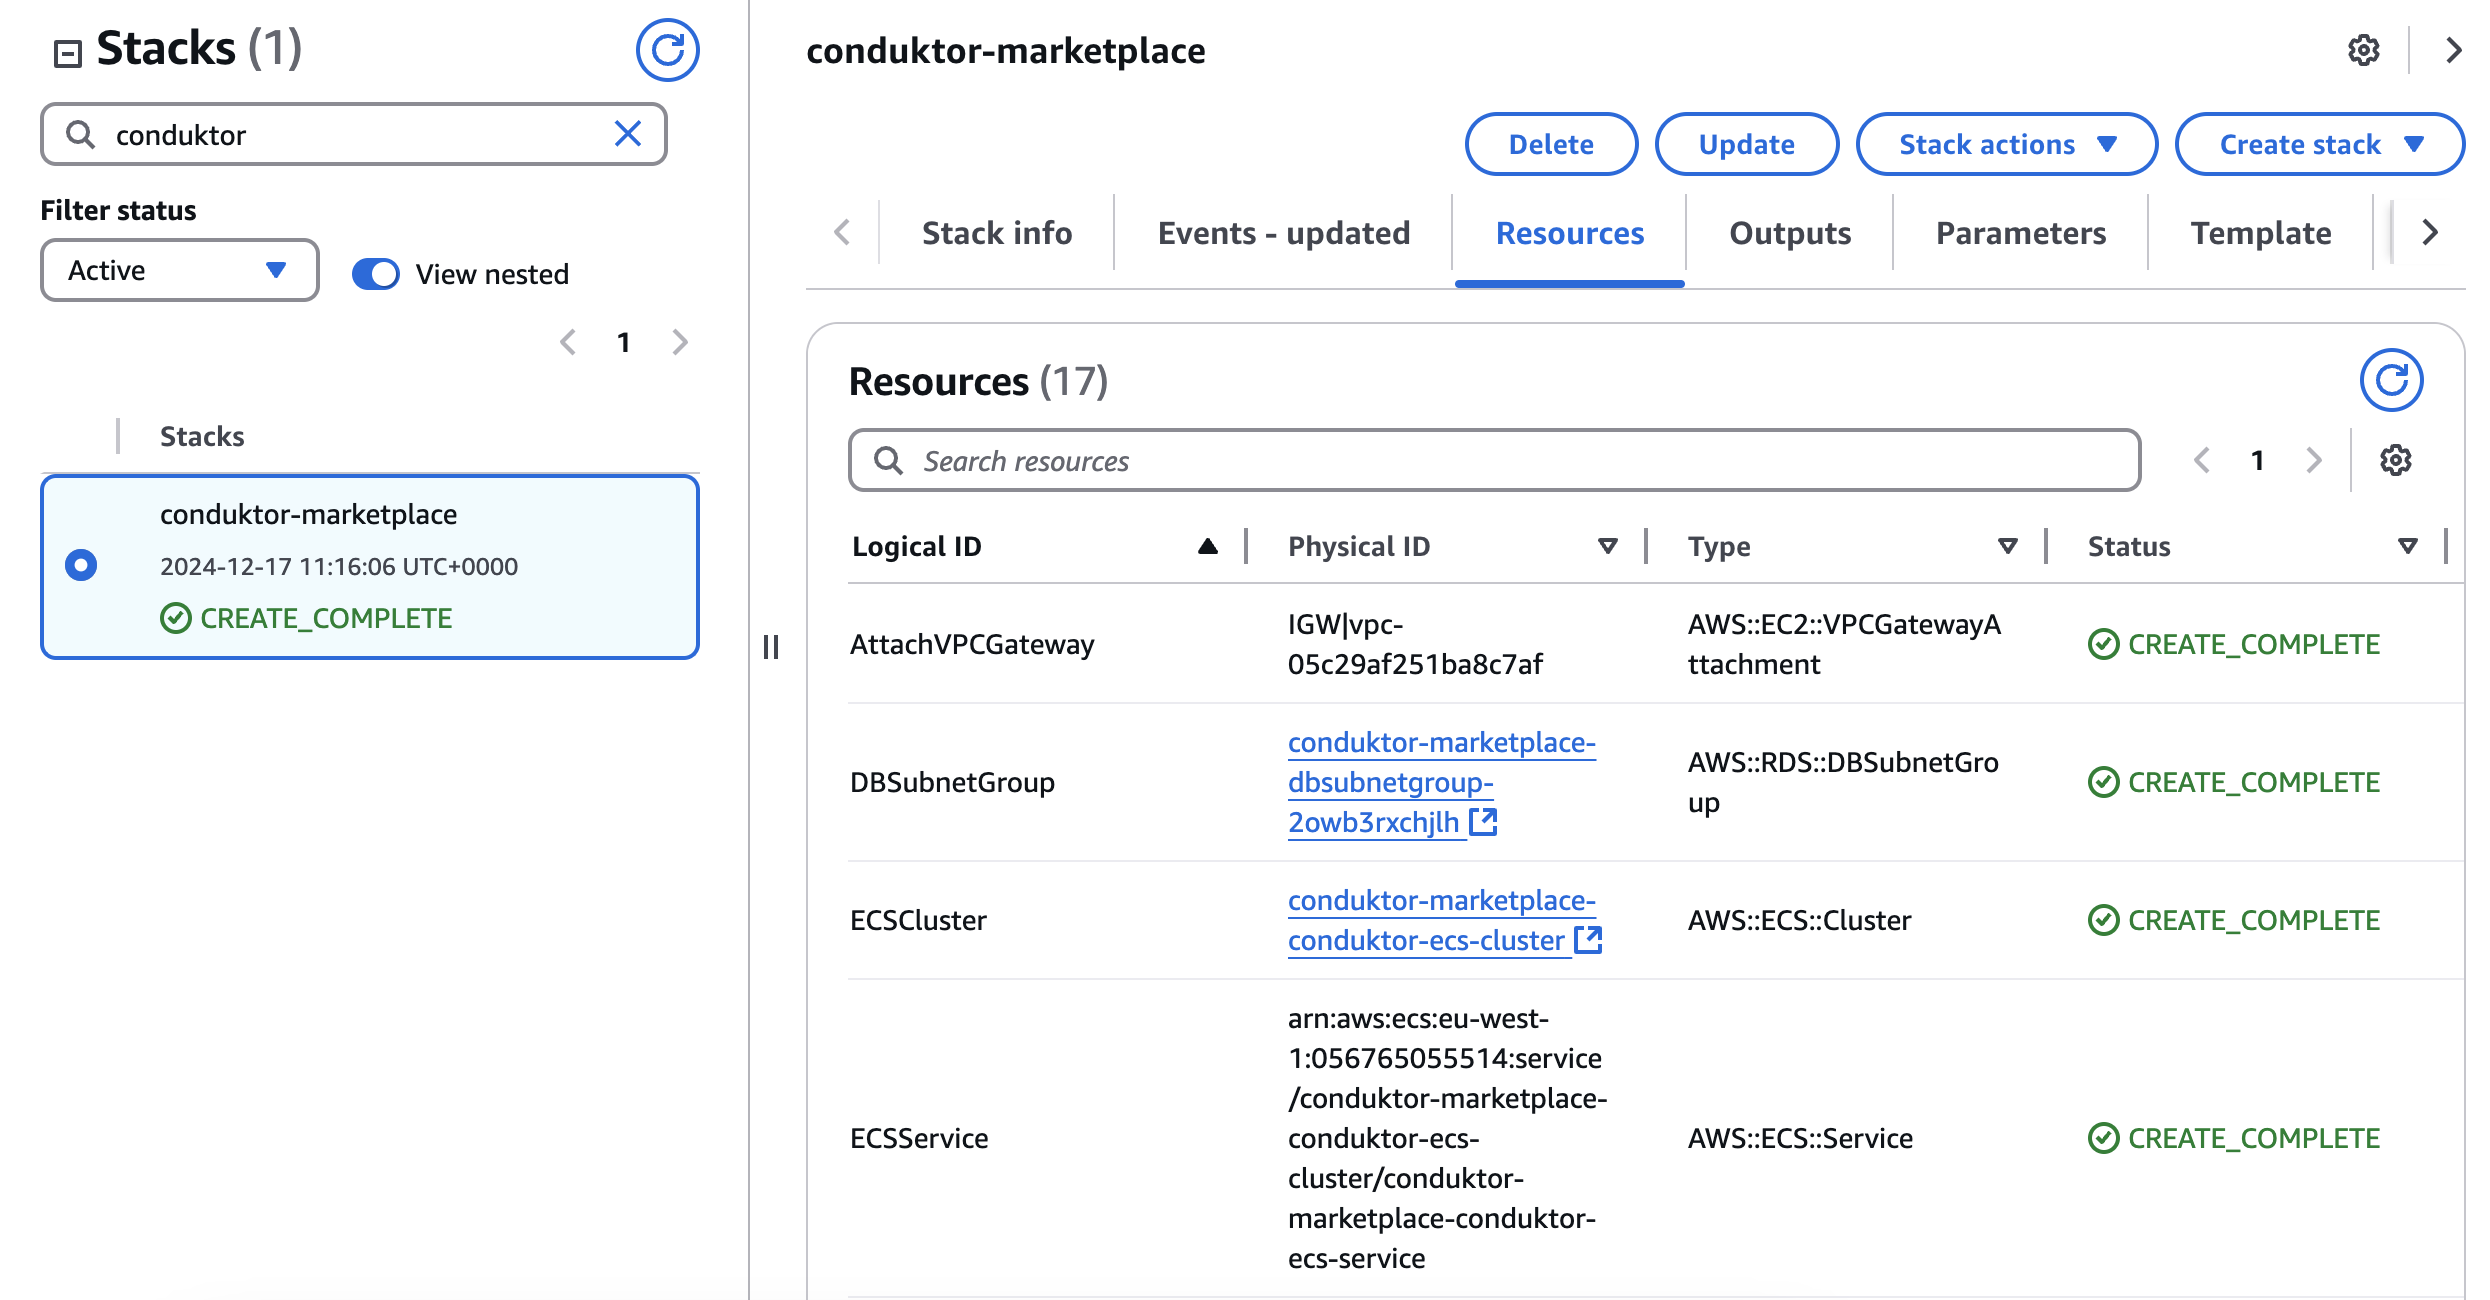 12. From the **Resources** tab, click on `${AWS::StackName}-conduktor-ecs-cluster`. From **Cluster**, navigate to your newly created **Service** and then to the **Task**. Be sure to click on the links.
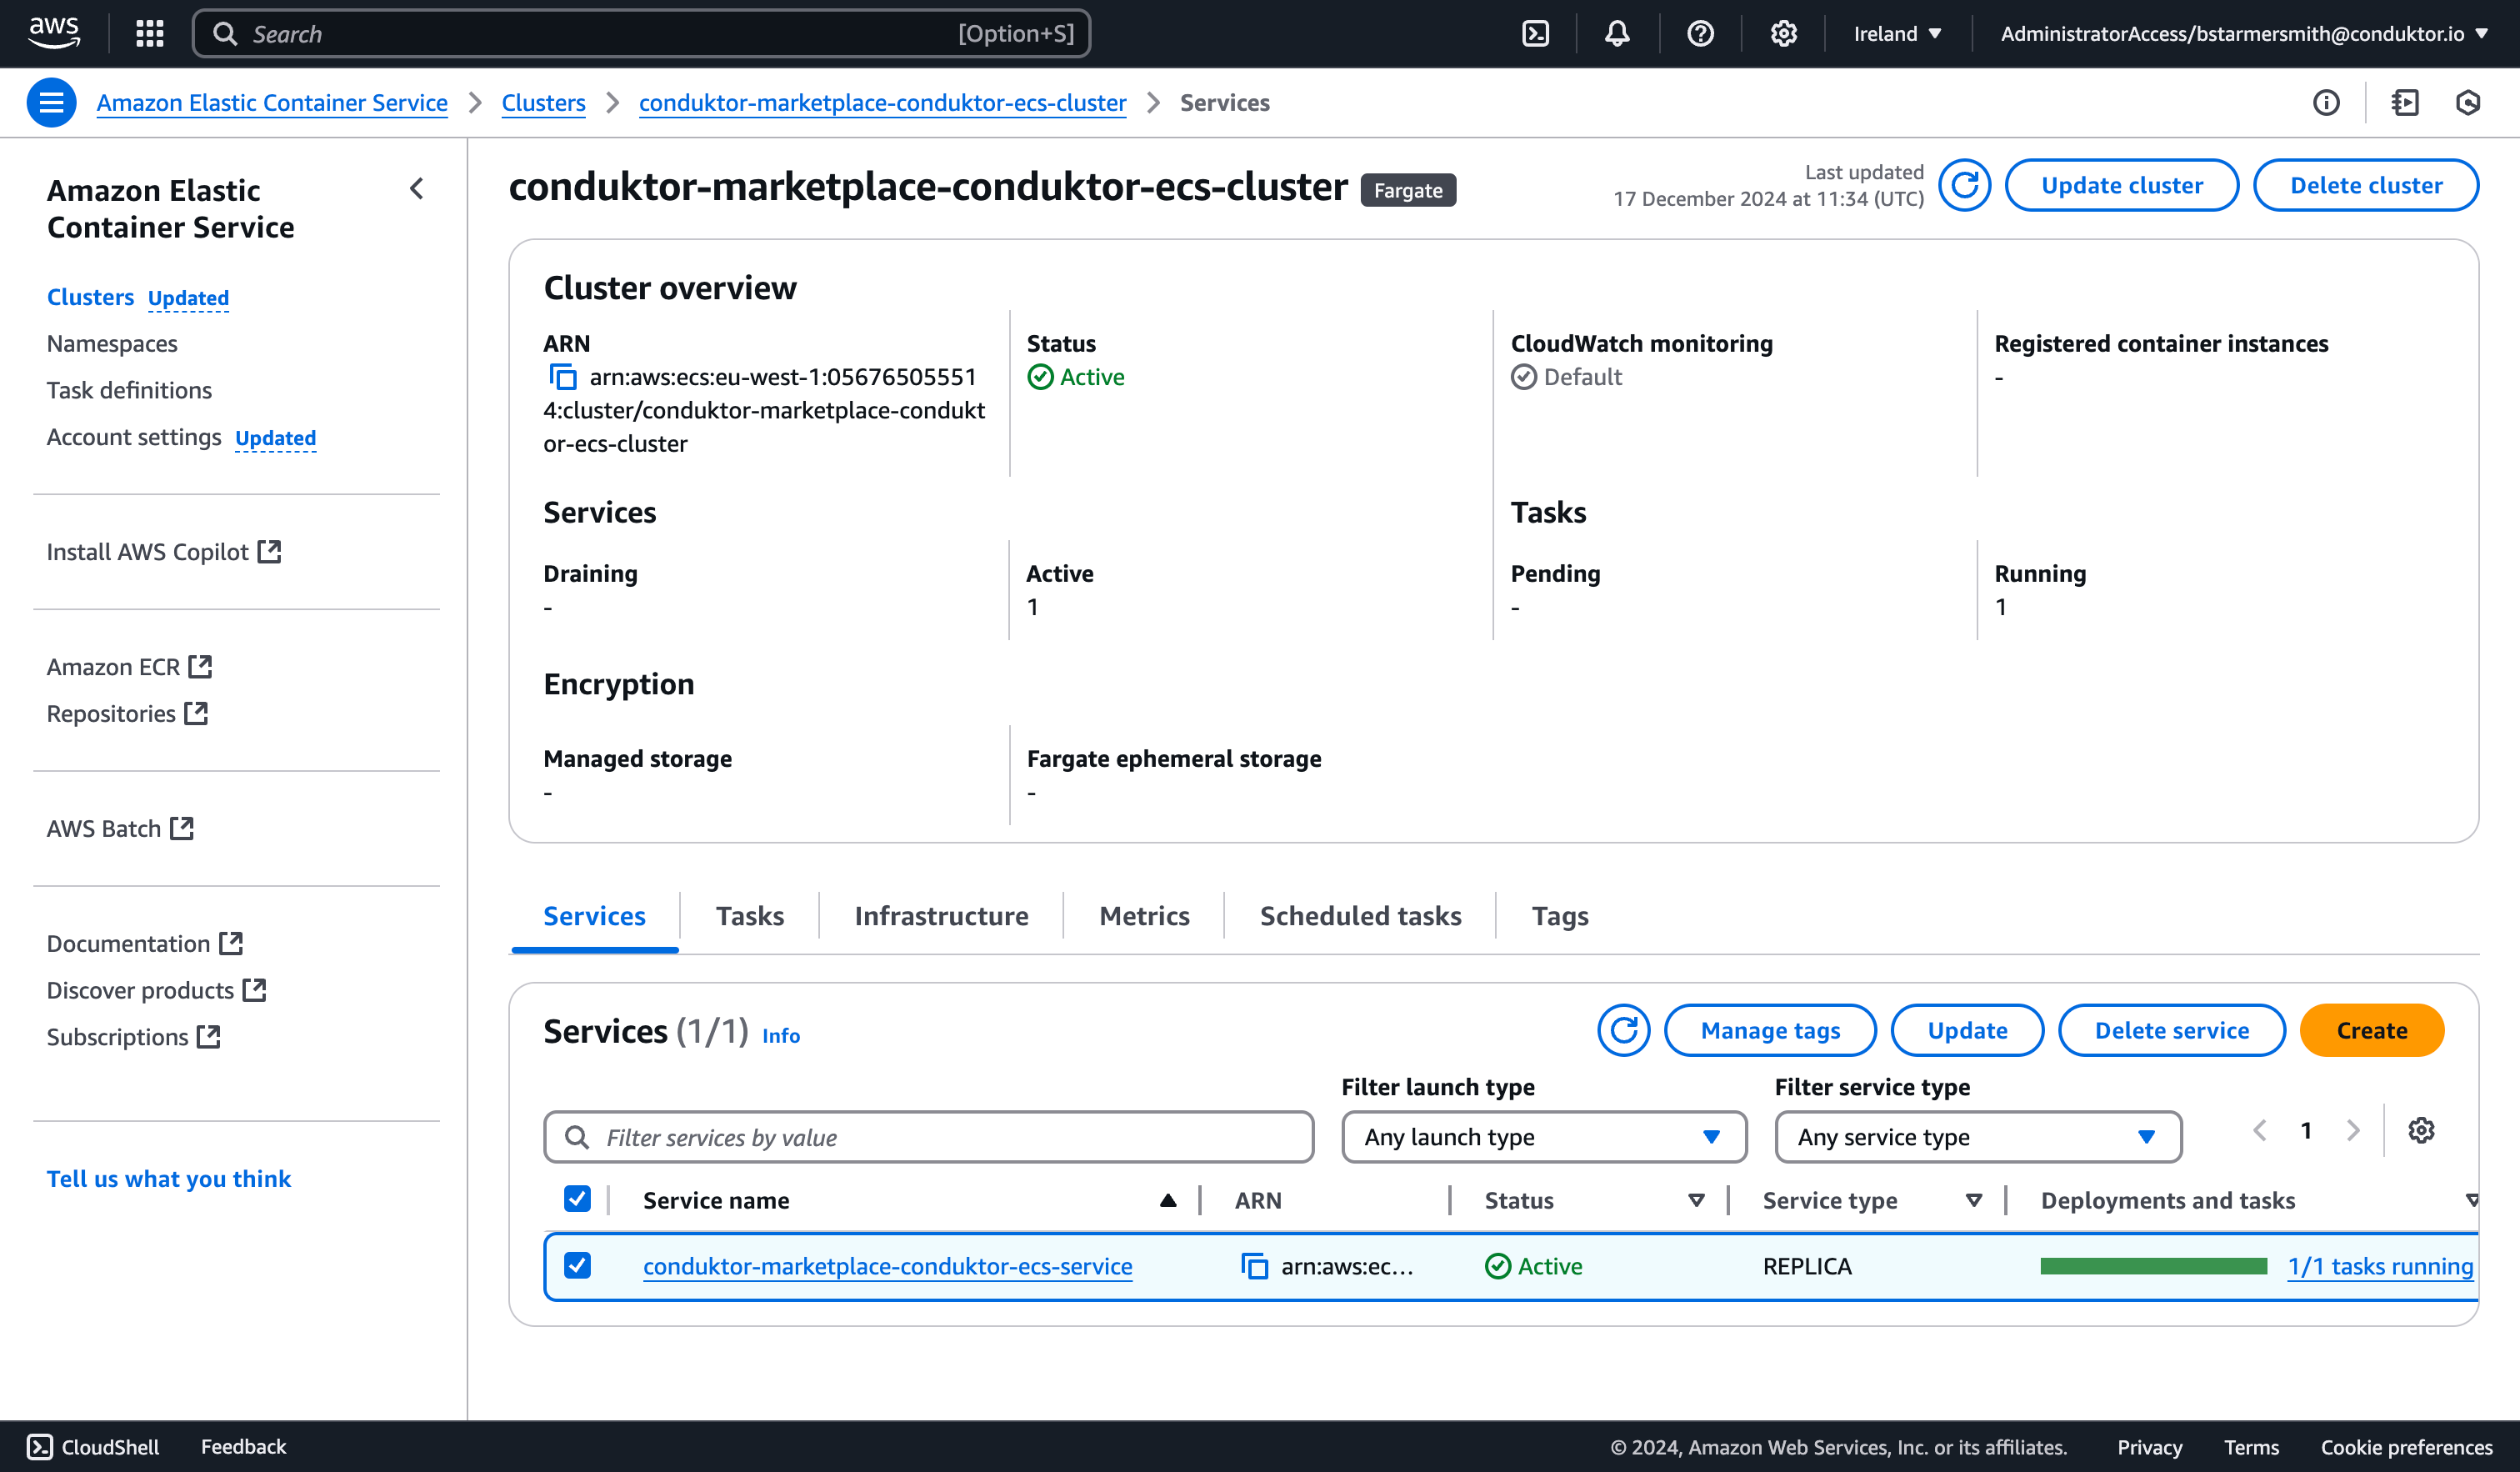
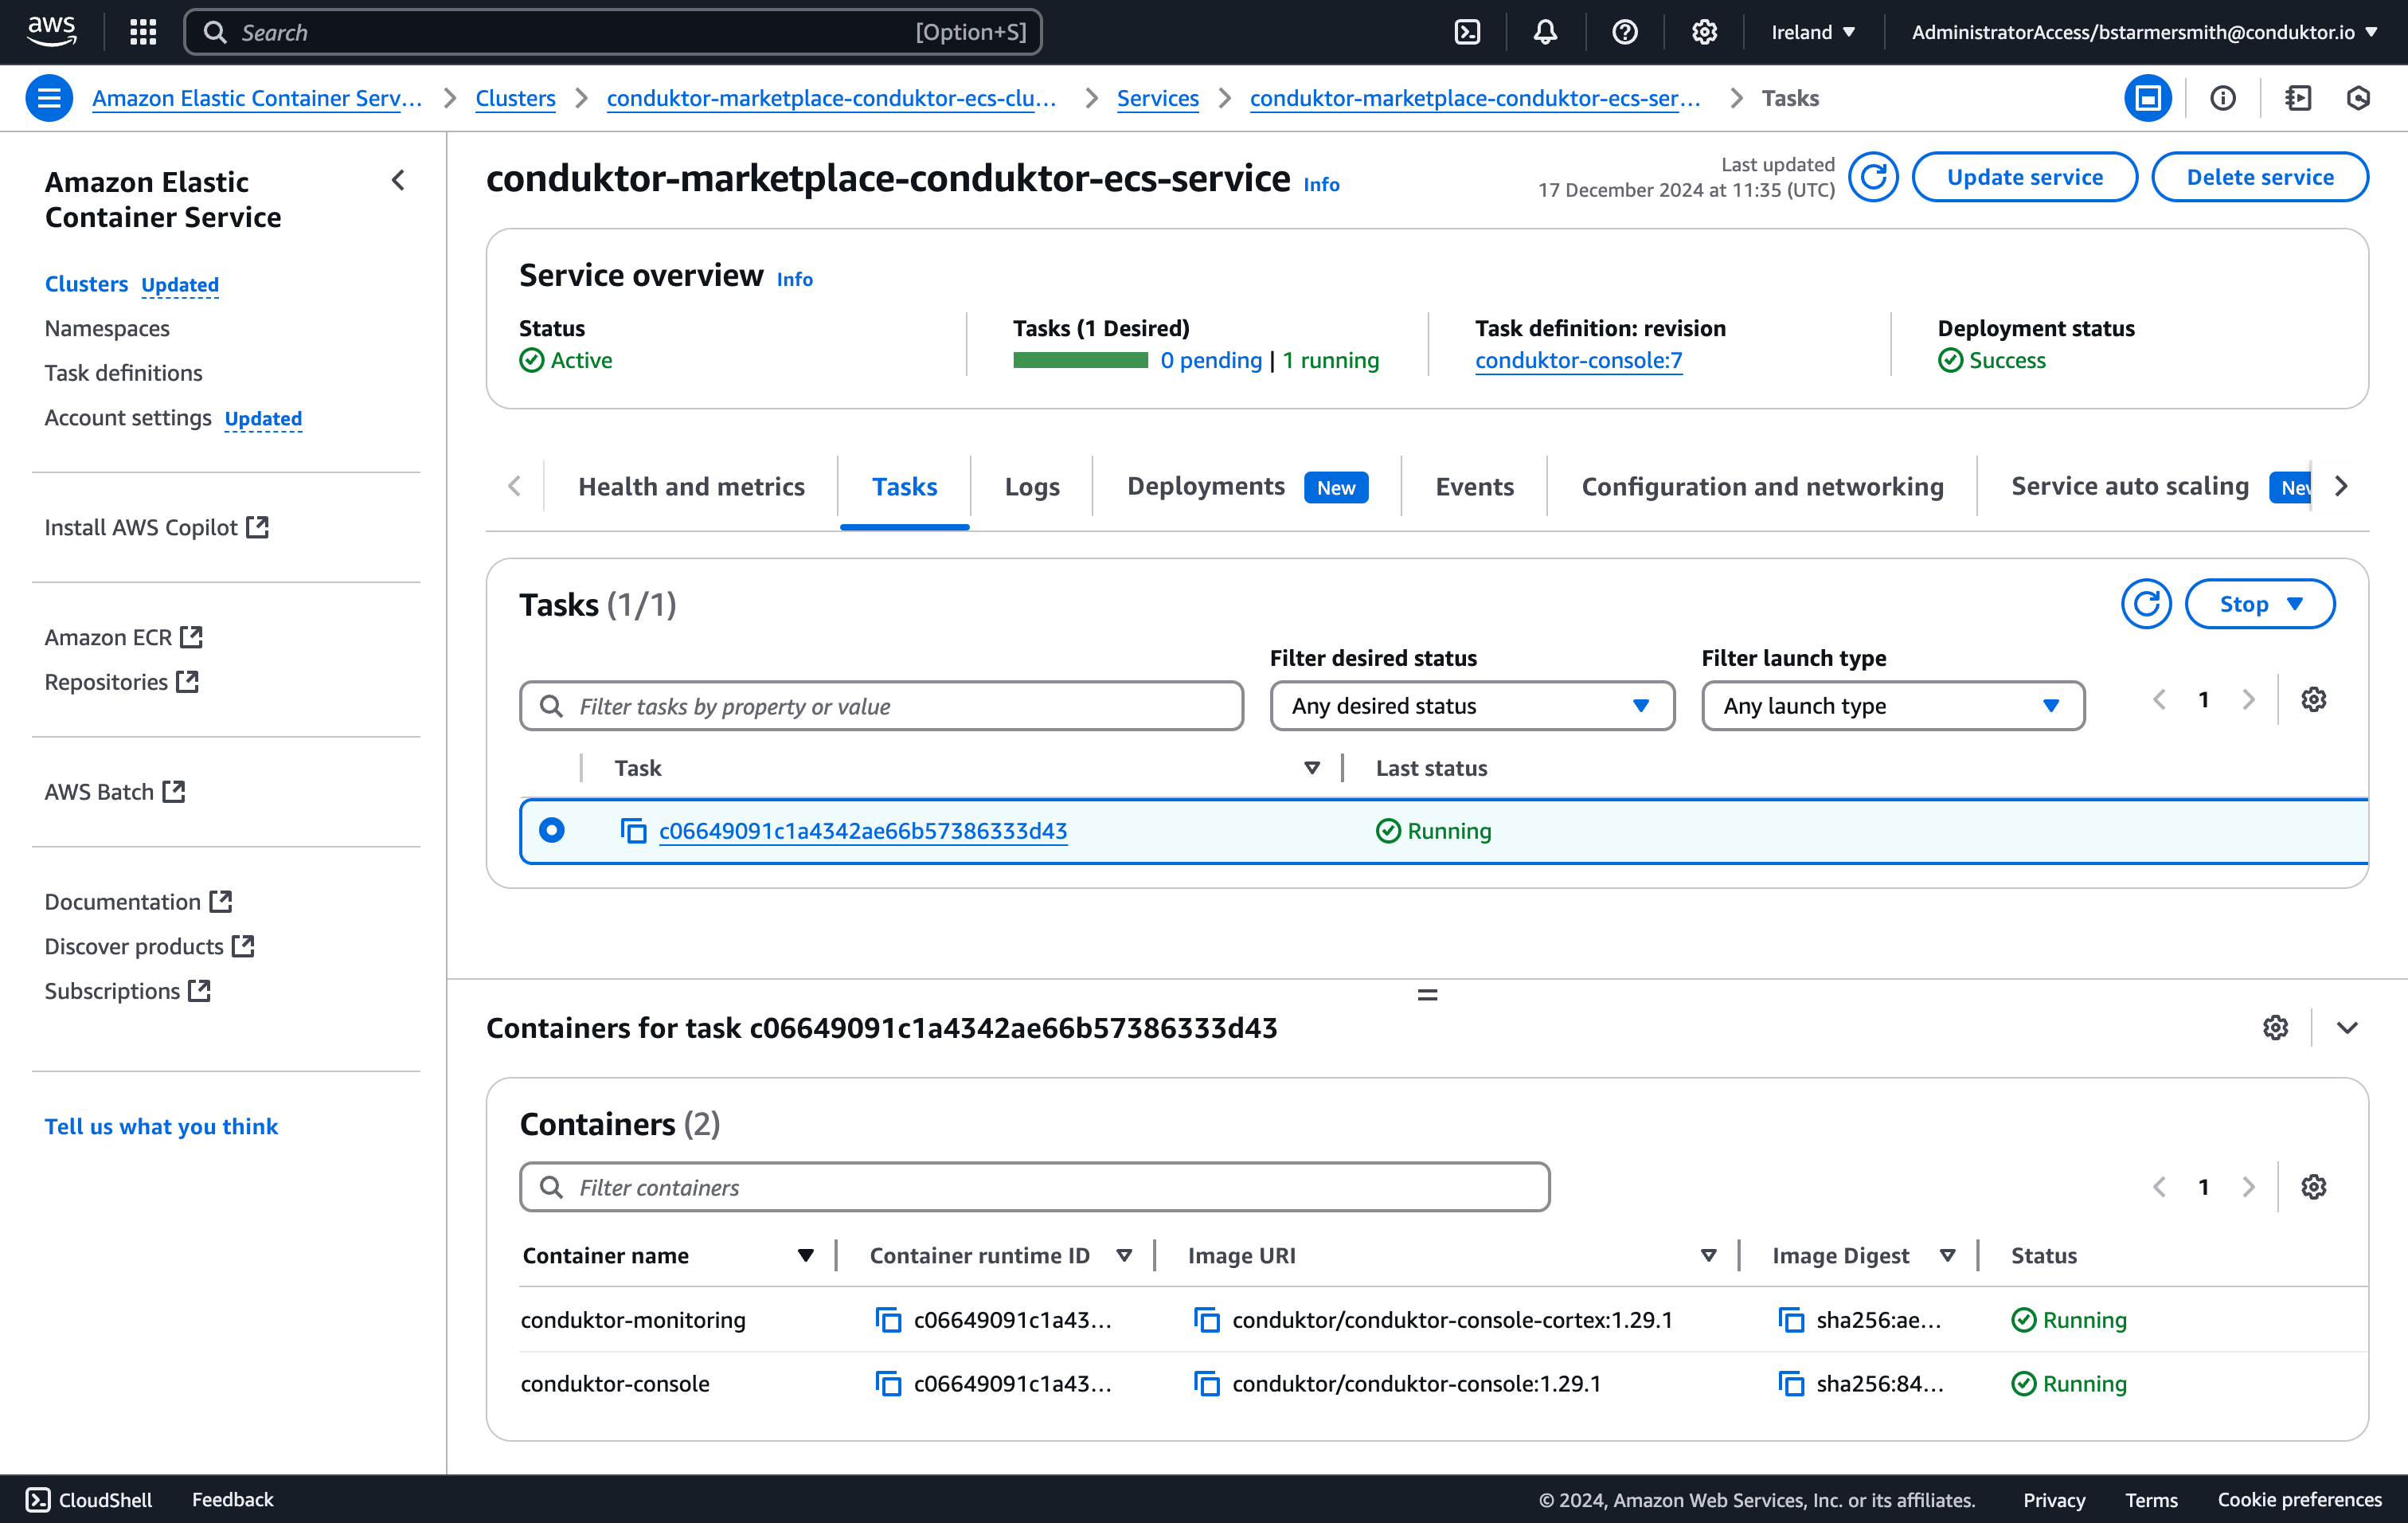 13. Find the `conduktor-console` Container and (not the *conduktor-console-cortex* one) and navigate to the **Network bindings** tab.
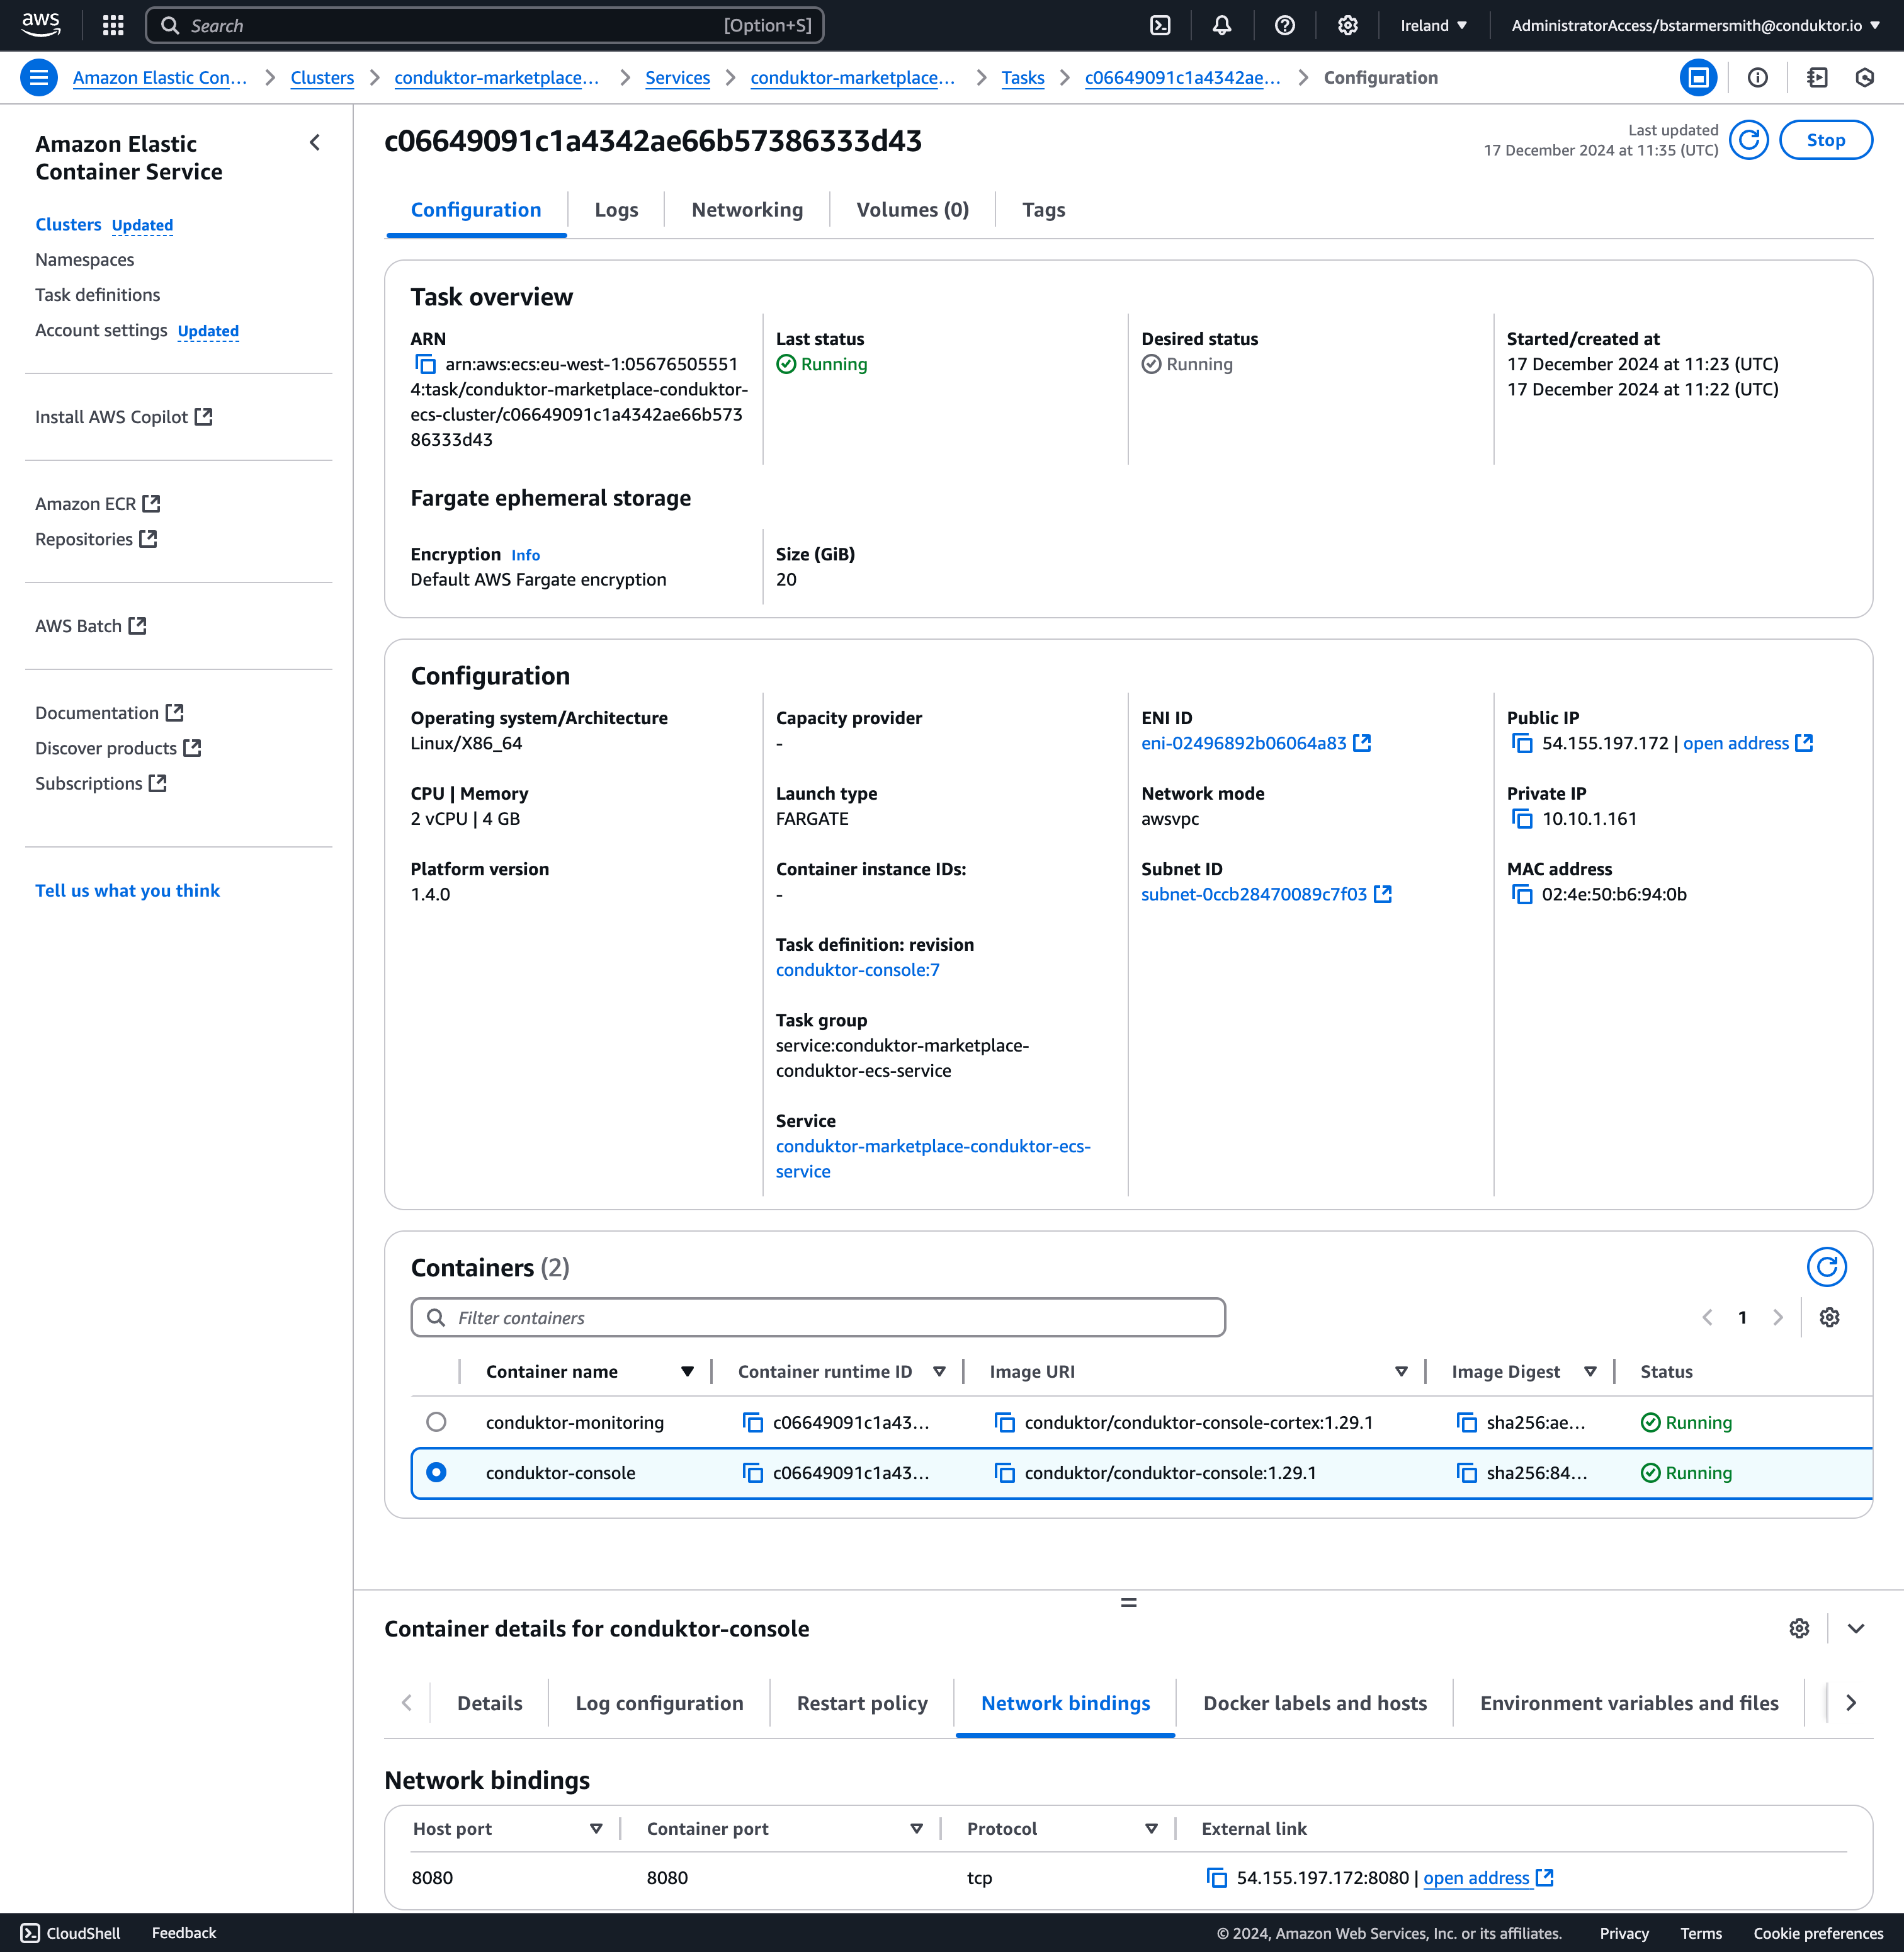 14. Click on the **External** link to open the Console application. In this example, our application is running at 54.155.197.172:8080.
 ### Access Conduktor
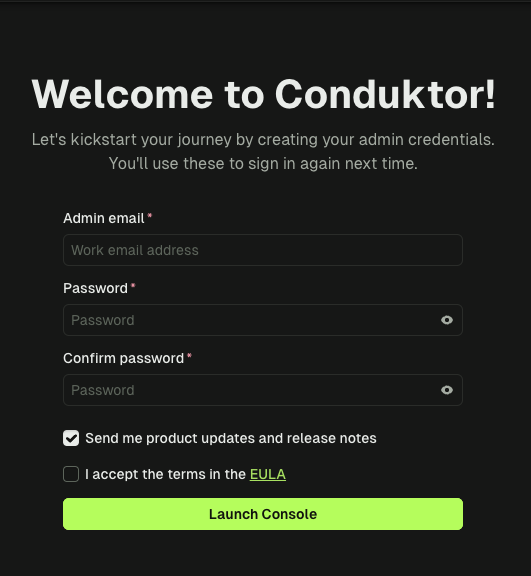
You will now be greeted with the create admin login. Create credentials and **make a note/save them** as they are for this instance. If lost, Conduktor cannot remotely reset these credentials.
From here, you can add additional local users if needed. When you're ready for a production level deployment, you'll want to connect to SSO for importing your organization's existing users and groups.
### Access Conduktor
You will now be greeted with the create admin login. Create credentials and **make a note/save them** as they are for this instance. If lost, Conduktor cannot remotely reset these credentials.
From here, you can add additional local users if needed. When you're ready for a production level deployment, you'll want to connect to SSO for importing your organization's existing users and groups.