Topic Consume
Checkout our video that presents the most important features of Topic Consume
Filtering and Sorting Techniques for Exploration and Troubleshooting with Console
Configure the Kafka Consumer
When you access a Topic from the Topic List page for the first time, a consumer is automatically triggered with default settings:
- Show From:
Most recent - Limit:
500 records - Partitions:
All
This default setup lets you quickly browse through the 500 most recent messages produced in the topic.
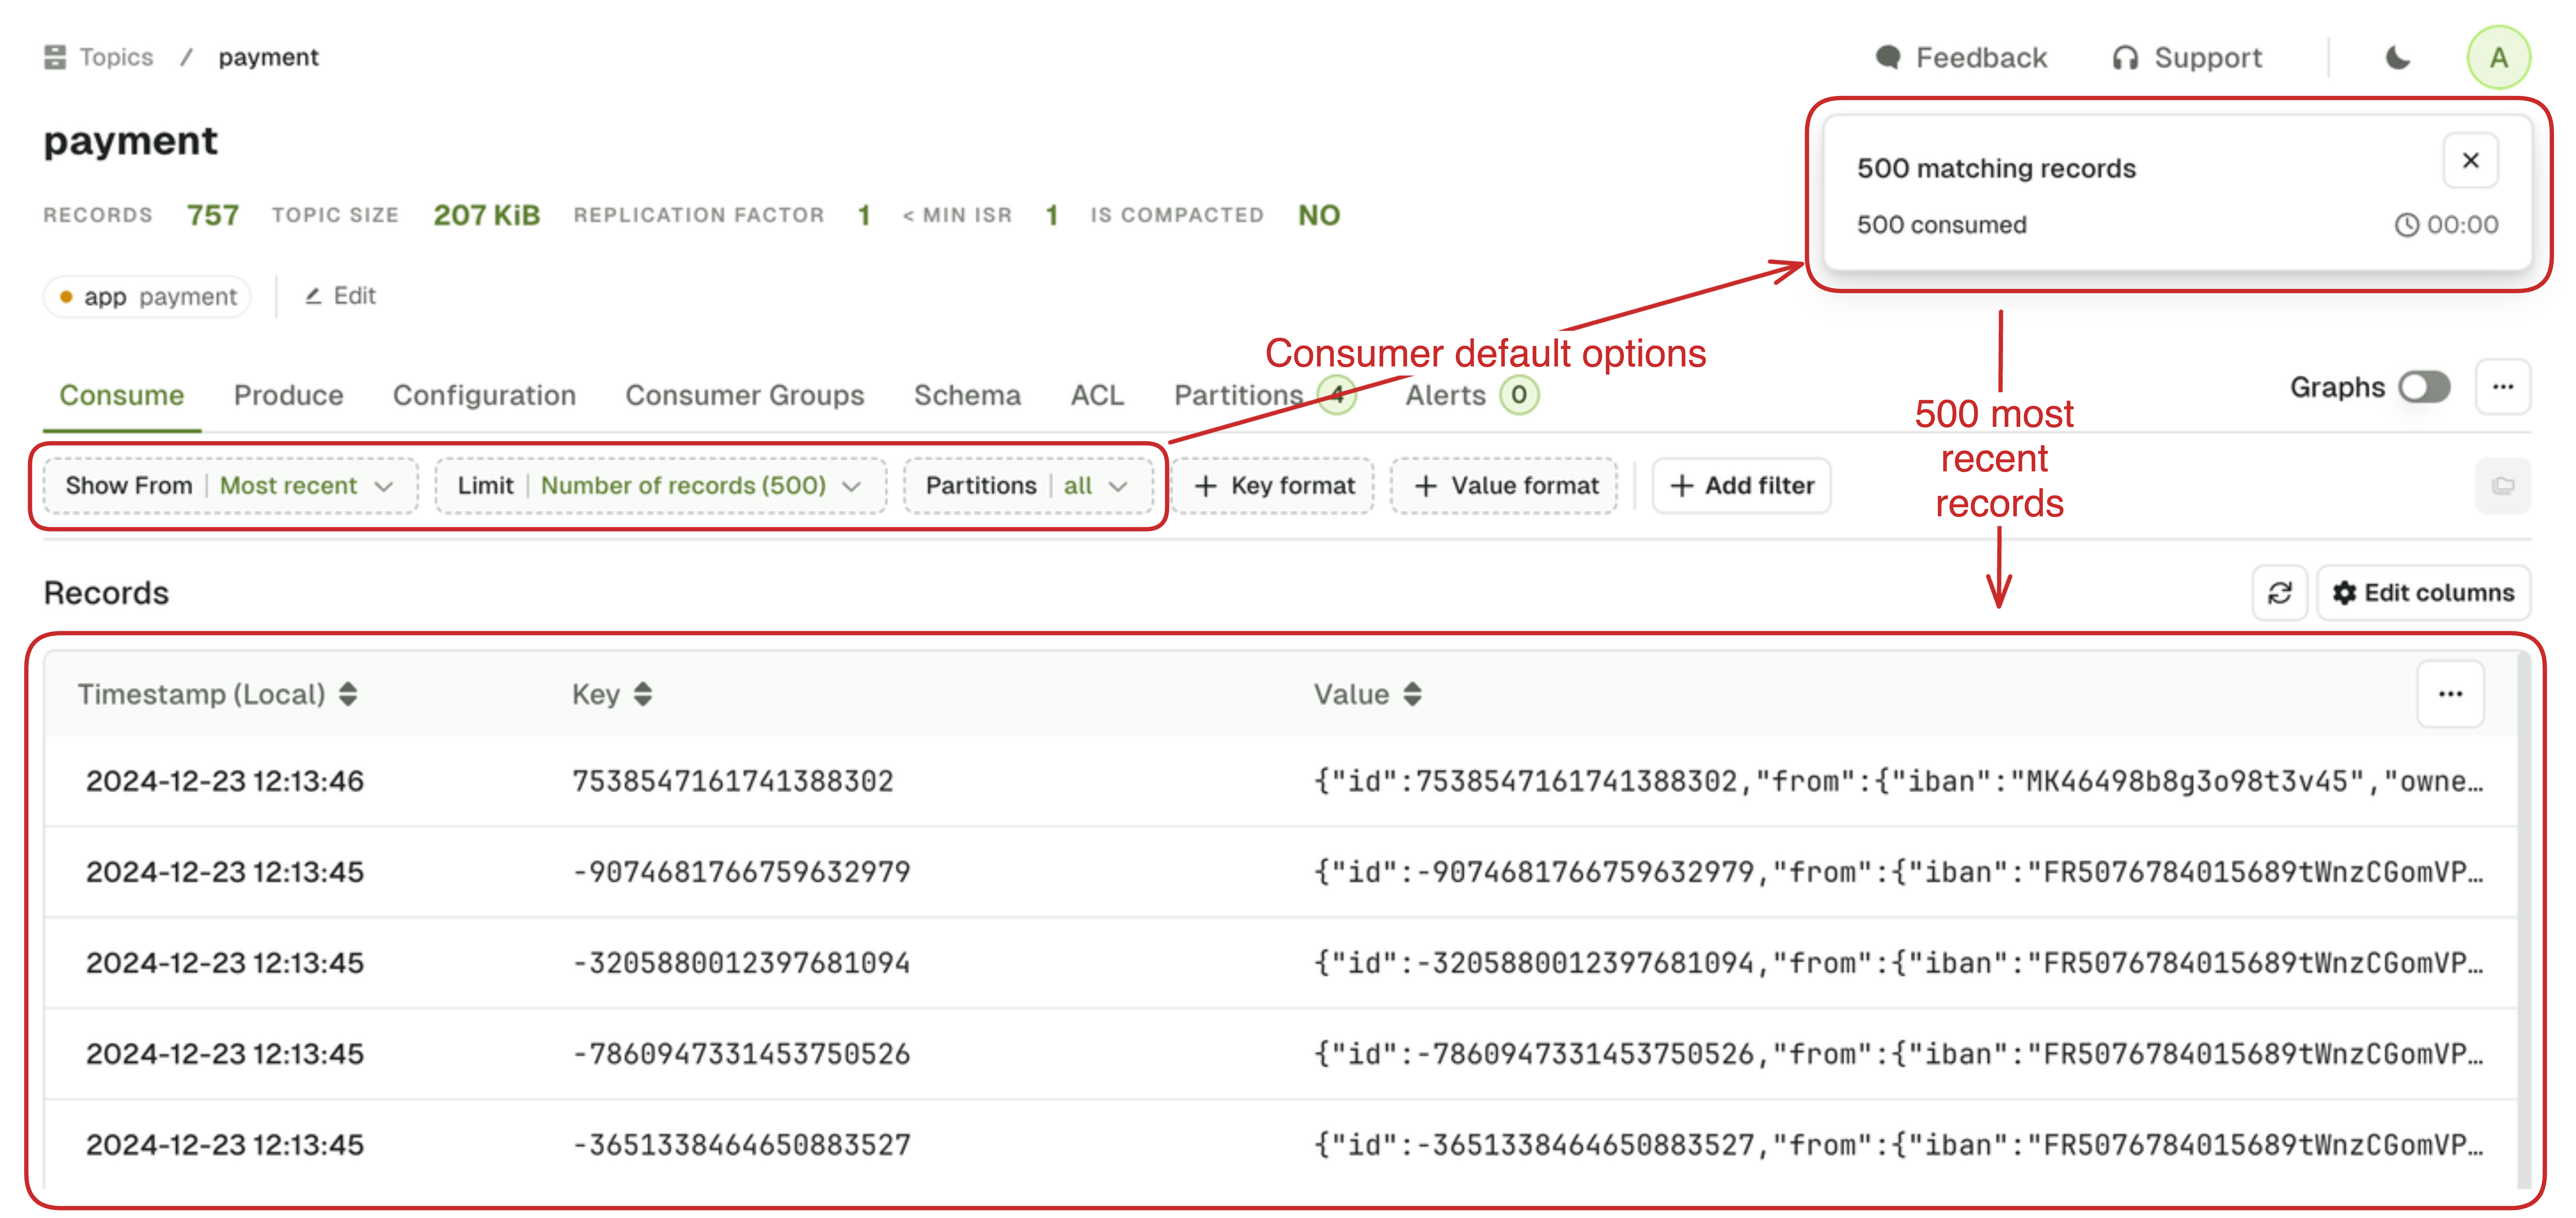
There's a good chance this will not correspond to your requirements, so let's explore how you can configure you consumer to give you the records you need.
Show From
Show From defines the starting point for the Kafka Consumer in your topic.
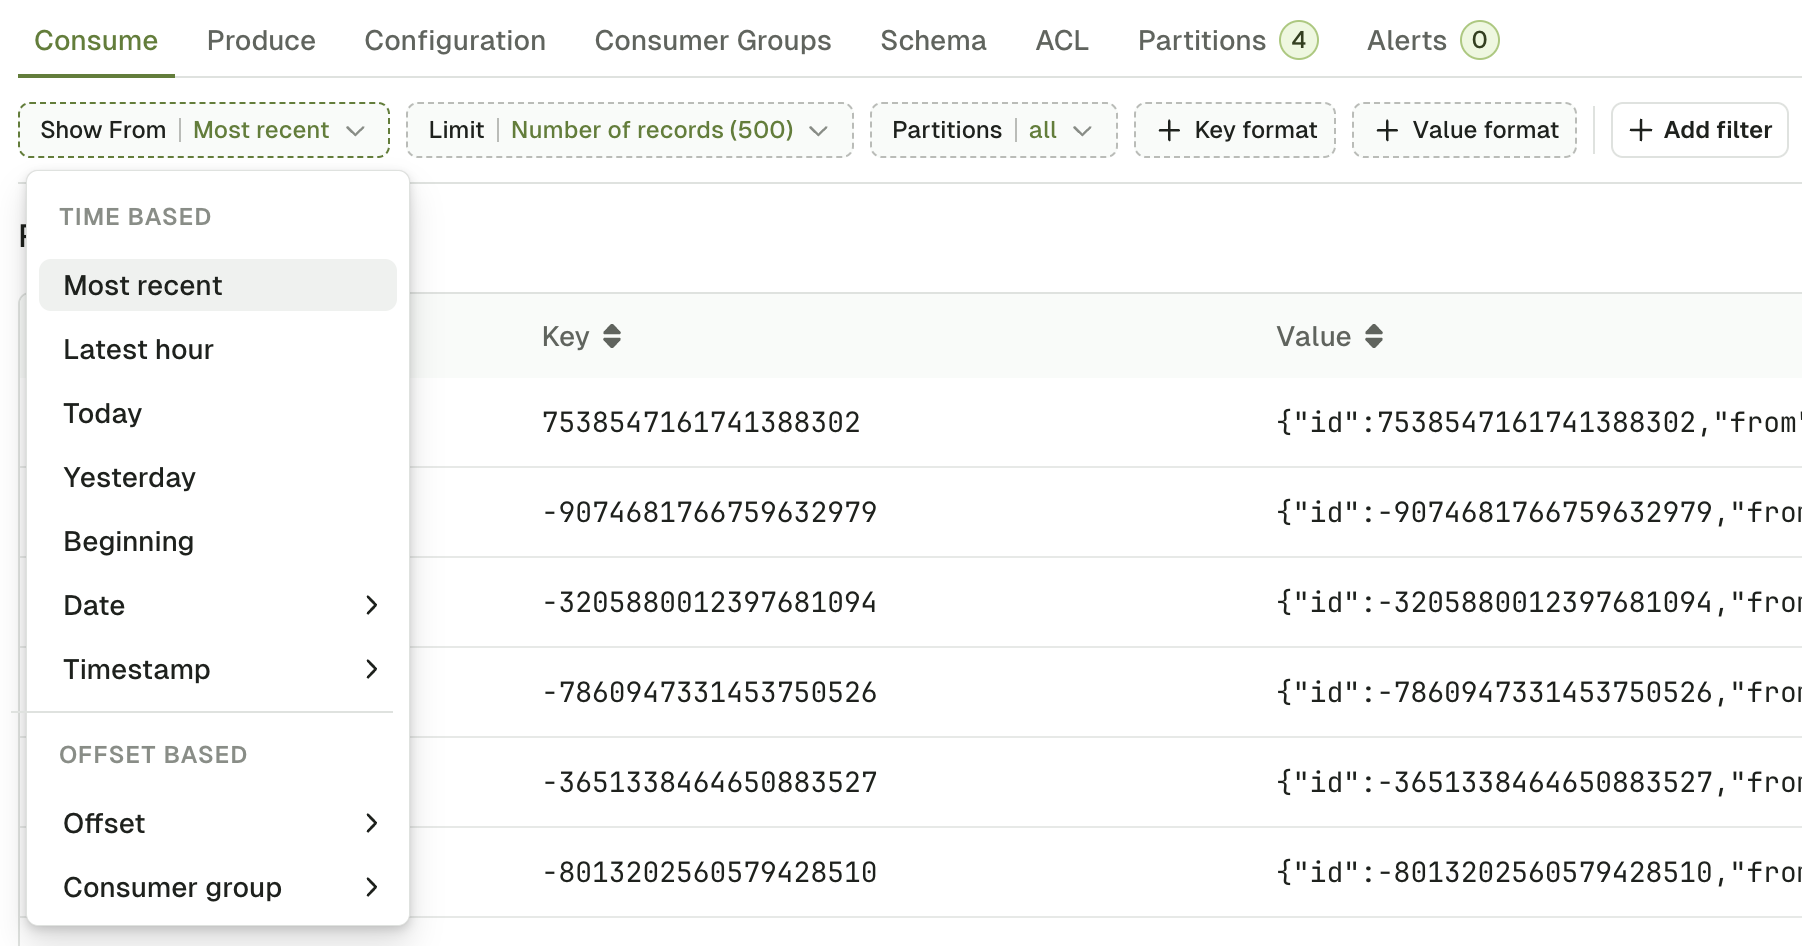
The possible values are as follow:
Most Recentoption works differently depending on the Limit that you select- With Number of records limit (let's say 500), it sets the starting point in your topic backward relative to Now, in order to get your the 500 most recent records.
- With None (live consume), it simply set the starting point to Now. This lets you consume only the messages produced after the consumer was started.
Latest hour,Today,Yesterdayto start the consumer respectively- 60 minute ago,
- At the beginning of the day at 00:00:00 (Local Timezone based on your browser)
- At the beginning of the day before at 00:00:00 (Local Timezone)
Beginningto start the consumer from the very beginning of the topic.DateandTimestampto start from a specific point in time datetime or an epoch- Date: ISO 8601 DateTime format with offset
2024-12-21T00:00:00+00:00 - Timestamp: Unix timestamp in milliseconds
1734949697000
- Date: ISO 8601 DateTime format with offset
Offsetto start the consumer at a specific offset, ideal for use with a single Partition setting.Consumer Groupto start the consumer from the last offsets committed by a consumer group on this topic.
Limit
Limit defines when your consumer must stop.
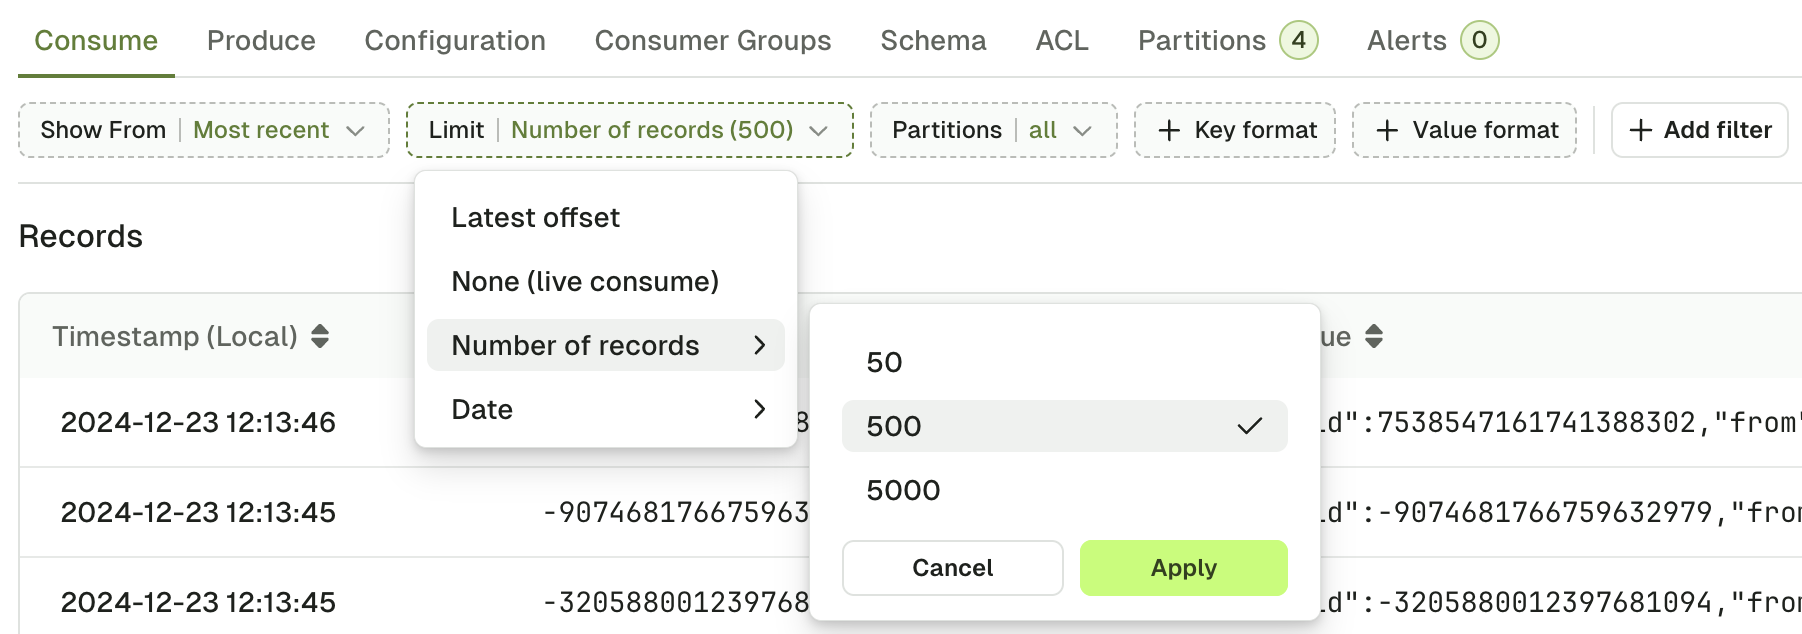
Possible choices are:
Latest Offsetstop the consumer upon reaching the end of the topic.- ⚠️ The end offsets are calculated when you trigger the search. Records produced after that point will not appear in the search results.
None (live consume)to start a Live Consumer that will look for messages indefinitelyNumber of recordsstop the consumer after having sent a certain number of records to the browser.- 💡 When you have active filters, non-matching records will not count toward this limit.
Datestop the consumer after reaching the configured date- ISO 8601 DateTime format with offset
2023-12-21T00:00:00+00:00
- ISO 8601 DateTime format with offset
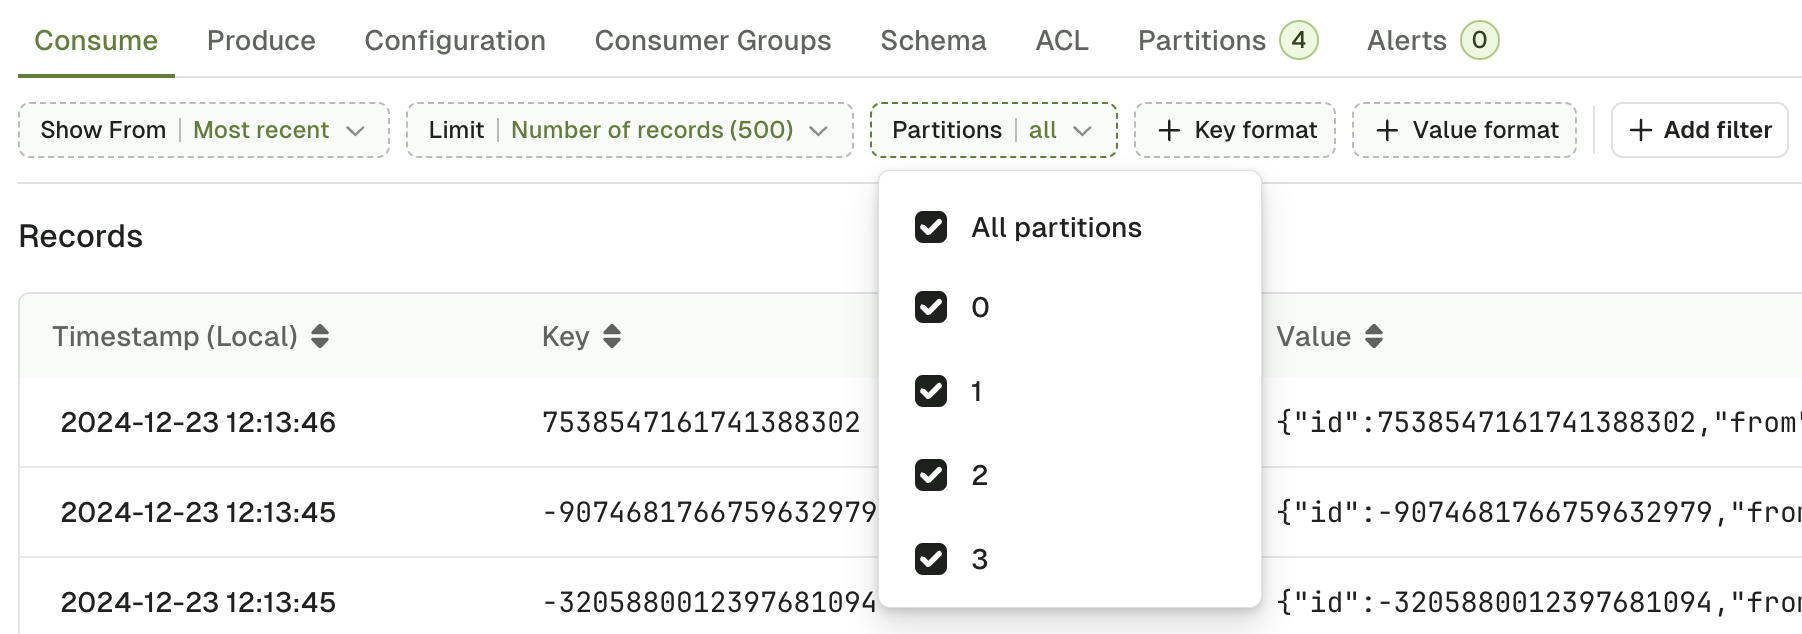
Partitions
Partitions lets you restrict the consumer to only consume from certain partitions of your topic. By default, records from all partitions are consumed.
Key & Value Format
Key format and Value format lets you force the deserializer for your topic.
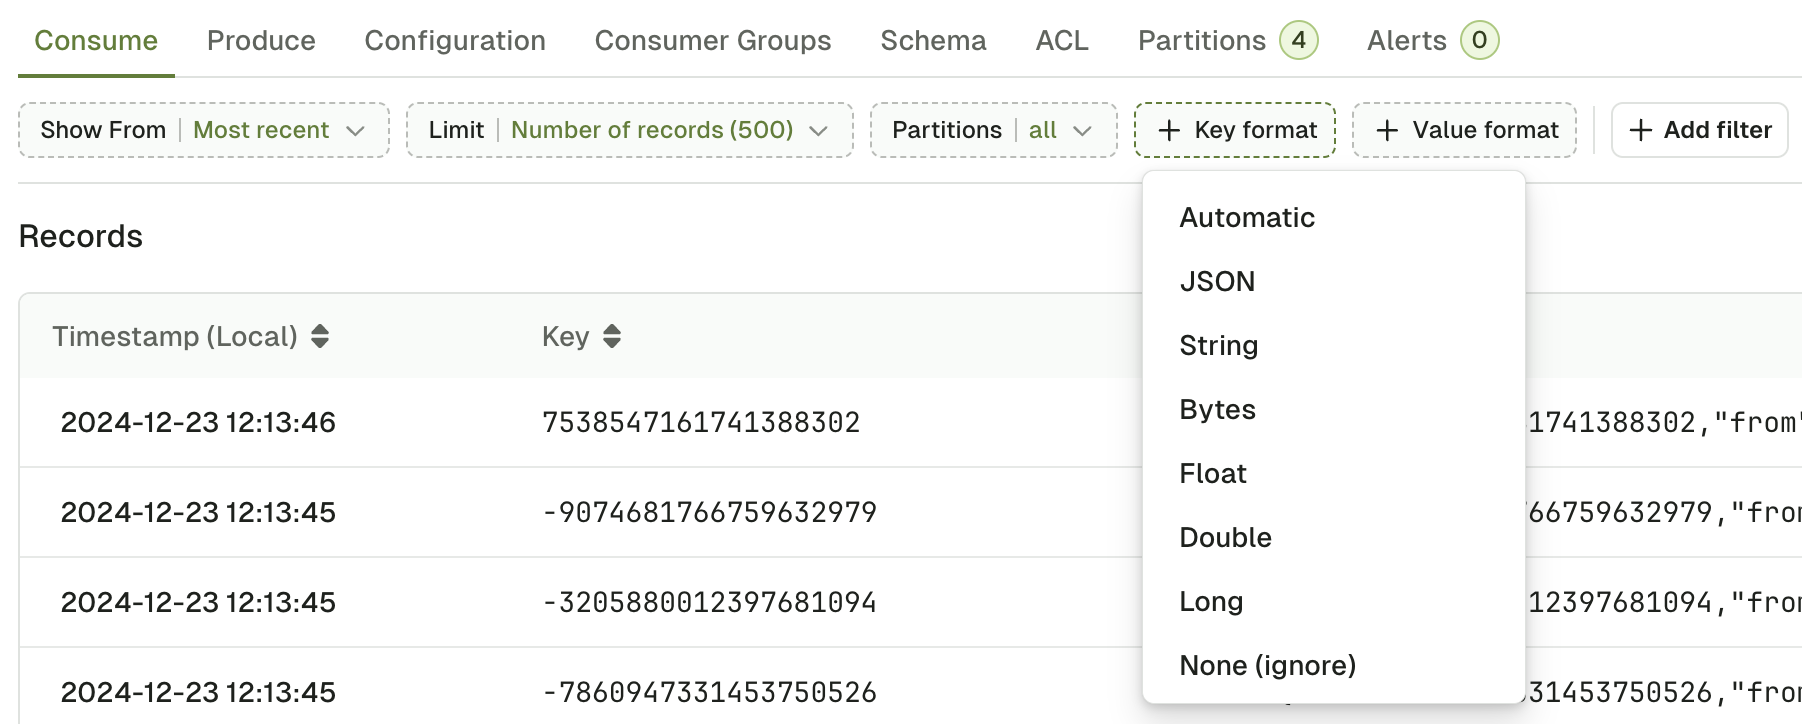
Automatic Deserializer
This is the default deserializer. Automatic infers the correct deserializer in the following order:
- Schema Registry Deserializers (Avro, Protobuf, Json Schema)
- JsonDeserializer
- StringDeserializer
- ByteDeserializer (fallback)
Automatic deserializer applies to all the records within a topic, based on the one that matches the first record it encounters.
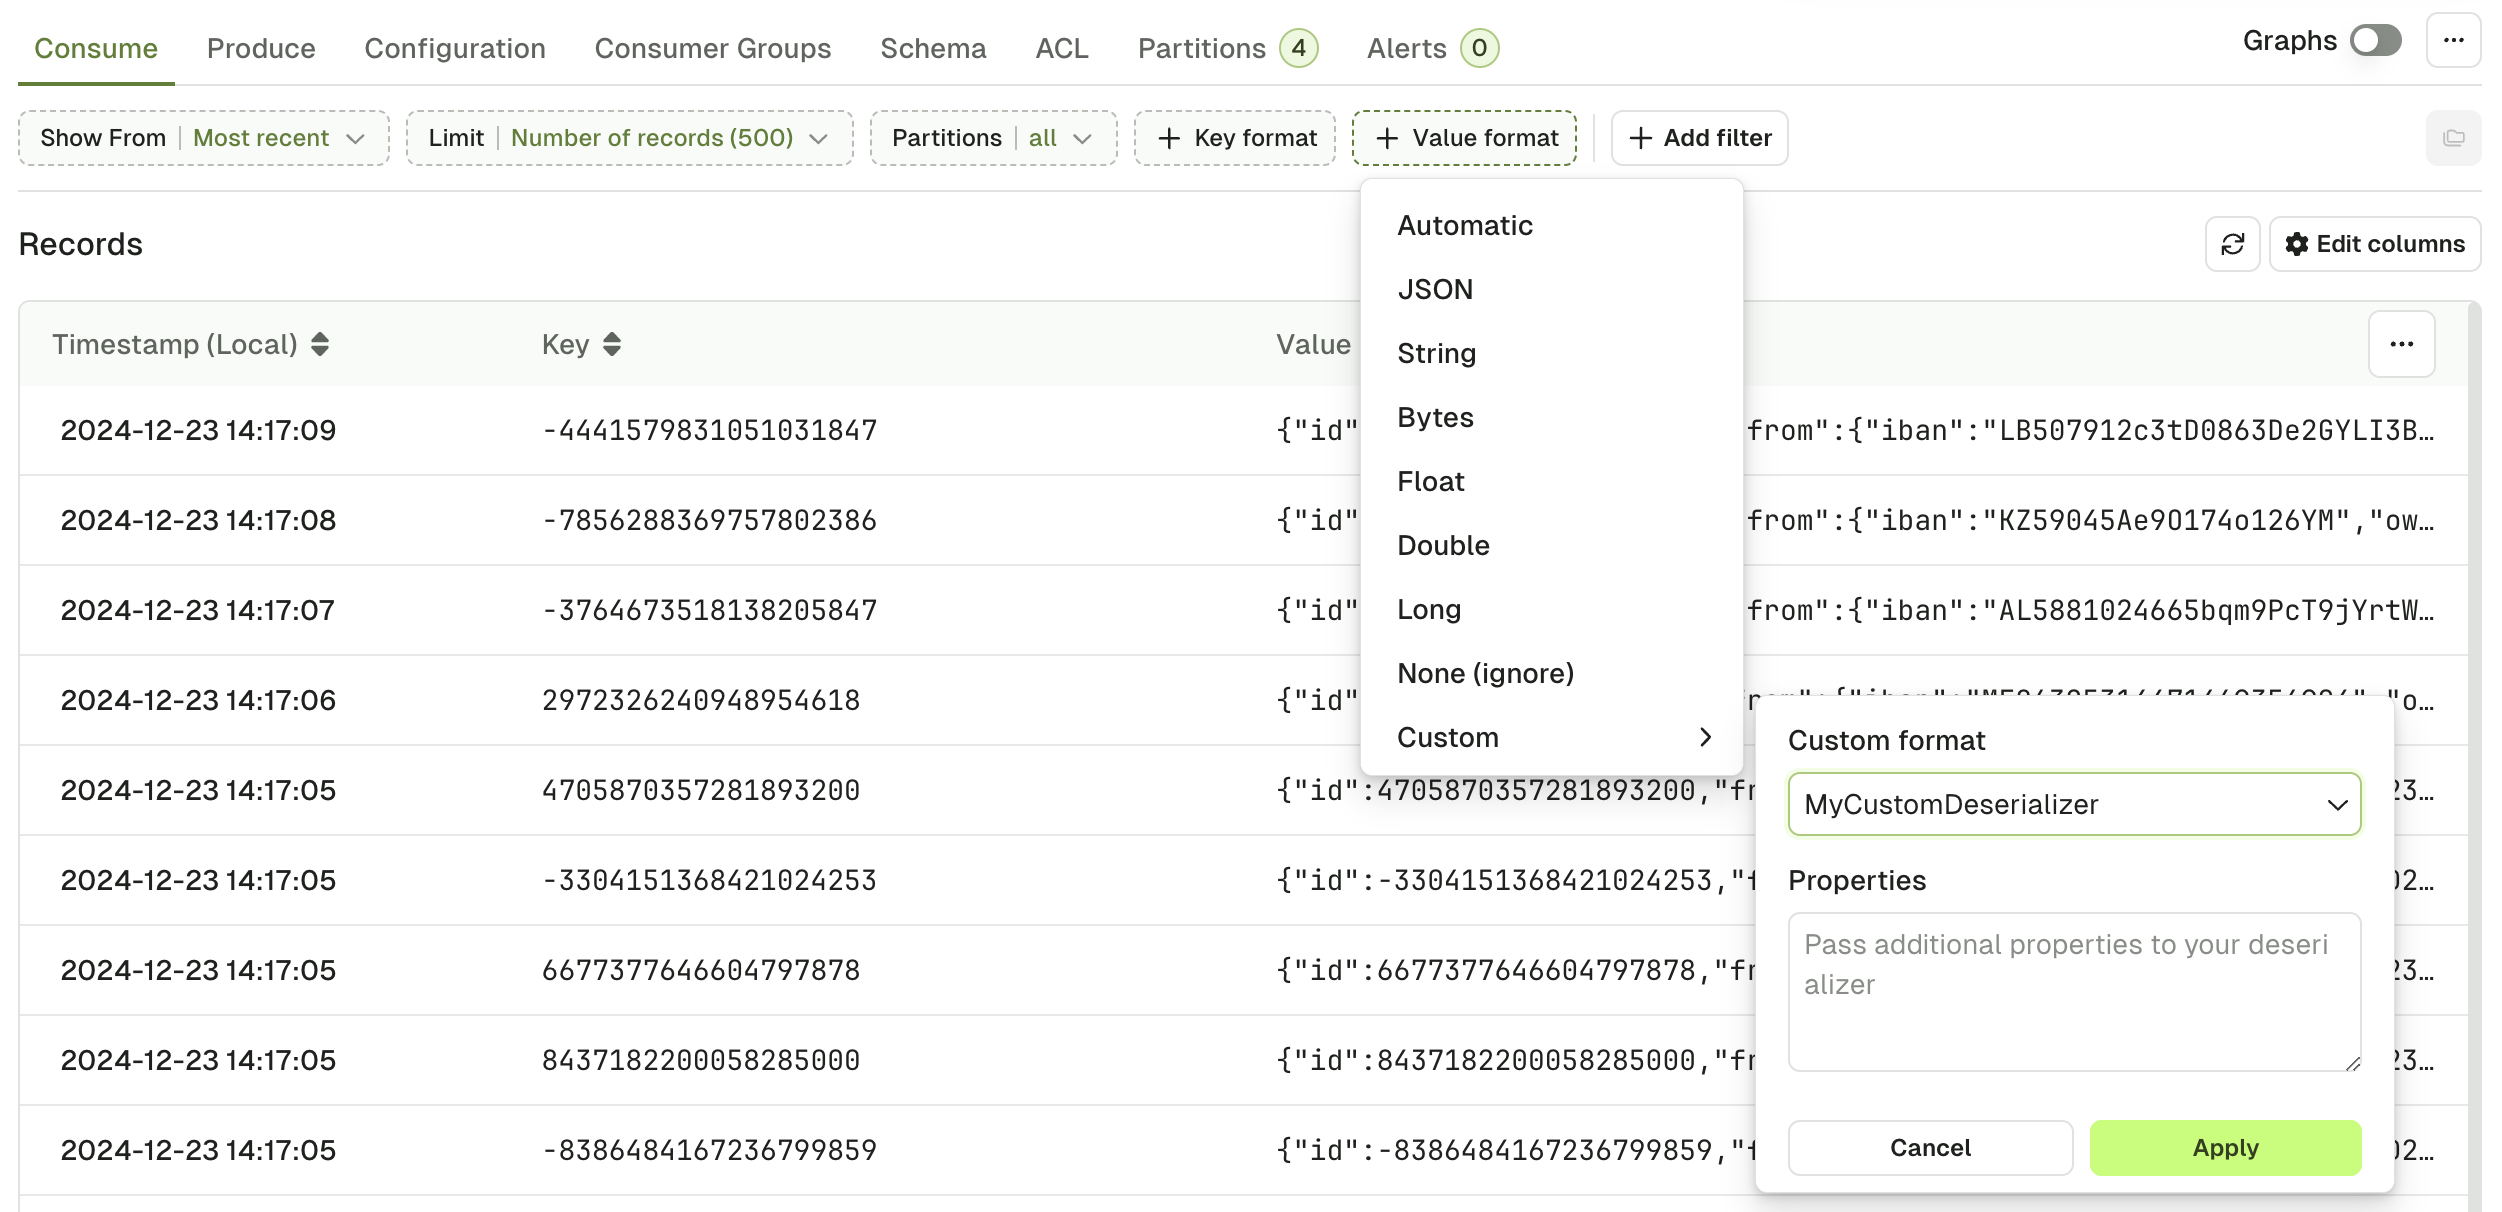
Custom Deserializer
If you have installed them, your Custom Deserializers will appear here.
Optionally configure them using the Properties text and your messages will show as expected.
Check our guide on how to Install & Configure Custom Deserializers in Console.
JSON Deserializer
JSON Deserializer will explicitly fail on records that doesn't match a JSON type.

Bytes Deserializer
Bytes Deserializer helps you visualize your records by printing the non-ASCII characters as hexadecimal escape sequences. For instance, the following sequence of bytes:
00 00 00 00 07 10 49 27 6D 20 41 56 52 4F
corresponding to the wire format of a Schema Registry AVRO message:
00                            0   Magic Byte (0)
00 00 00 07                   1-4 Schema ID (7)
10 49 27 6D 20 41 56 52 4F    5+  serialized AVRO data
will be represented like this:
\x00\x00\x00\x00\x07\x10I'm AVRO

Filter records
Console give you 3 methods to define filters that will be executed on the server and will only return the records that matches. This is a very powerful feature that lets you quickly see the records that matter to you in large topics.
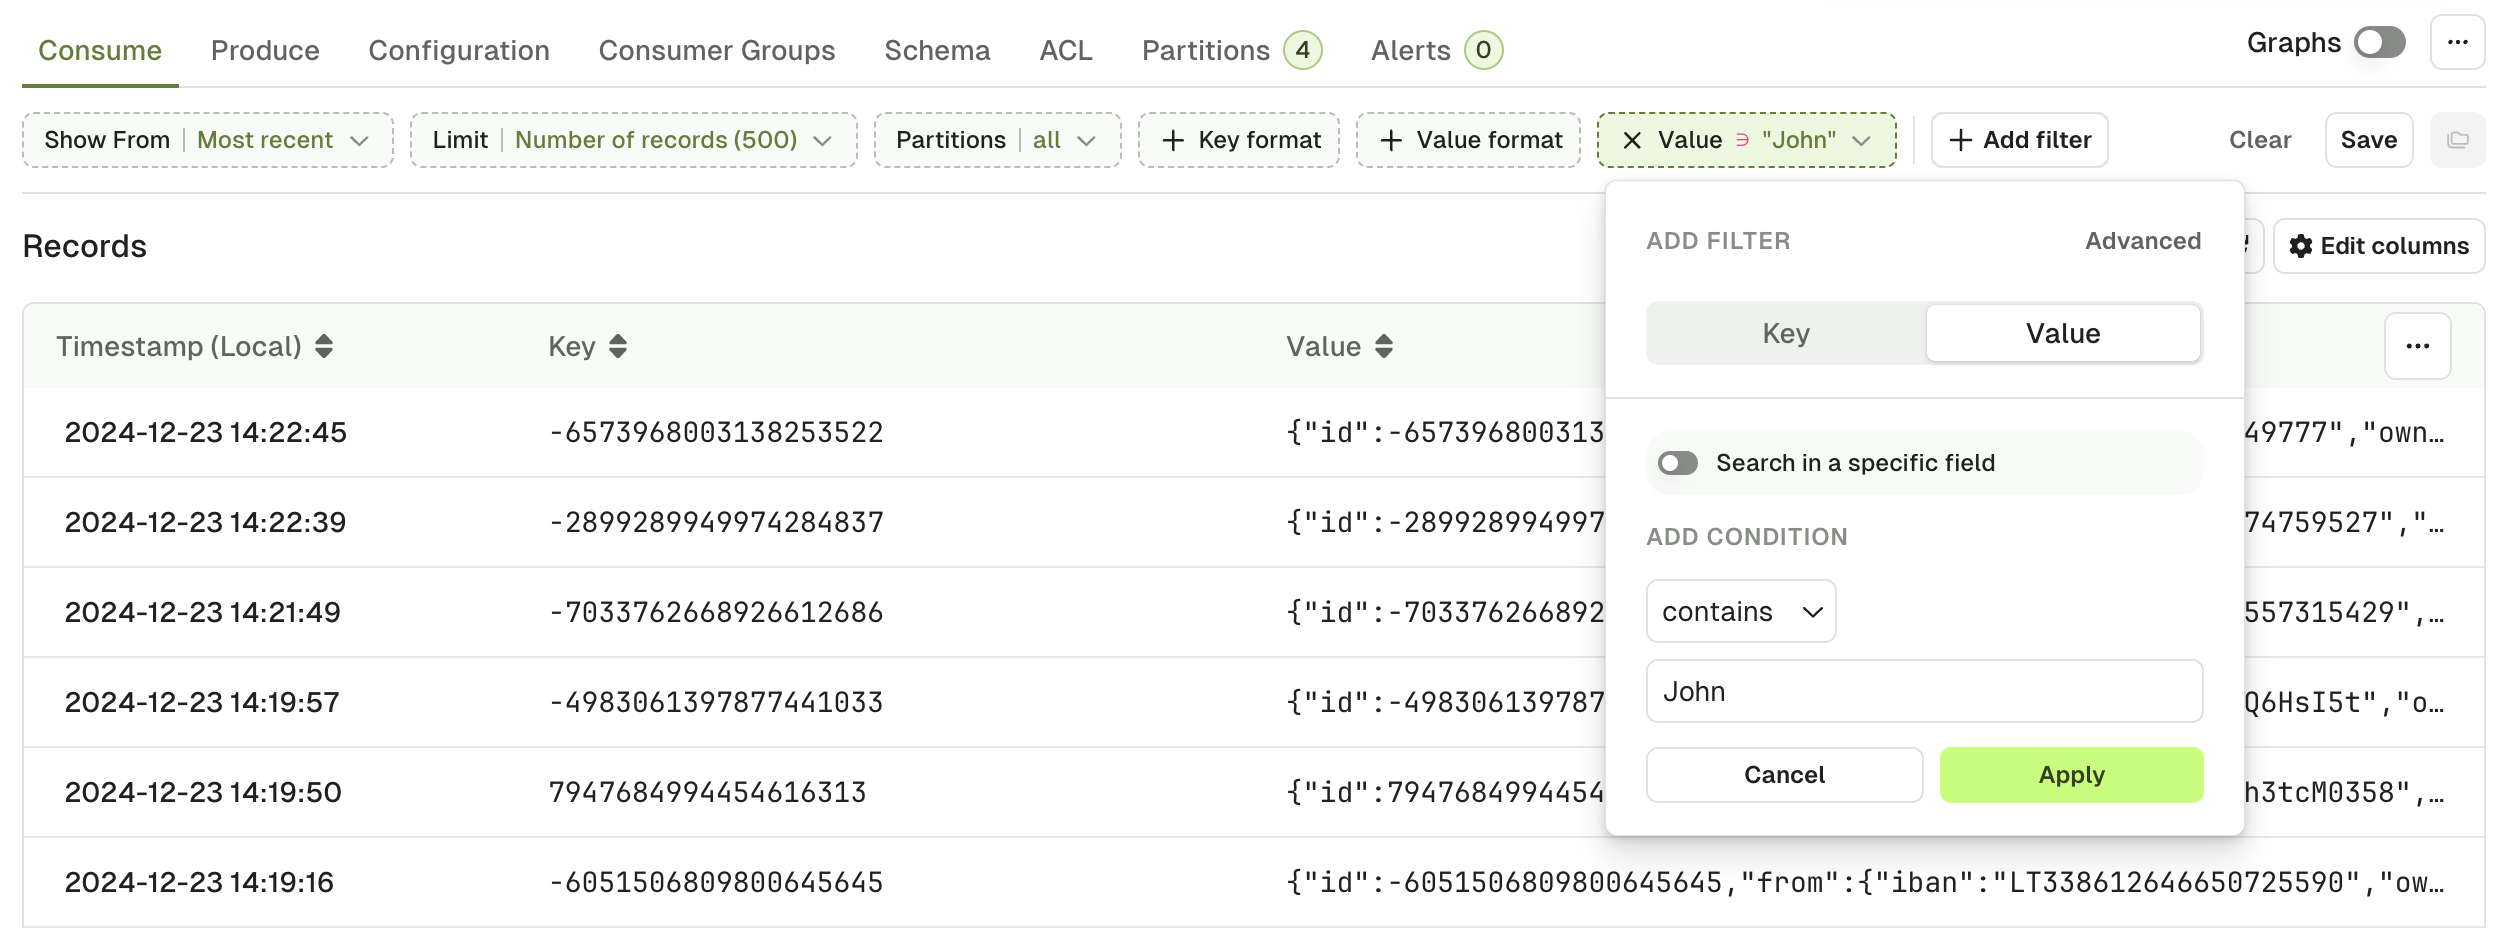
Global Search
Global Search is the most simple type of filter you can use.
- Specify whether to look in the Key or in the Value,
- Pick an operator (contains, not contains, equals, not equals)
- Type your search term
Internally, this will treat the record Key or Value as text to apply the operation (contains, equals, ...).
This might not be the preferred approach if your record is JSON-ish
Search in a Specific Field
You can make your search more fine-grained by activating "Search in a specific field".
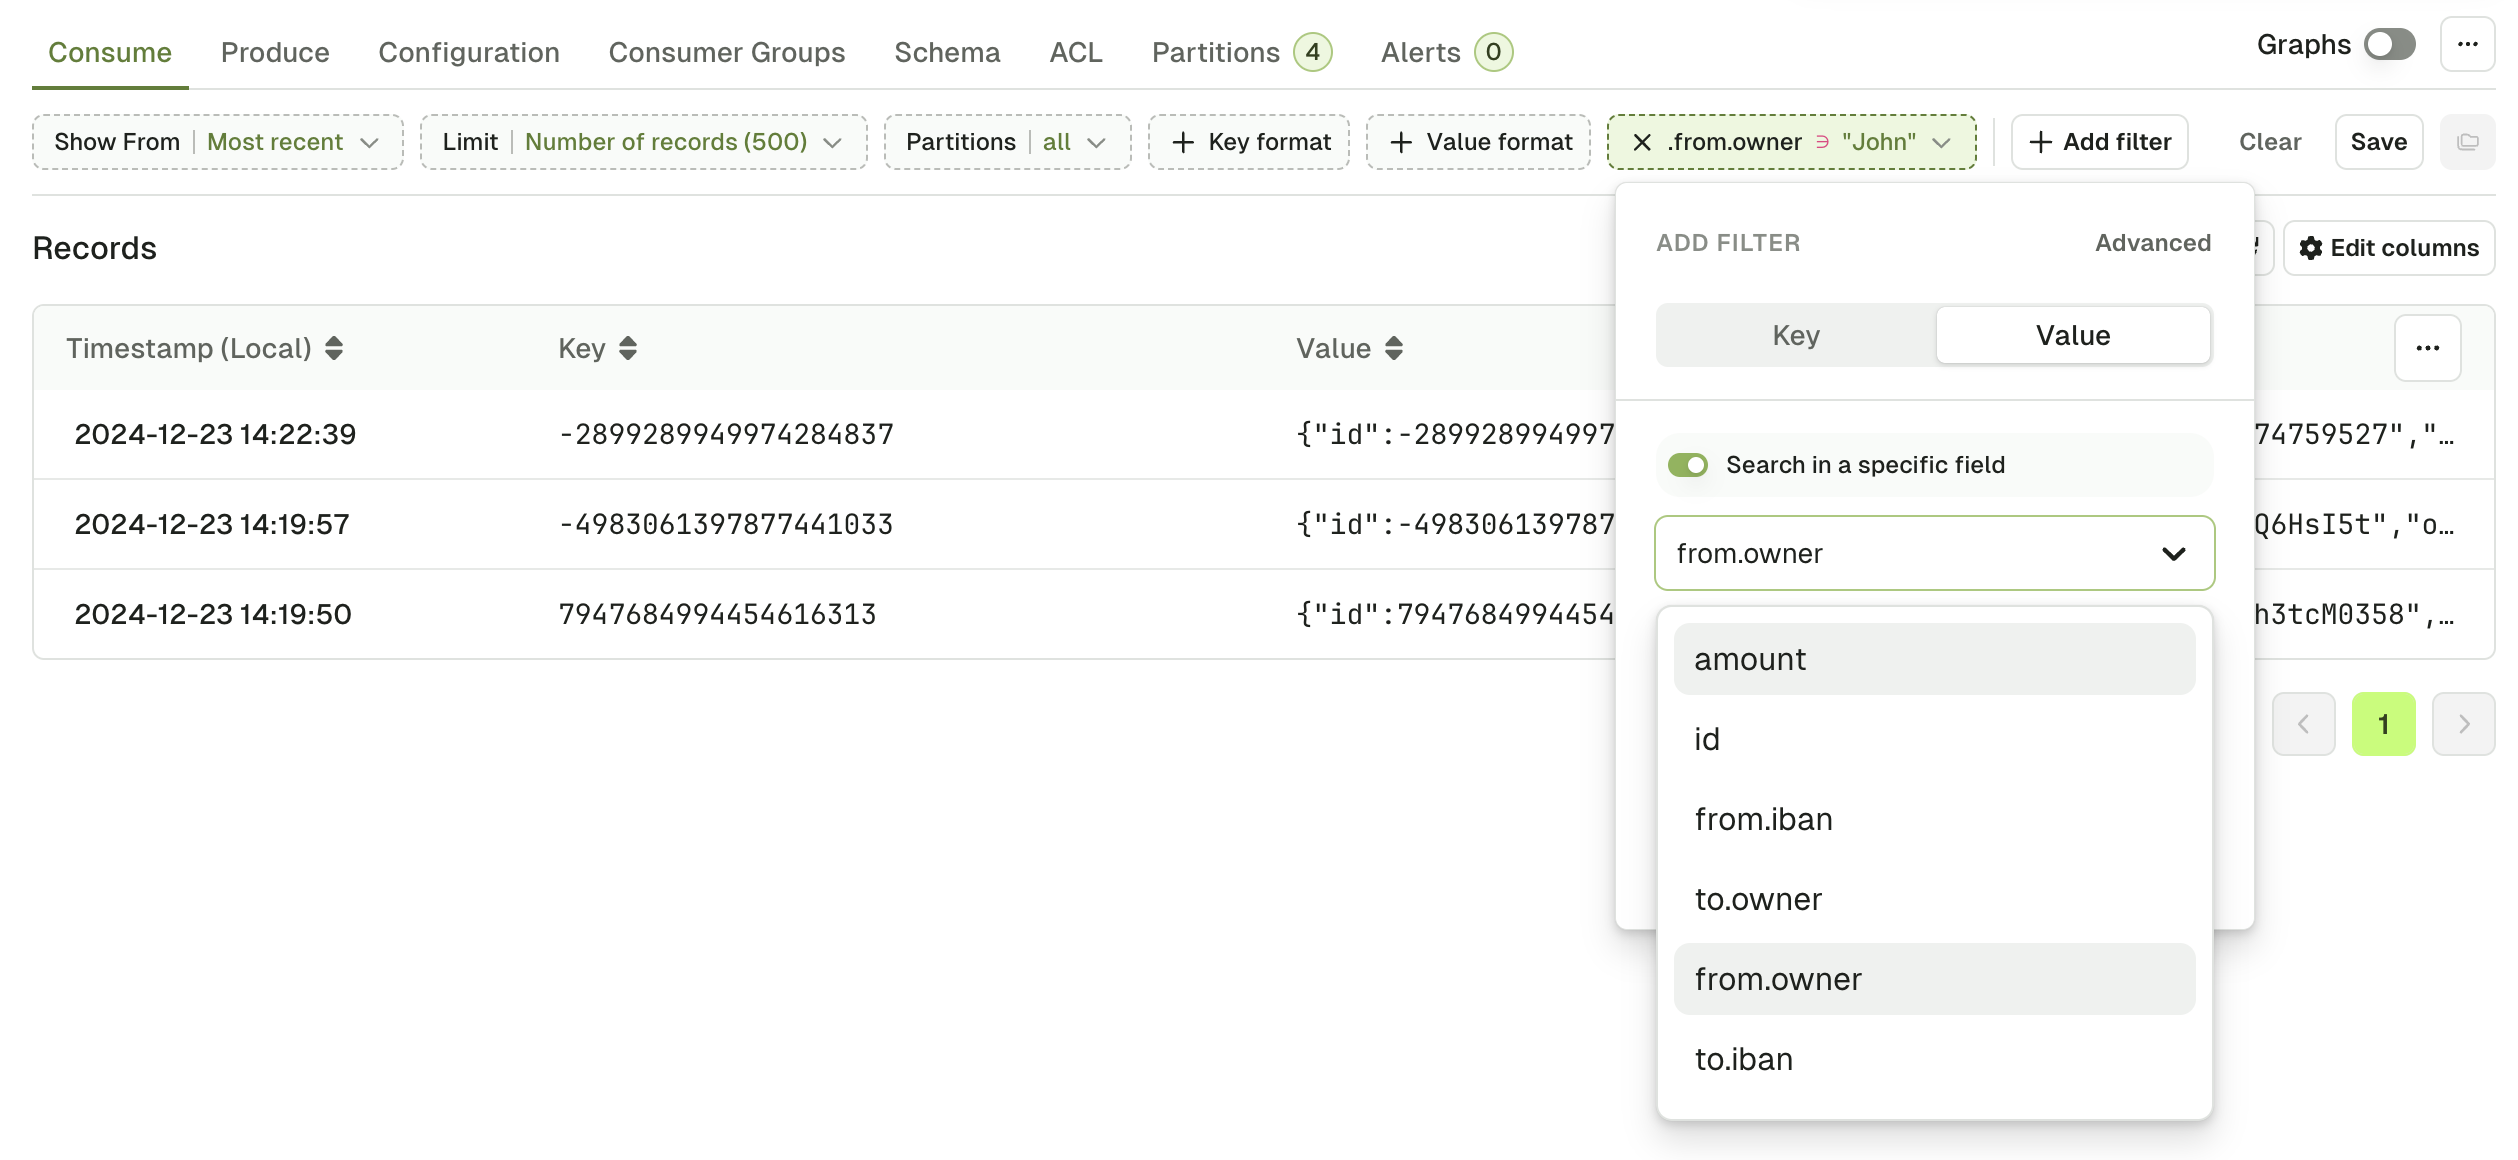
Console will generate an autocomplete list by looking at the most recent 50 messages in the topic. If the key you're looking for is not here, you can type it manually.
Examples:
data.event.name
data.event["correlation-id"]
data.clientAddress[0].ip
JS Search
If you need to construct more advanced filters, you can switch to the advanced view and use plain Javascript to build your filter.
Check this article on JS Filters syntax to get examples and syntax around this filter.
While it is the option that can potentially address the most complex use-cases, it is not the recommended or the fastest one.
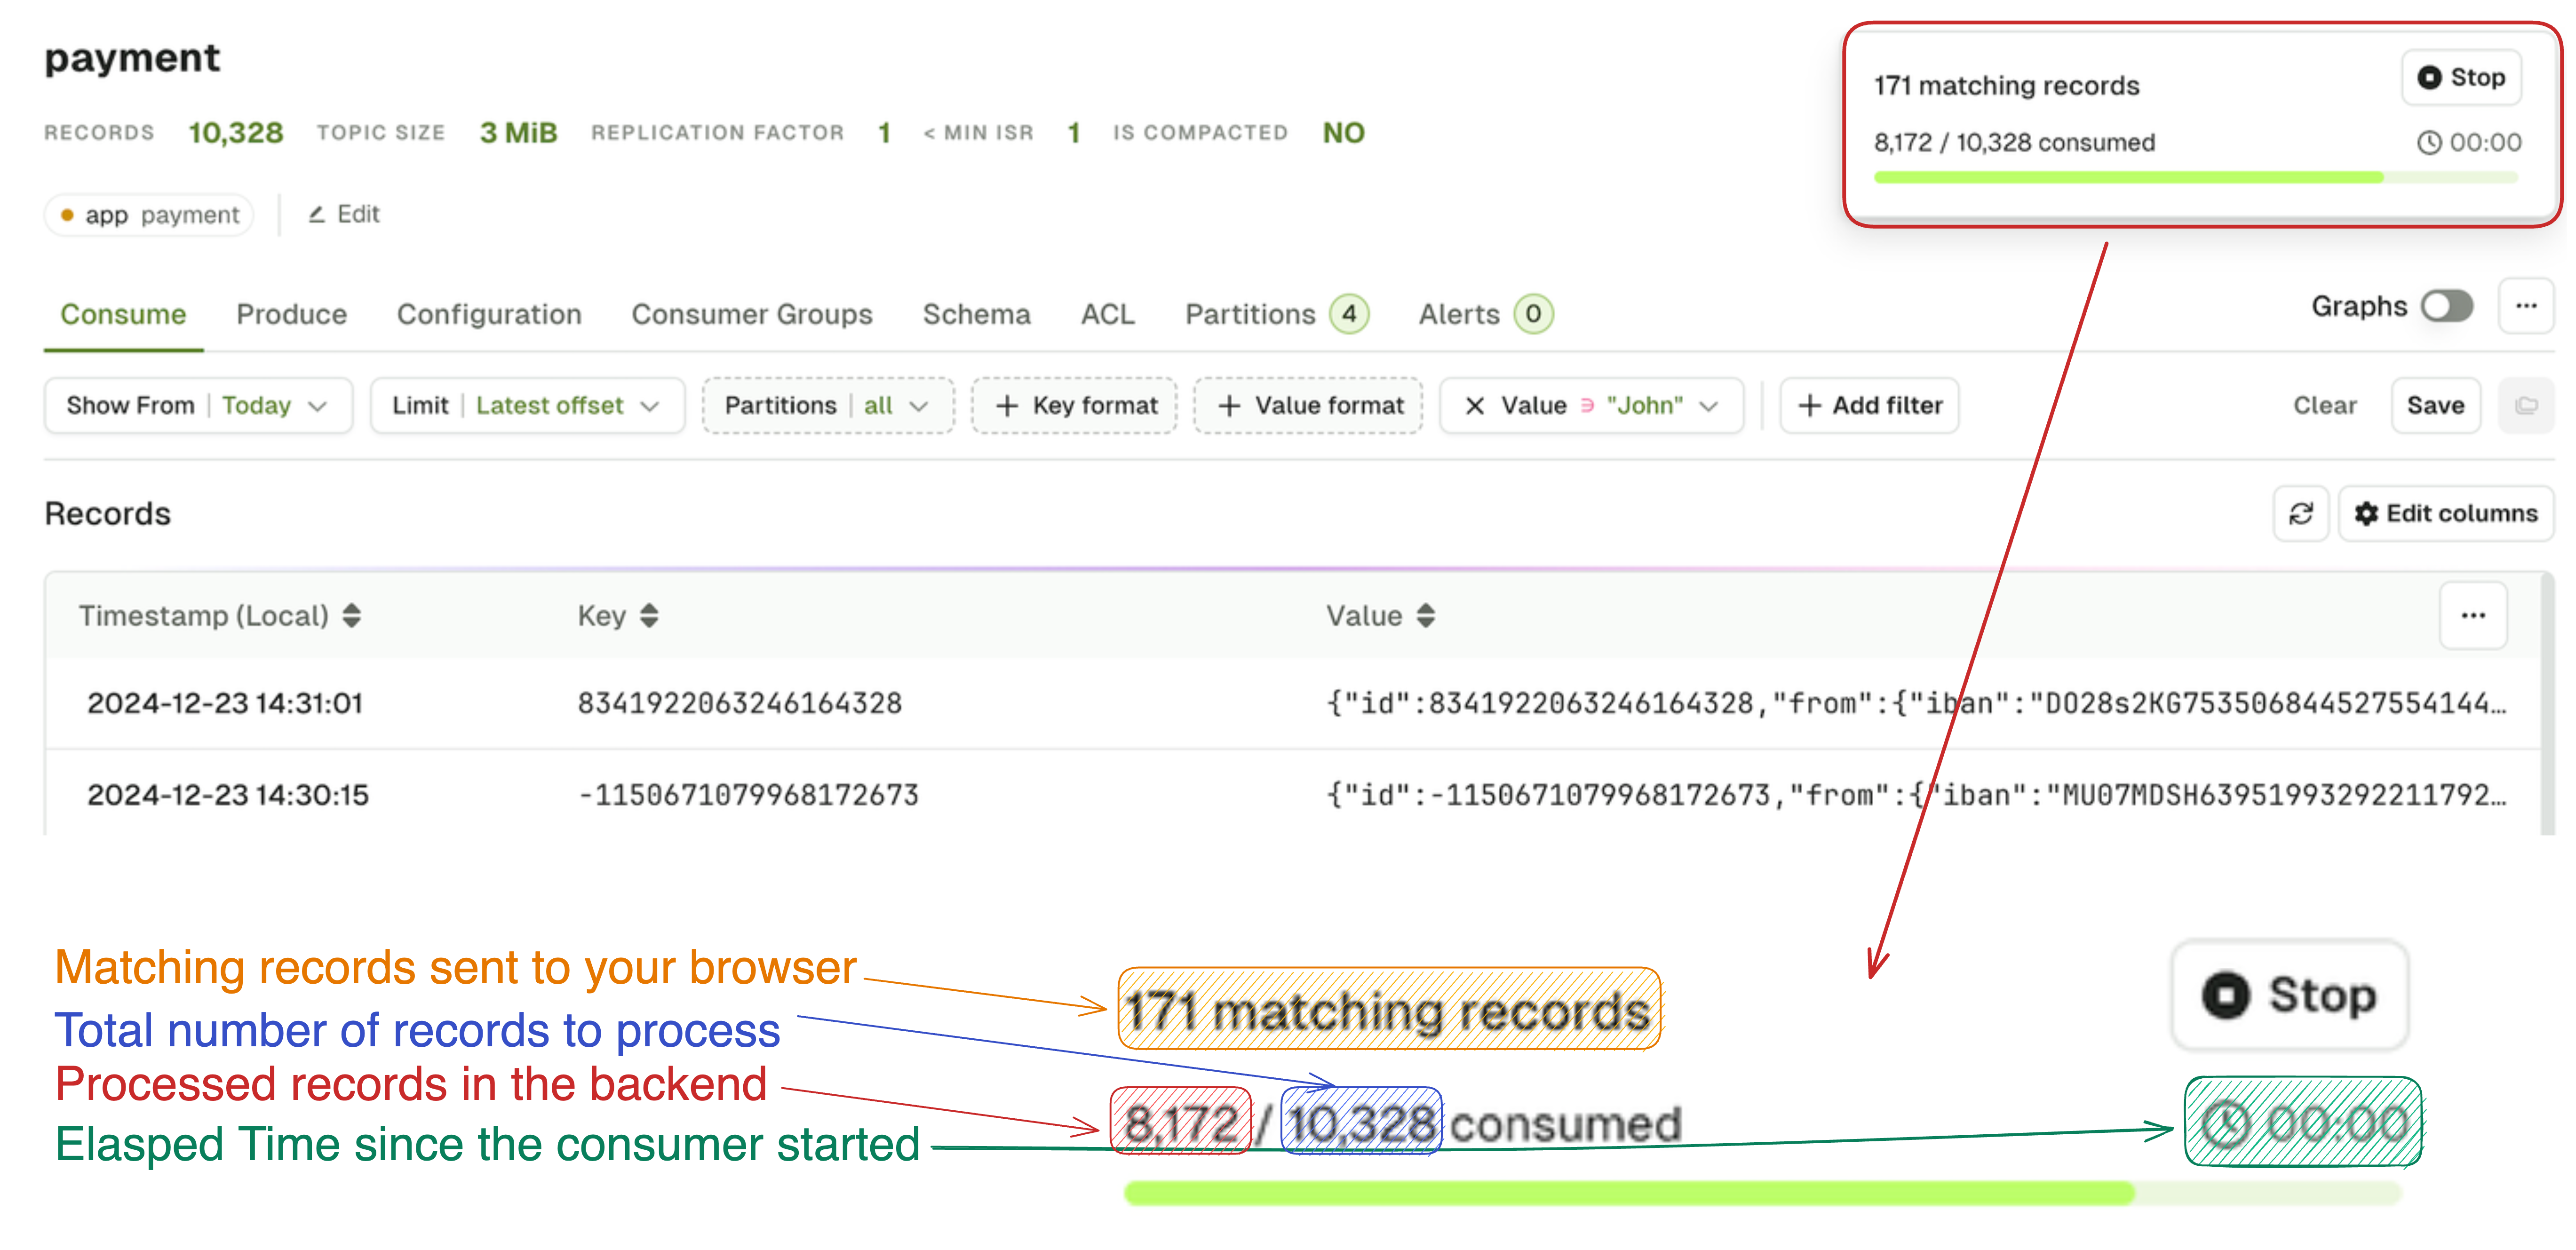
Statistics pop-up
While the consumer is processing, you will see the following statistics window.
This little window present the necessary information to let you decide wether it's worth pursuing the current search or if you should rather refine it further.
Here's how to read it.
Browse records
From the main table
Once the search starts, you will see messages appearing in the main table. The table has 3 columns: Timestamp, Key and Value.
Note that the Timestamp column takes the local timezone of the user.
For example, if you are producing a message from Dublin, Ireland (UTC+1) at 14:57:38 local time, and you then consume this message from your browser (in Dublin), you will see 14:57:38.
However, if another user consumes the same message in Console but from Paris, France (UTC+2), they will see 15:57:38.
Please be aware that this isn't a mistake from Kafka itself, you are simply seeing messages displayed in your local timezone.
Individual records
Upon clicking on a record from the list, a side bar will open on the right to display the entire record.
Use the arrow keys to navigate between messages: ⬆️ ⬇️
There are 3 tabs at the top to display different elements of your record: Data, Headers and Metadata.
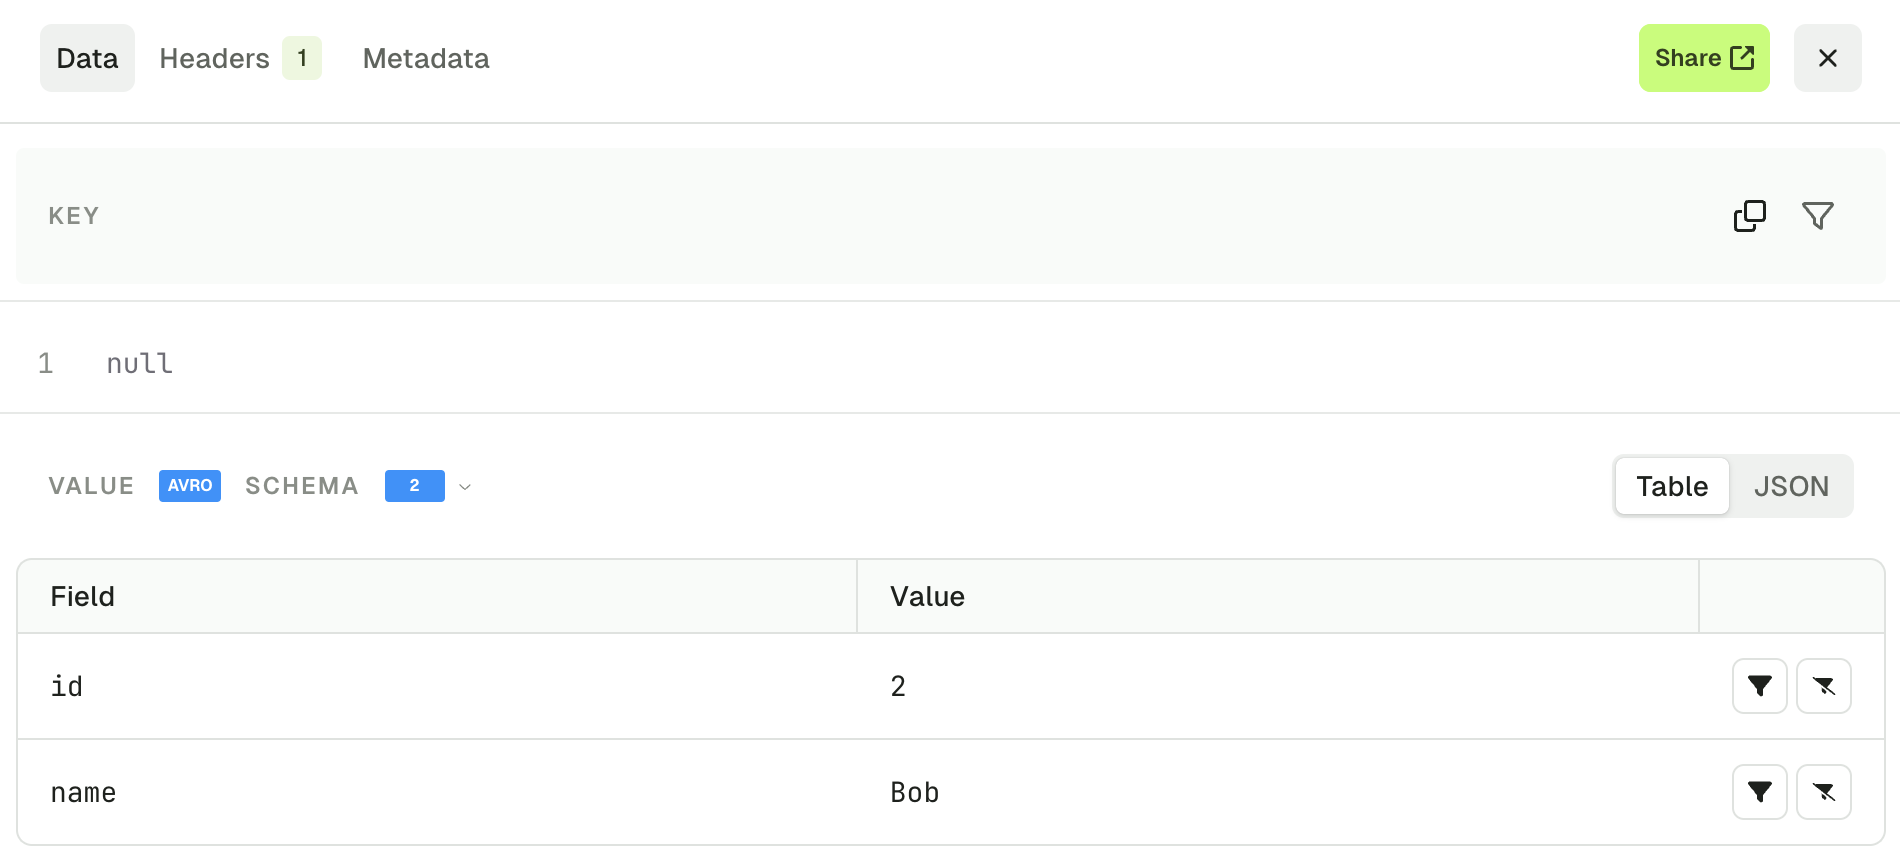
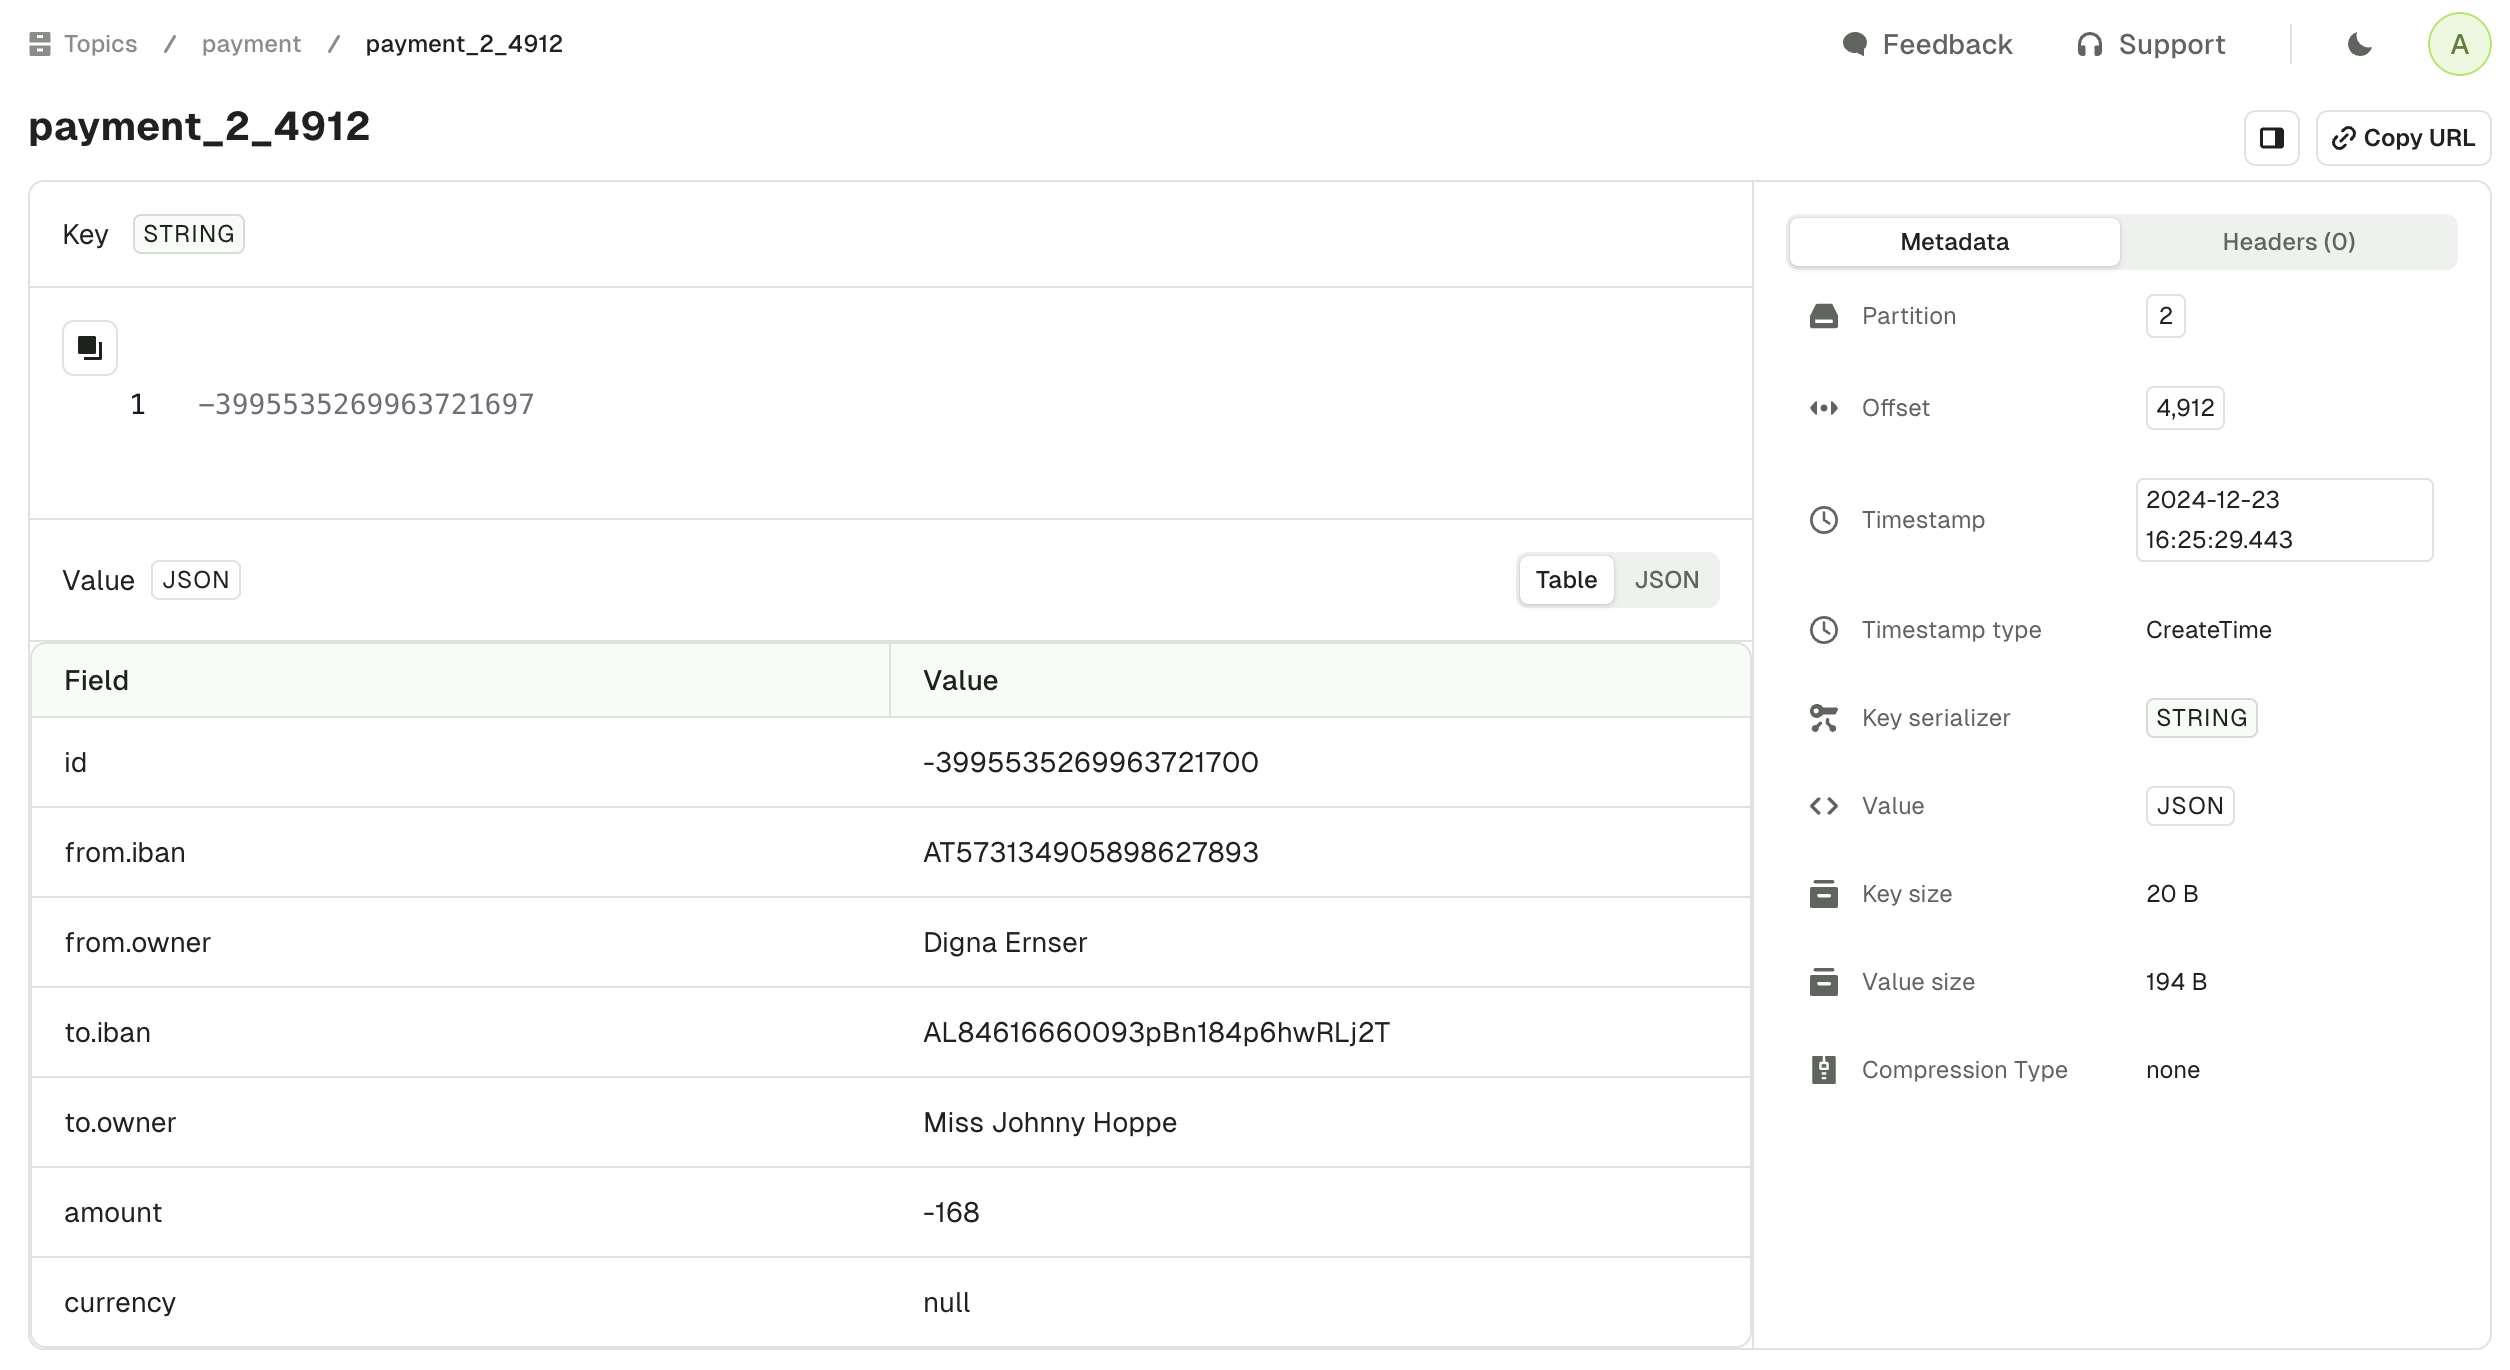
The Share button will lead you to a page dedicated to this record, allowing you to share it with your colleagues, and to get more details about it.
Data tab
The Data tab lets you visualize your record's Key and Value.
If your record Value is serialized with JSON or using a Schema Registry it is presented by default using the Table view. You can also switch to the JSON view if necessary.
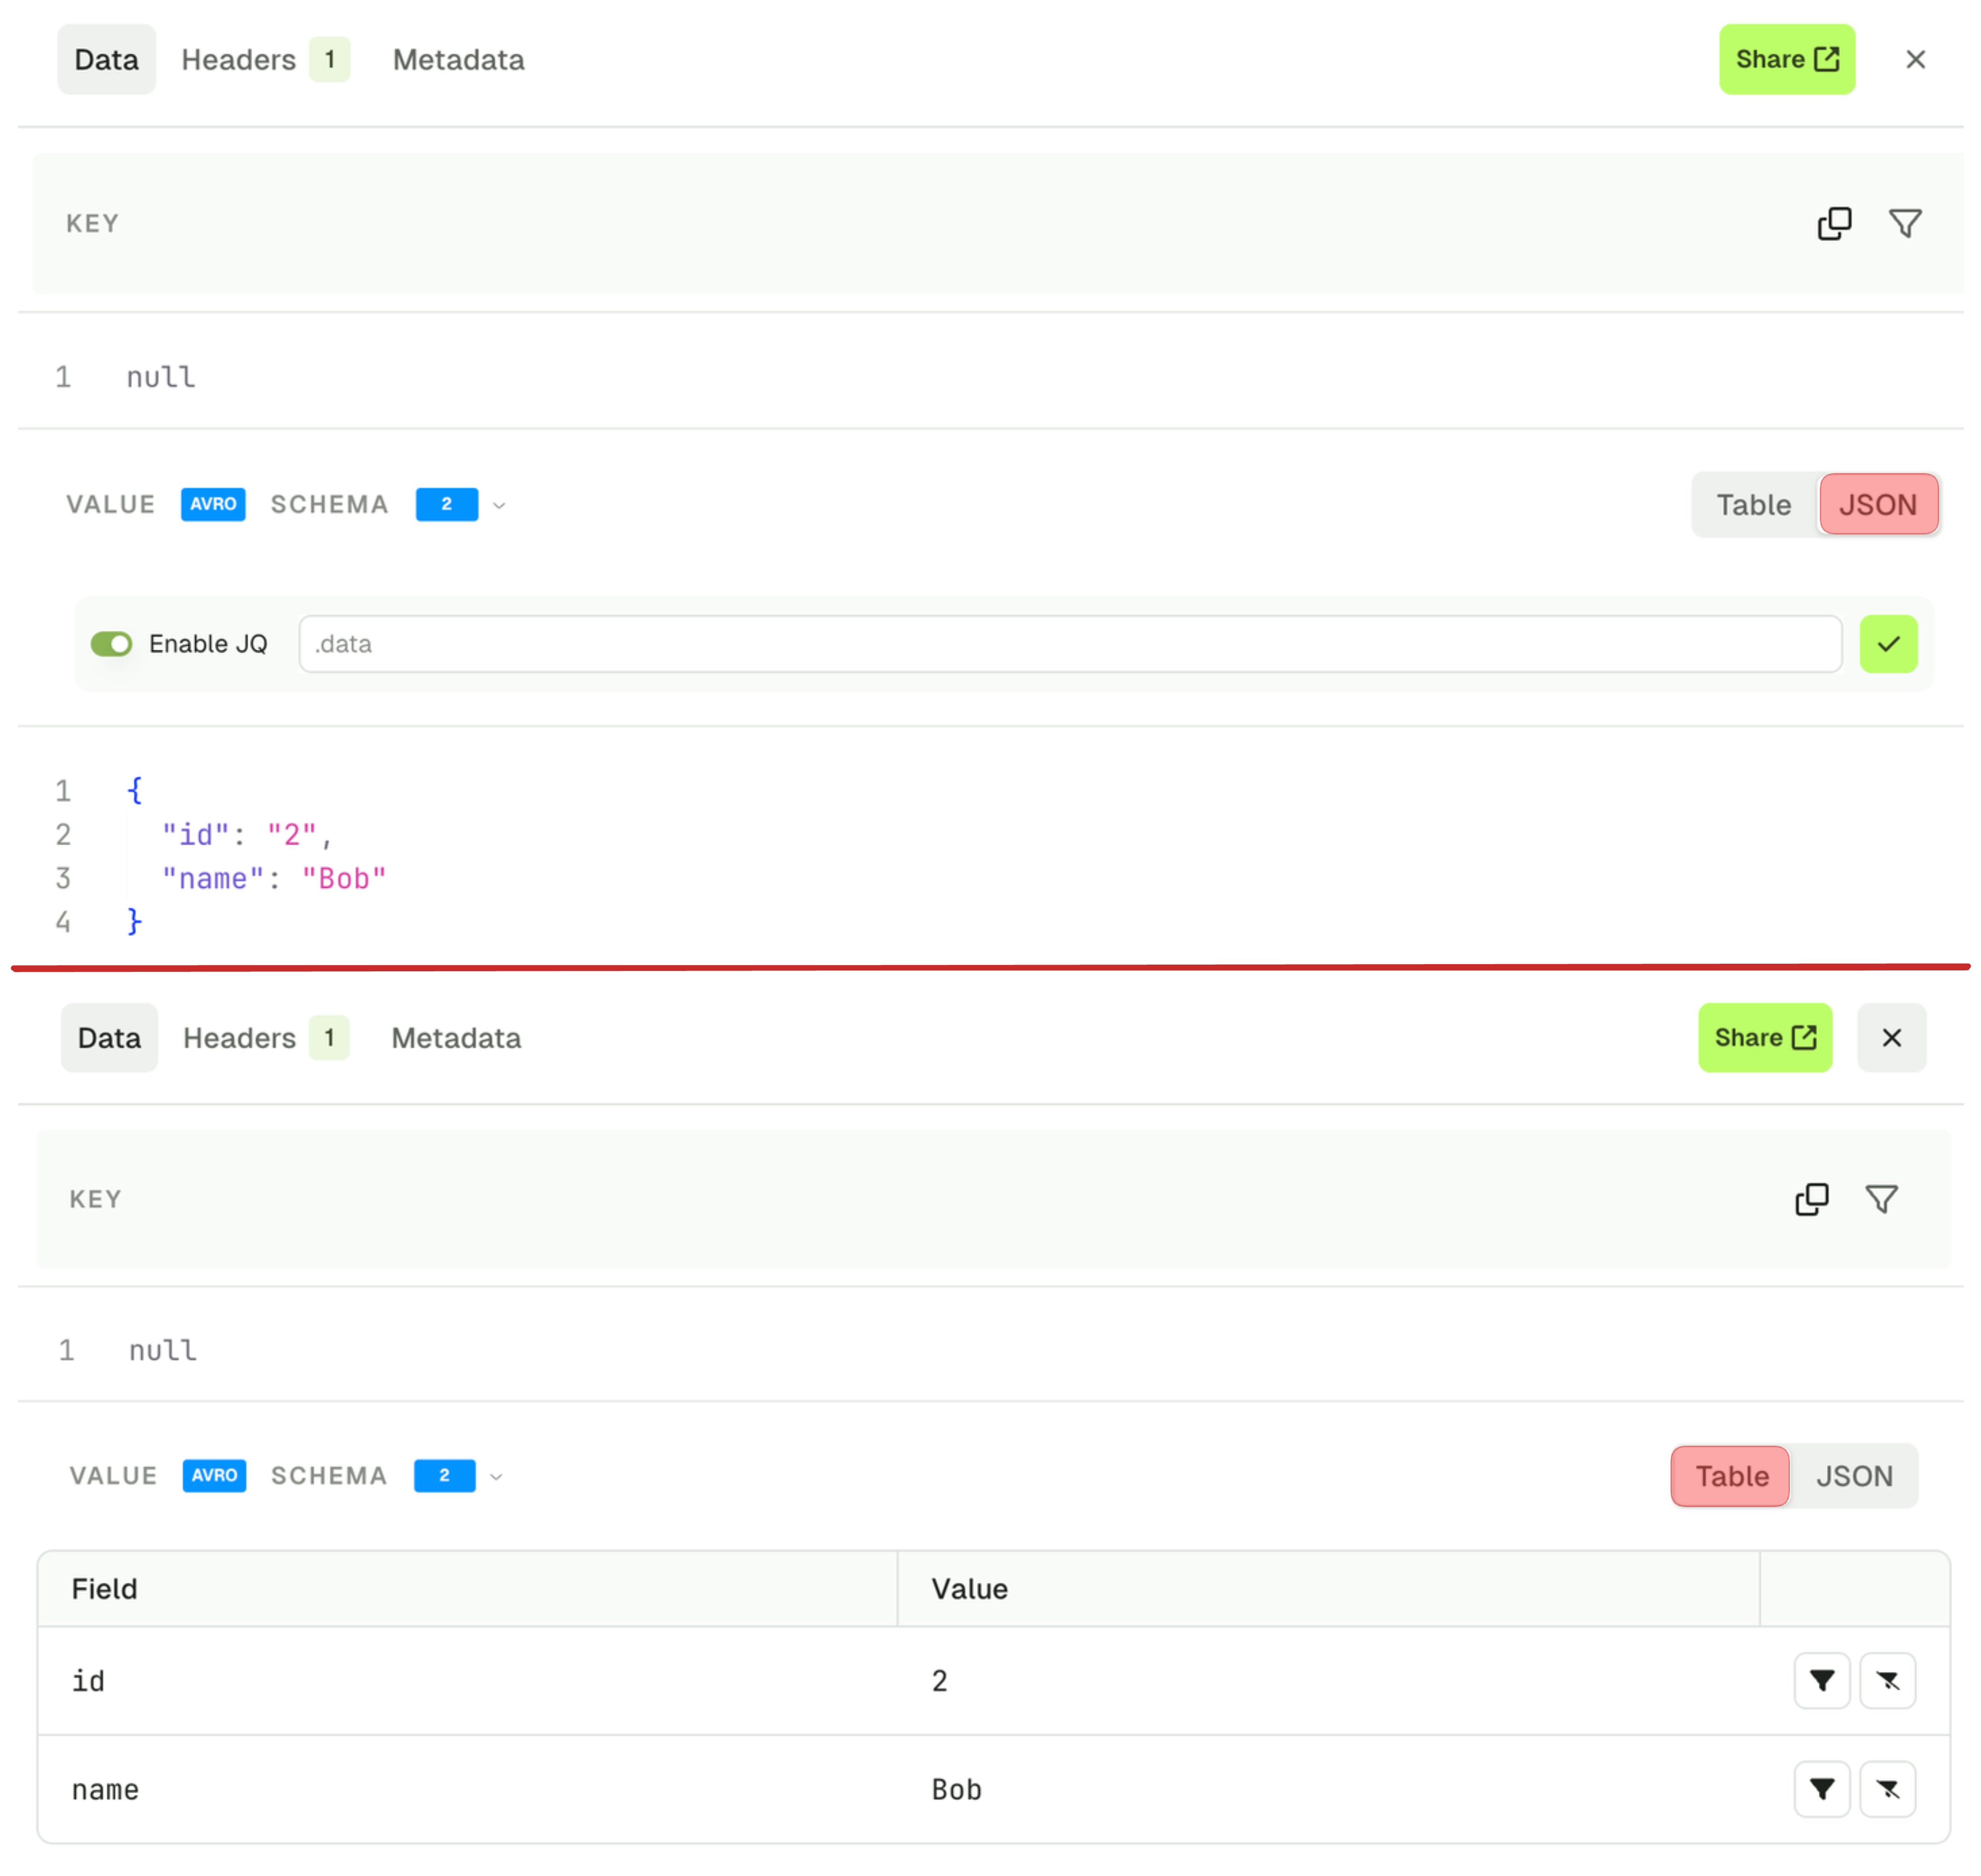
The 2 views have different features associated.
Table View
The table view lets you visualize your message field by field and also gives you the possibility to restrict your search further by applying more filters on individual fields. Filter types are Include and Exclude.
Filters are available for:
- string fields
- number fields
- bool fields
but disabled for:
- null fields
- fields contained within lists
JSON View
The JSON view lets you visualize your message , the "Enable JQ" toggle lets you create a different projection your record value.
The basic syntax lets you focus on sub-elements of your record, as shown in the screenshot below.
{ foo: .bar }  // Renders {"foo": "value of .bar"}
.meta.domain // Renders a single String
{ id, meta } // Renders a new JSON with both elements
 Check the JQ Syntax Reference for more advanced use-cases.
Headers tab
The headers tab show you all the headers of your Kafka record, and lets you find more messages with the same header value, using the funnel icon.
 The resulting filter will be created:
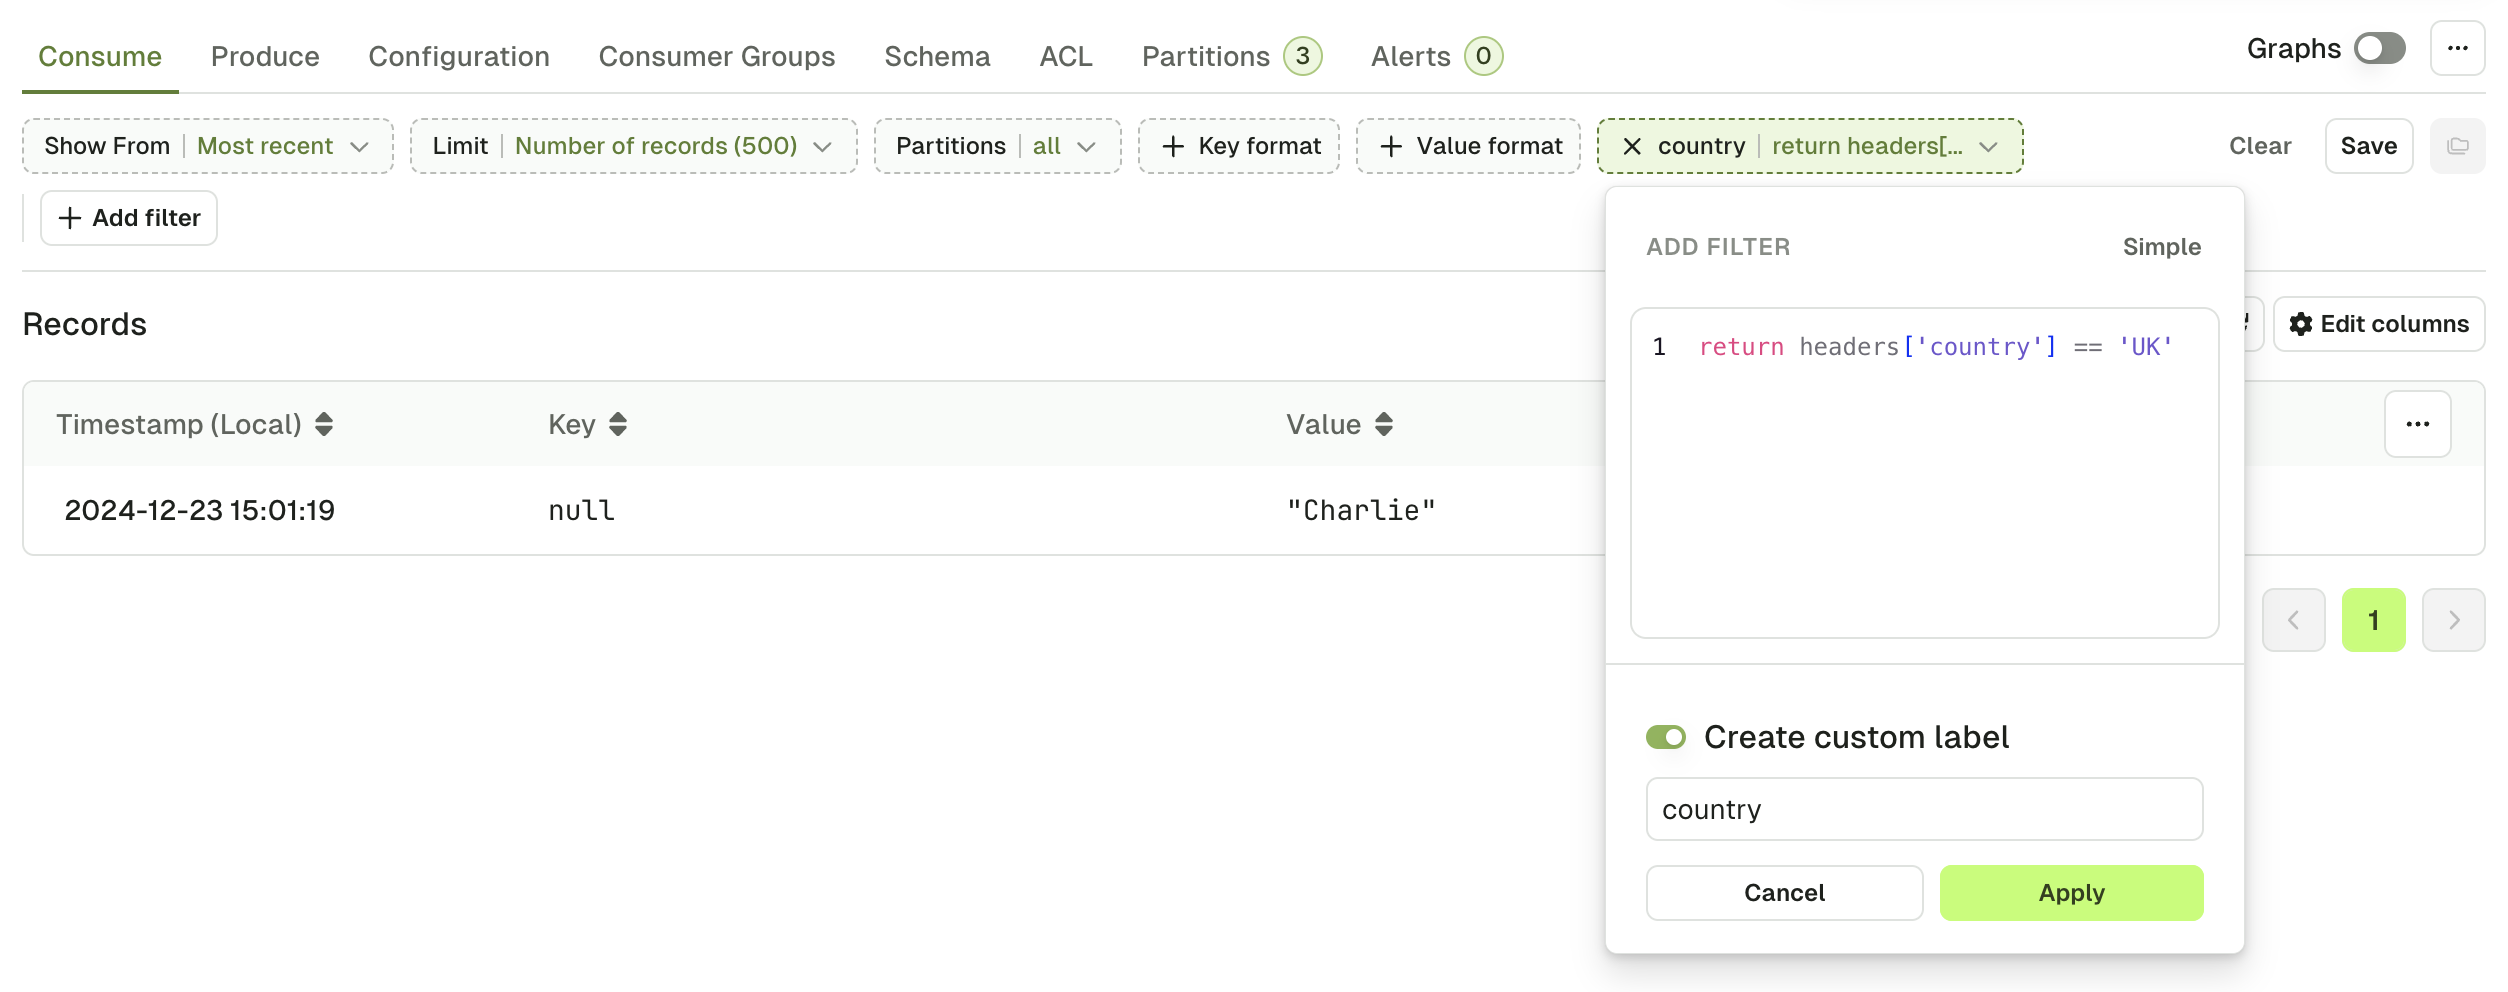
While Kafka header values are internally stored as byte[], Console uses StringDeserializer to display and filter them.
If your producer doesn't write header values as UTF8 String, this tab might not render properly, and header filter might not work as expected.
Metadata tab
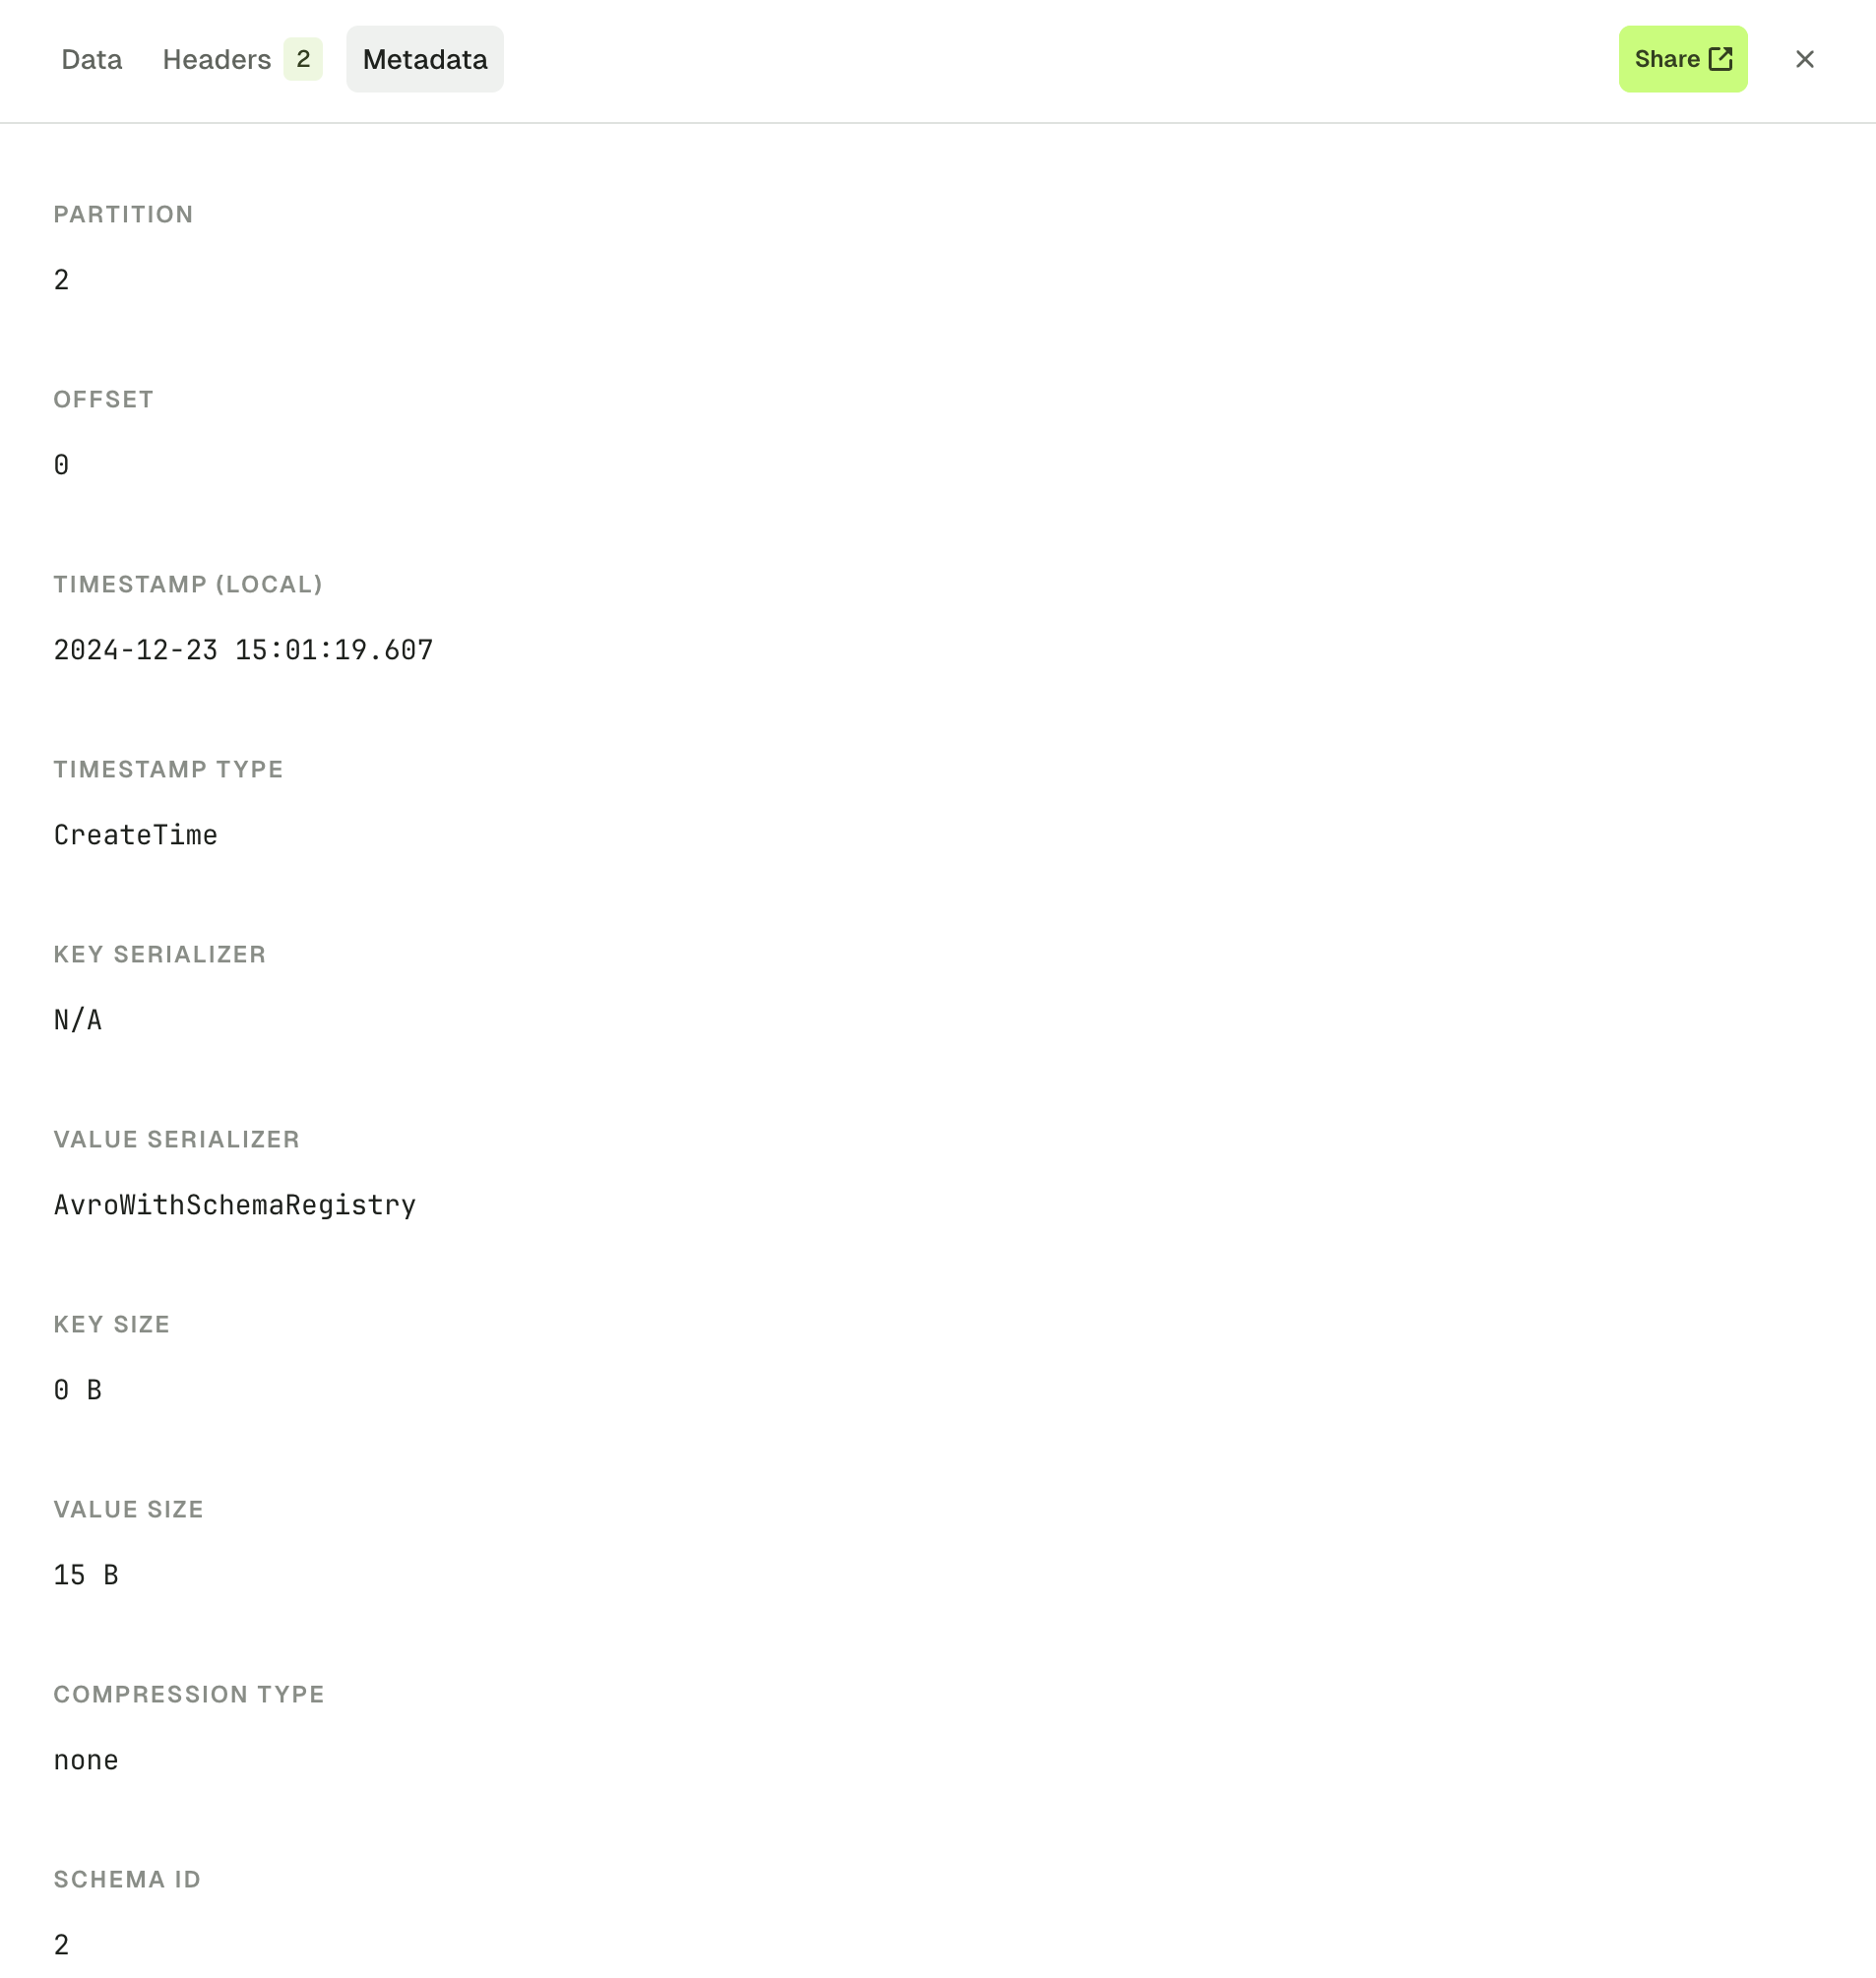
The metadata tab gives you all the other information regarding your record that could be useful under certain circumstances. The information presented are as follow:
- Record Partition
- Record Offset
- Record Timestamp
- The Key and Value Serializer inferred by the Automatic Deserializer
- Key Size and Value Size (how it's serialized on the broker)
- Compression type
- Schema ID if any
Operations
Export Records in CSV & JSON
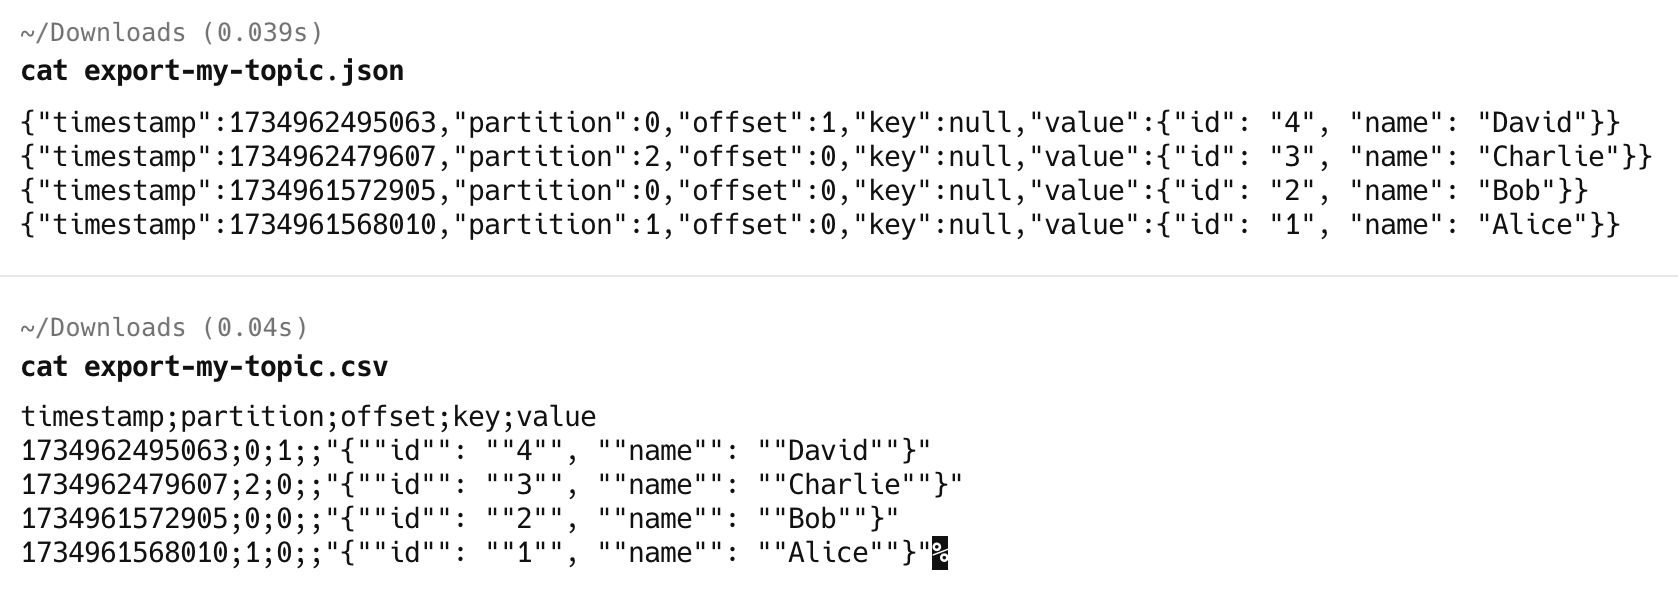
You have the ability to export the records in either JSON or CSV format.
CSV particularly useful in particular because you can use Console to re-import them either in a new topic or in the same topic after having modified them (or not)
 The resulting files will look like this:
Reprocess Record
This feature lets you pick a record from the list and reprocess it either in the same or in a different topic, while letting you change its content beforehand.
Upon click the Reprocess message (1), you will be asked to pick a destination topic (2), and then you will end up on the produce tab with your message pre-filled. From there you can either Produce the message directly or make adjustments before (3).
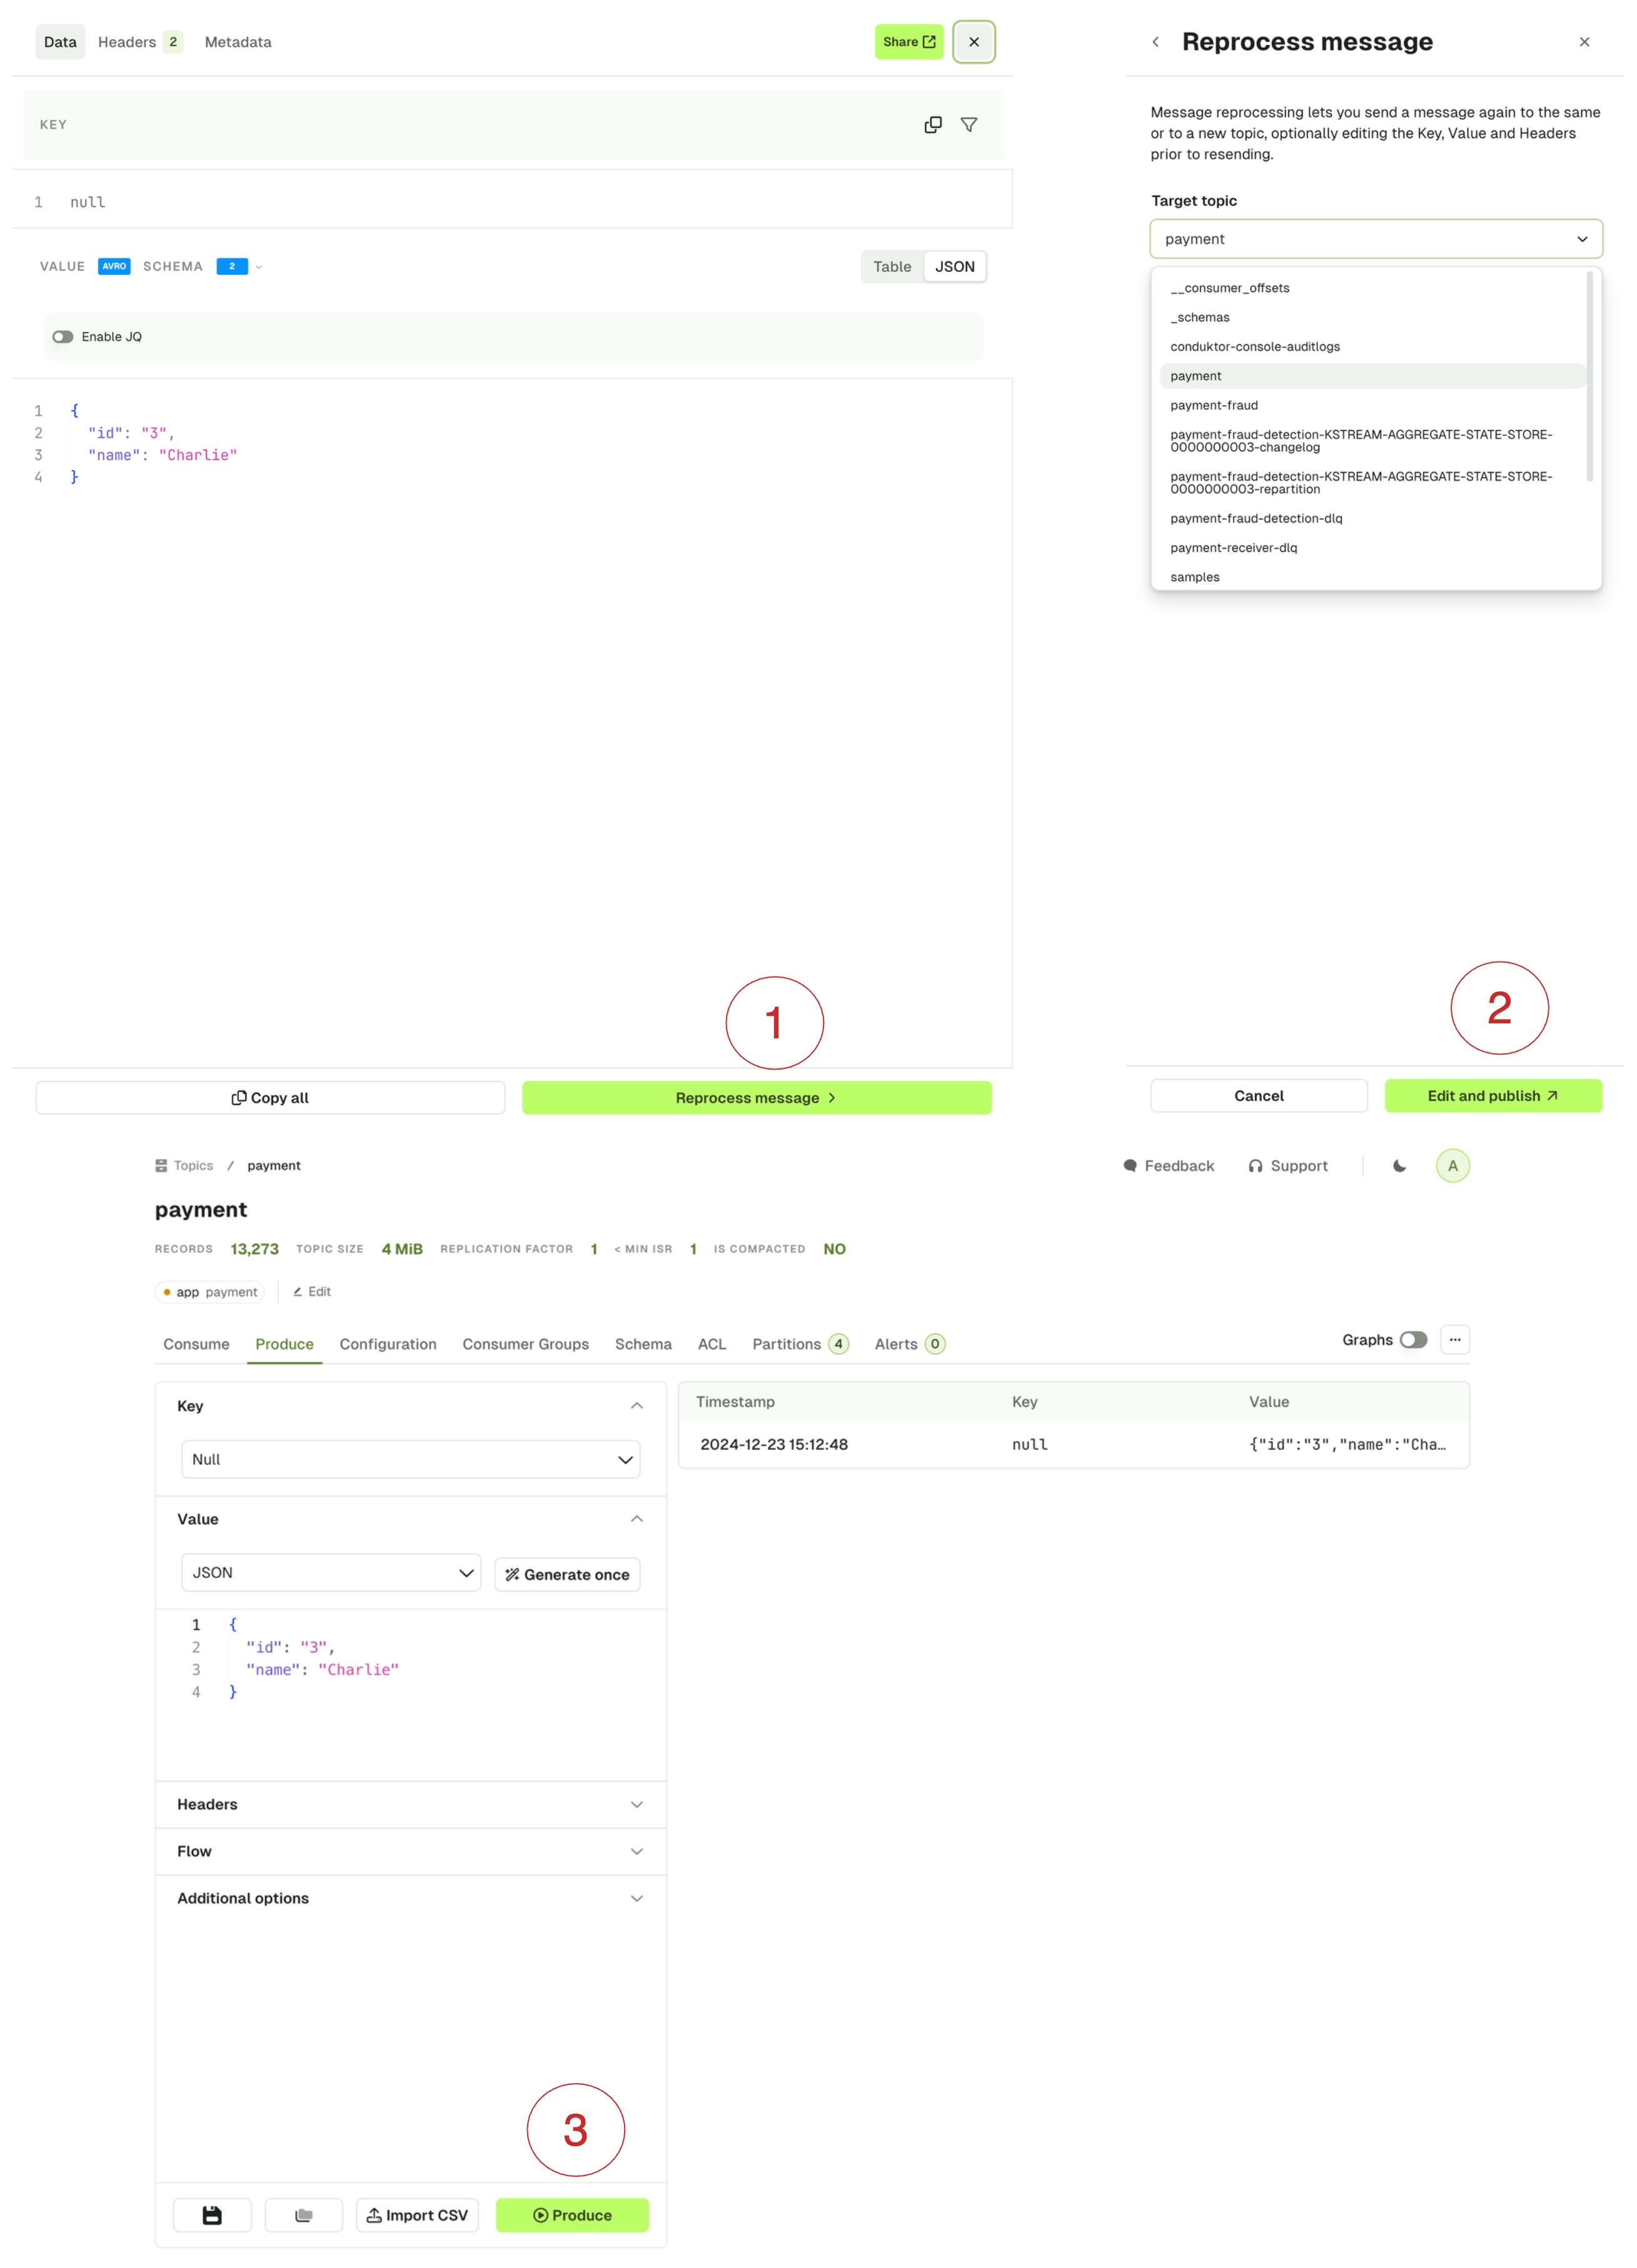
Know more about How to reprocess records.
Save and load views
If you are regularly using the same set of Consume Configuration (Show From, Limit, ...) and Filters, or if you'd like to share them with your colleagues, you can save your current view as a template for reuse.
Create a new view
Click on the Save icon button to save your current view as a template:

From there, you can name your view, add a description, and select whether this view is private, or if you want everyone in your organization to be able to see it and use it.

List the existing views
To list the existing views, click on the folder icon:

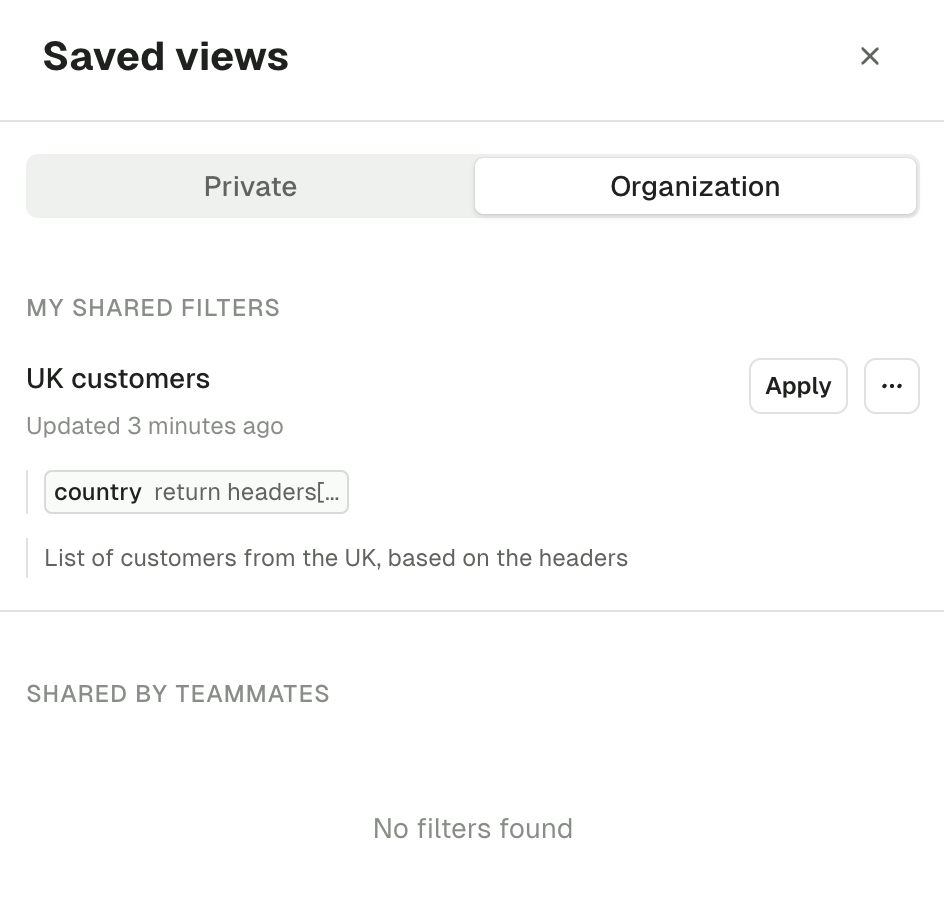
From here, you will see your private views, and the organization views that you created, or that were created by your colleagues.
