Configure Google as SSO
Google Configuration
On Google side, you'll have to follow these steps:
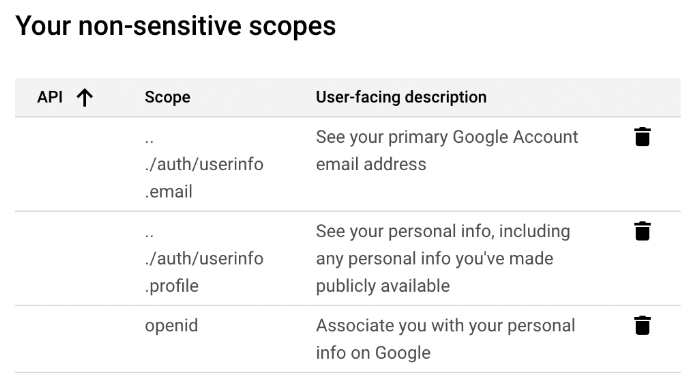
- Step 1: Create an application on the OAuth consent screen tab
The scopes needed are email, profile, and openid.
Optionally, you need https://www.googleapis.com/auth/cloud-identity.groups.readonly for External Group Mapping.
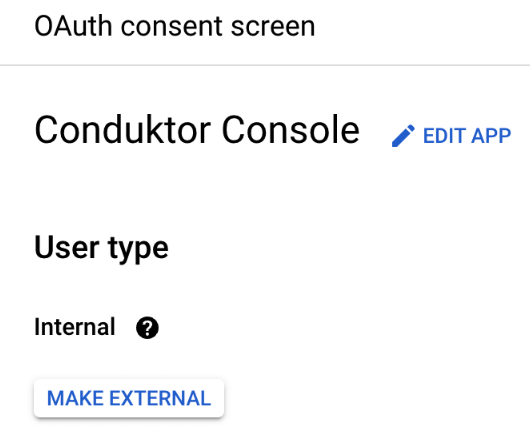
- Step 2: Restrict access to your internal workspace by checking the
Internaluser type in the OAuth consent screen.
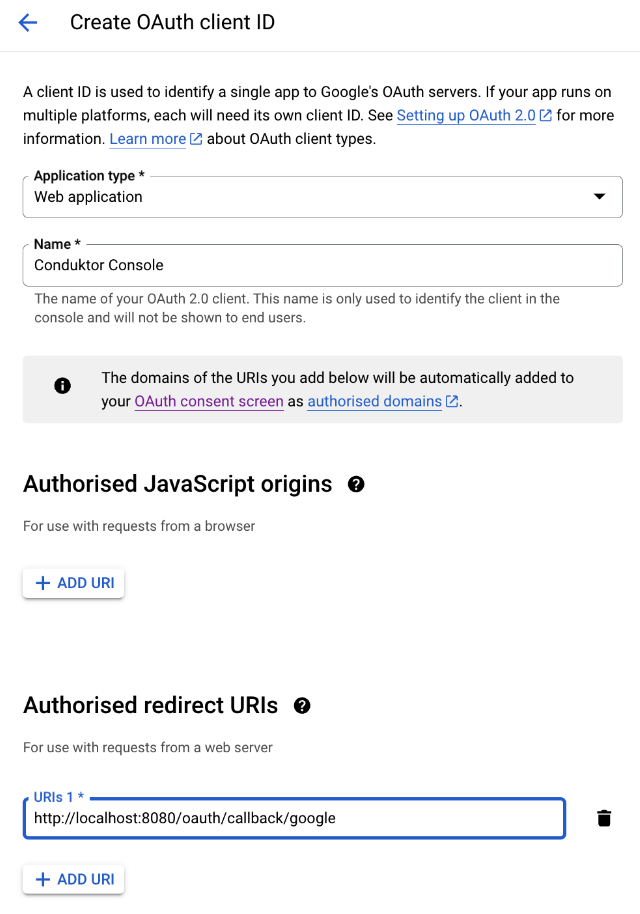
- Step 3: Create a new
OAuth client ID
You can select the name you want, shown here as Conduktor Console, and enter the redirect URI as the following: http(s)://<Console host>(:<Console port>)/oauth/callback/<OAuth2 config name>.
For example, if you deployed Console locally using the name google in your configuration file, you can use http://localhost:8080/oauth/callback/google, like on the screenshot below.
For more details on Console redirect URI for OAuth2, you can check the documentation.
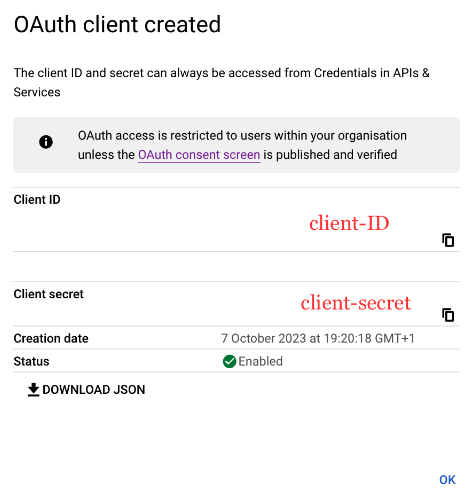
- Step 4: Get the
client IDand thesecret ID
After the creation, the pop-up below appears. You can save the client ID and secret as JSON if you want.
You can find the .well-known at: https://accounts.google.com/.well-known/openid-configuration.
If you need to add an authorized domain to your Google account, you can follow this guide.
Console Configuration
On Console side, you can add the snippet below to your configuration file. You have to replace the client ID and secret with what you got during the step 4.
- YAML File
- Environment Variables
sso:
  oauth2:
    - name: "google"
      client-id: "<client ID>"
      client-secret: "<client secret>"
      scopes: "openid,email,profile"
      openid:
        issuer: "https://accounts.google.com"
CDK_SSO_OAUTH2_0_NAME="google"
CDK_SSO_OAUTH2_0_CLIENT-ID="<client ID>"
CDK_SSO_OAUTH2_0_CLIENT-SECRET="<client secret>"
CDK_SSO_OAUTH2_0_SCOPES="openid,email,profile"
CDK_SSO_OAUTH2_0_OPENID_ISSUER="https://accounts.google.com"
Groups Configuration
An additional scope https://www.googleapis.com/auth/cloud-identity.groups.readonly is required if you want to sync Google Group with Conduktor Groups.
- YAML File
- Environment Variables
sso:
  oauth2:
    - name: "google"
      client-id: "<client ID>"
      client-secret: "<client secret>"
      scopes: "openid,email,profile,https://www.googleapis.com/auth/cloud-identity.groups.readonly"
      openid:
        issuer: "https://accounts.google.com"
CDK_SSO_OAUTH2_0_NAME="google"
CDK_SSO_OAUTH2_0_CLIENT-ID="<client ID>"
CDK_SSO_OAUTH2_0_CLIENT-SECRET="<client secret>"
CDK_SSO_OAUTH2_0_SCOPES="openid,email,profile,https://www.googleapis.com/auth/cloud-identity.groups.readonly"
CDK_SSO_OAUTH2_0_OPENID_ISSUER="https://accounts.google.com"
External Groups Mapping
Now that your configuration is finished, you can set up the mapping between Google Groups and Console groups. That way, when a user logs in, they will be automatically added to the corresponding Console groups, based on the groups they belong to in Google.
The value you need to put as an external group is the email address of the Google Group.