Configure JumpCloud as SSO
JumpCloud Configuration
On the JumpCloud side, you'll have to create a new application:
-
Step 1: Create a new application in
SSO Applications.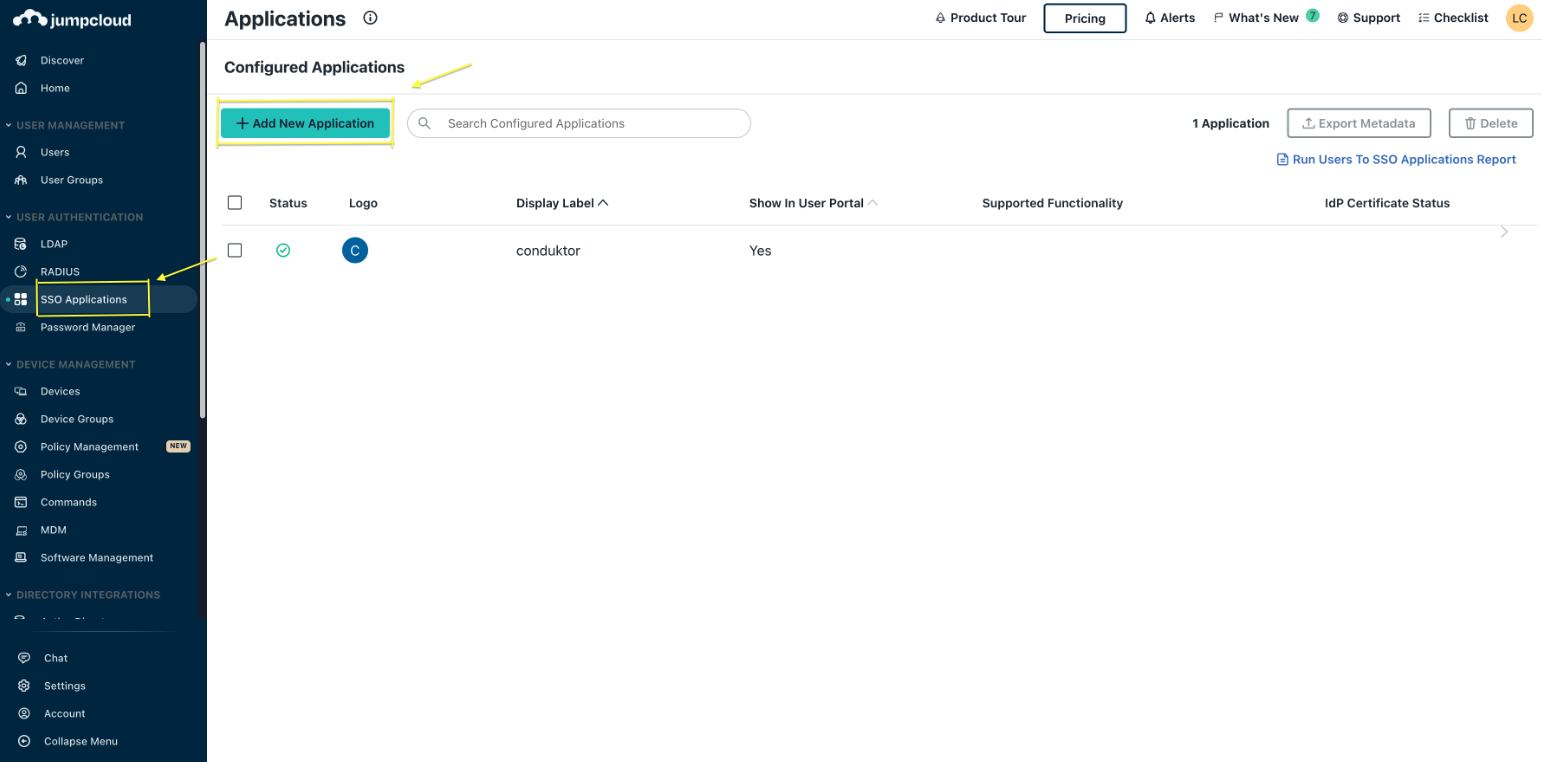
-
Step 2: Select a
Custom Applicationas shown below.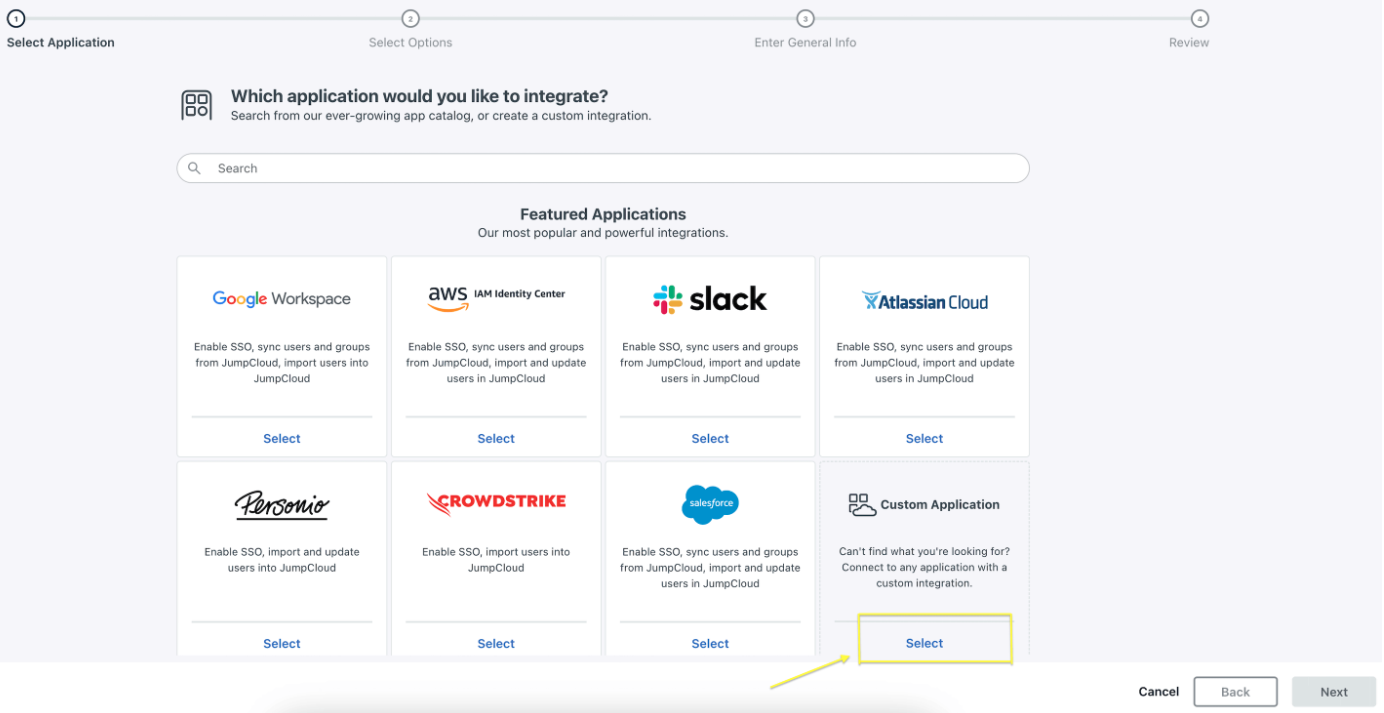
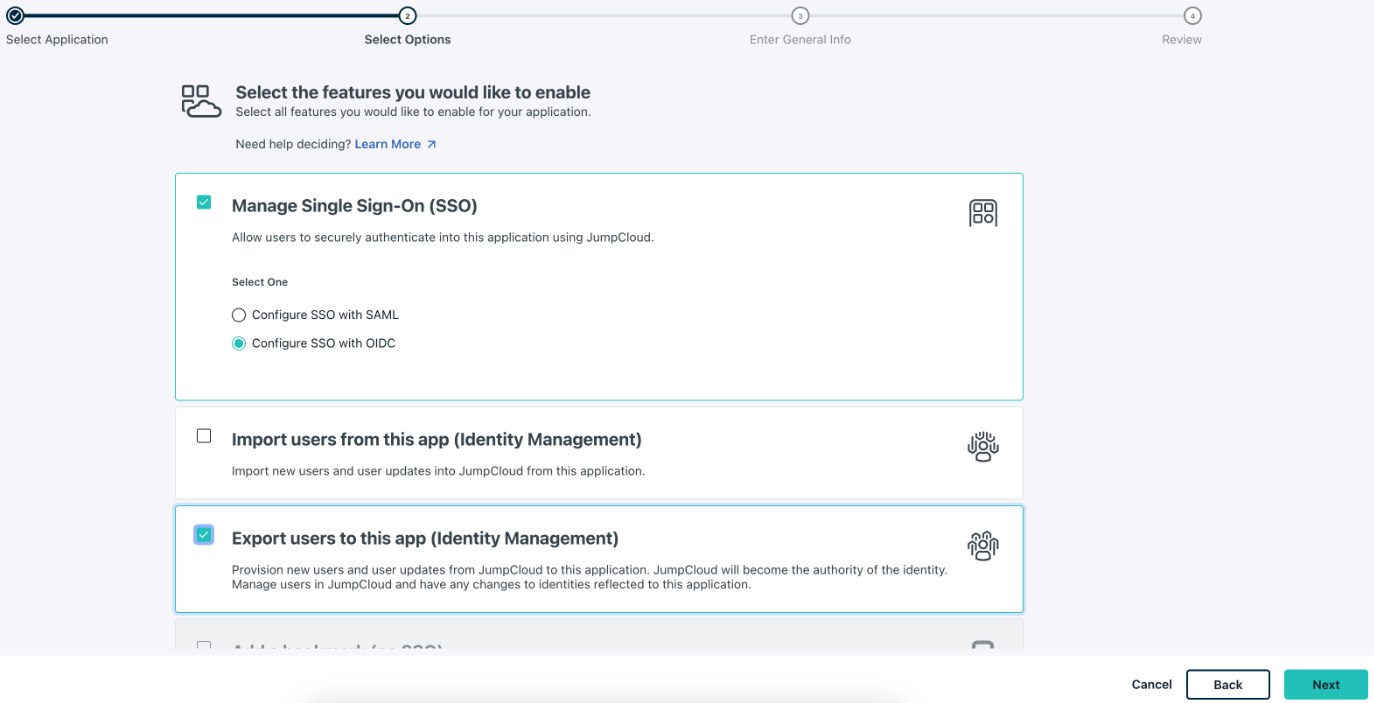
Then ensure to select Manage Single Sign-On (SSO), then Configure SSO with OIDC and Export users to this app (Identity Management) as seen in the screenshot below.
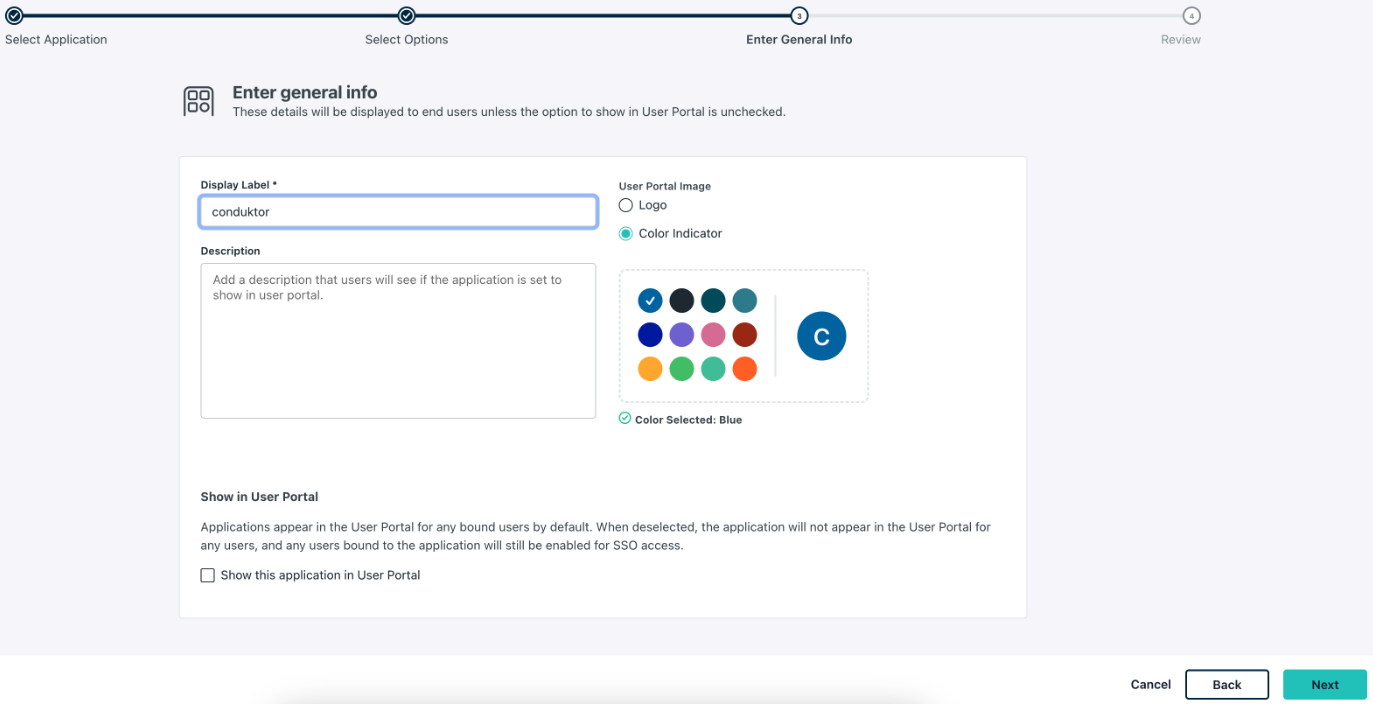
Following this, enter general information for your custom application, including the display label, such as conduktor as seen in the screenshot below and configure this application.
- Step 3: Add
Redirect URI(s)andLogin URL.
The Redirect URI is where JumpCloud sends the authentication response and ID token for the user's sign-in request to. The Login URL is the URL users need to log into this application.
Enter the redirect URI in the following way:
http(s)://<Console host>:<Console port>/oauth/callback/<OAuth2 config name>.
For example, if you deployed Console locally using the name jumpcloud in your configuration file, you can use
https://localhost:8080/oauth/callback/jumpcloud, as seen in the screenshot below.
Enter the Login URL, which is the URL users need to log into this application. In the example below, this is https://localhost:8080 .
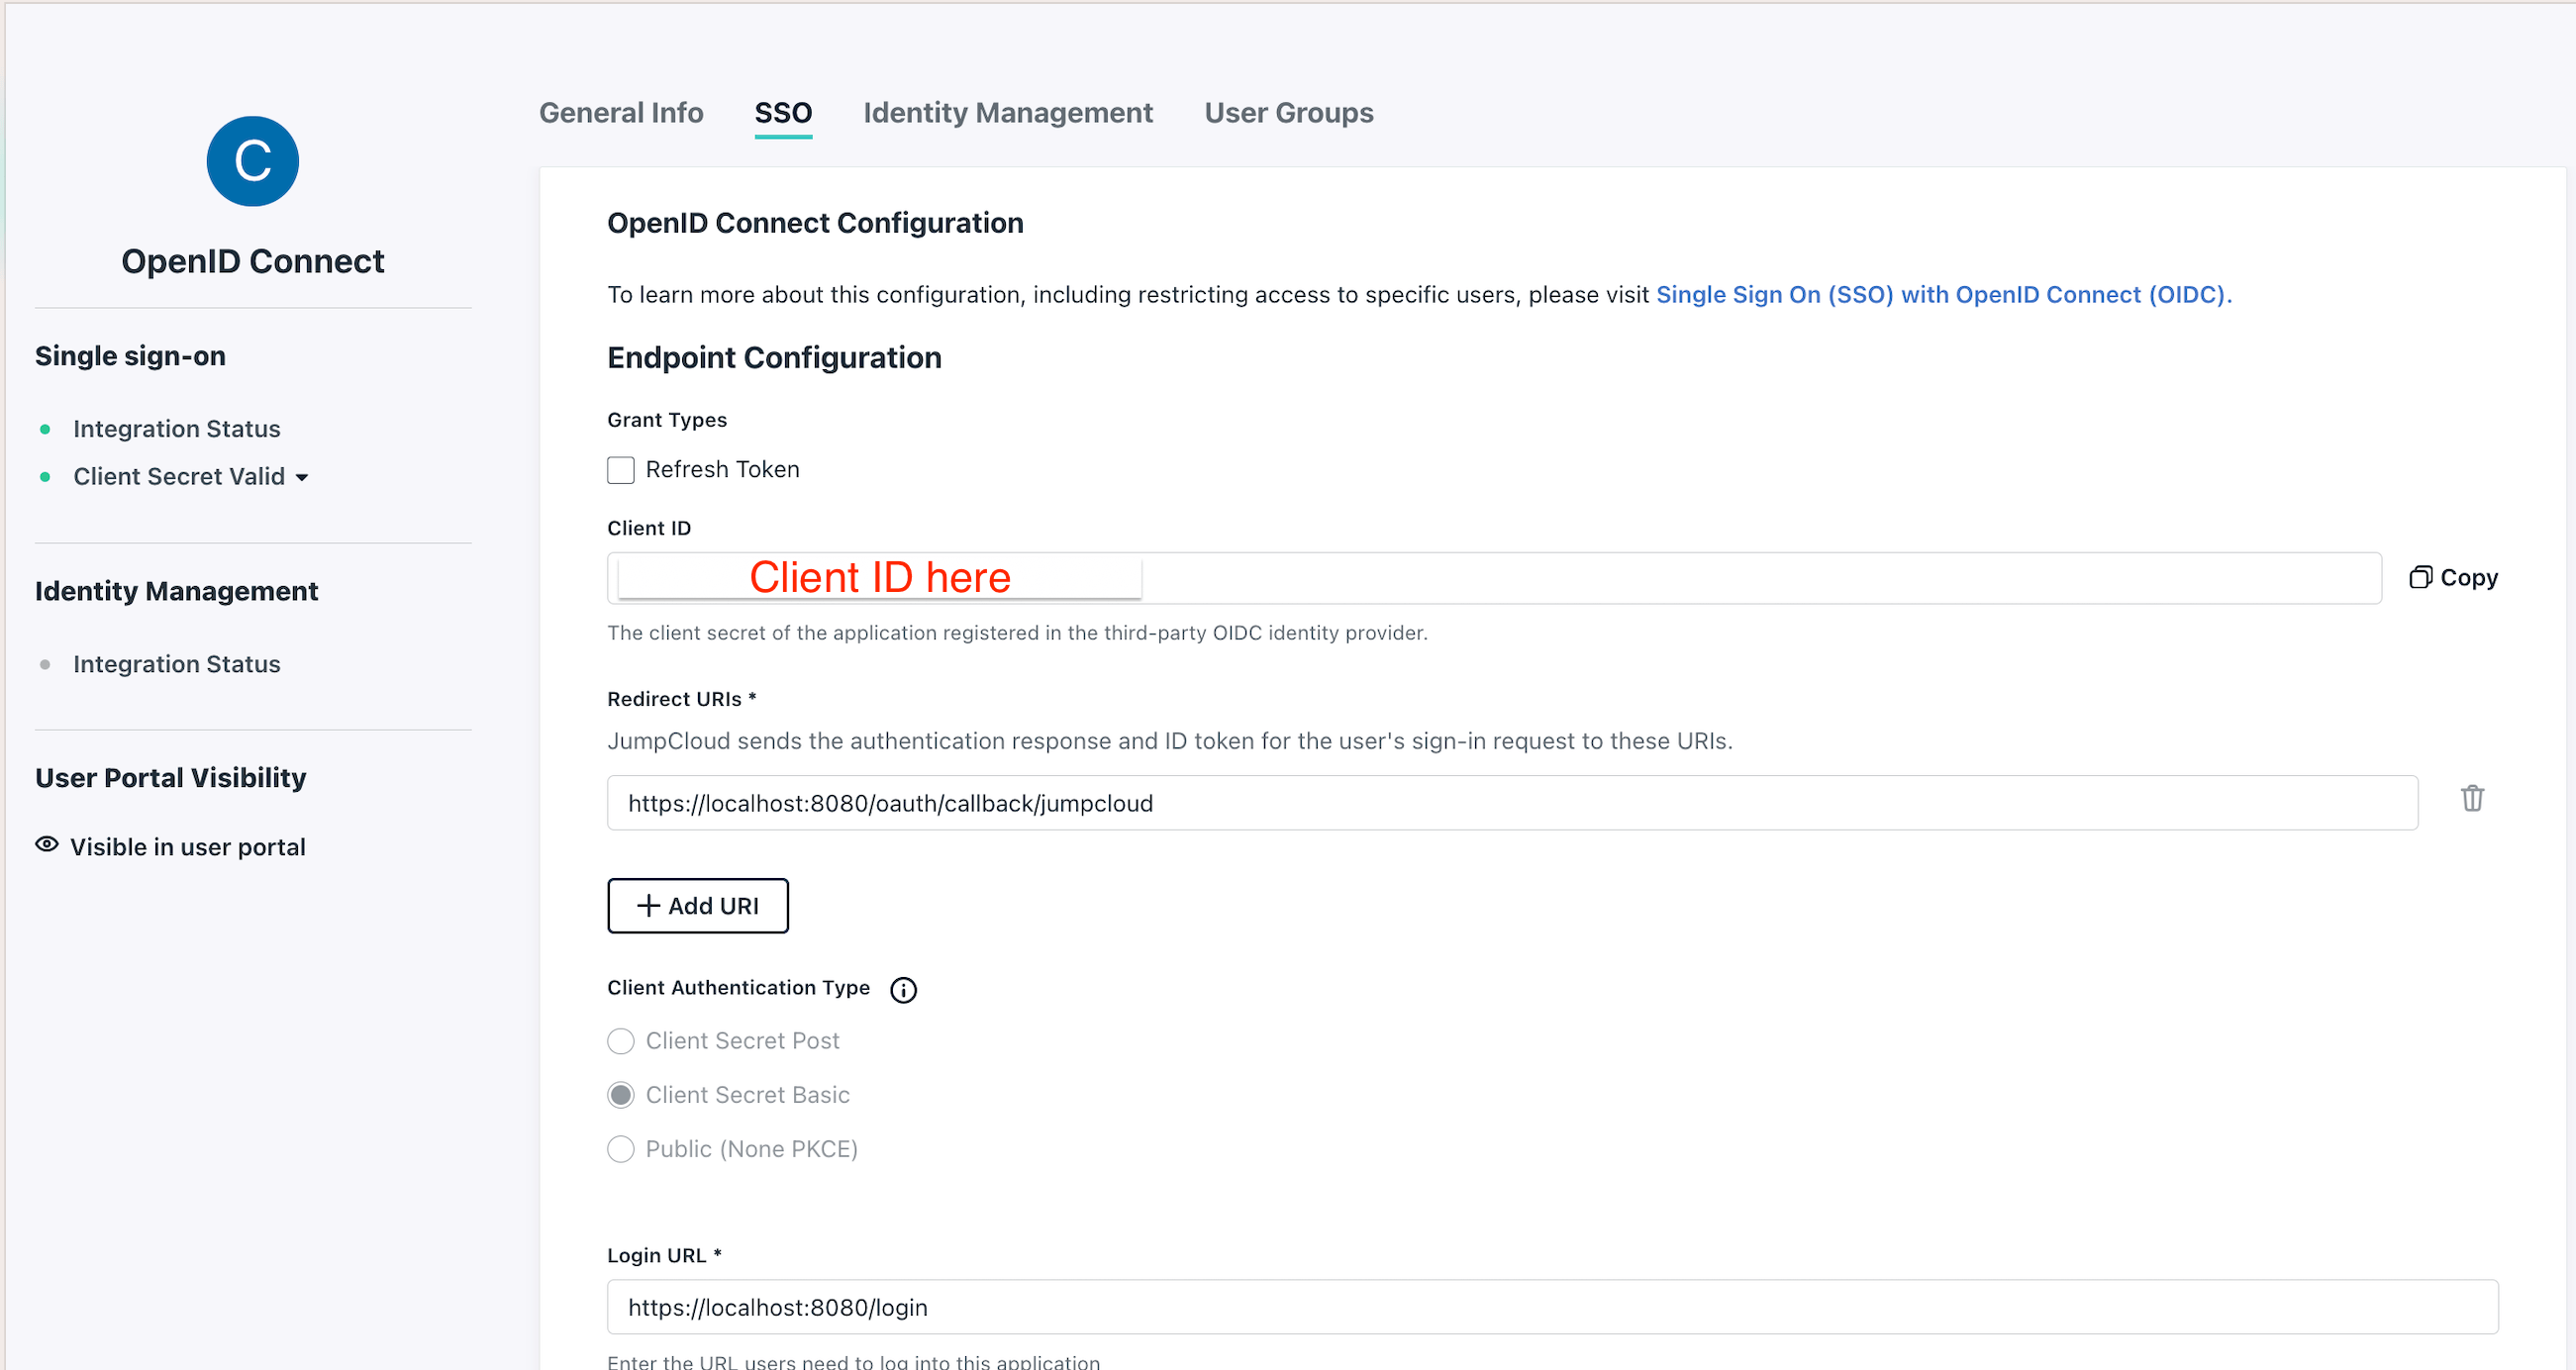
- Step 4: Find the
Client IDandClient Secret.
After clicking activate during Step 3 you will be shown configurations for Client ID and Client Secret, be sure to save these somewhere safe.
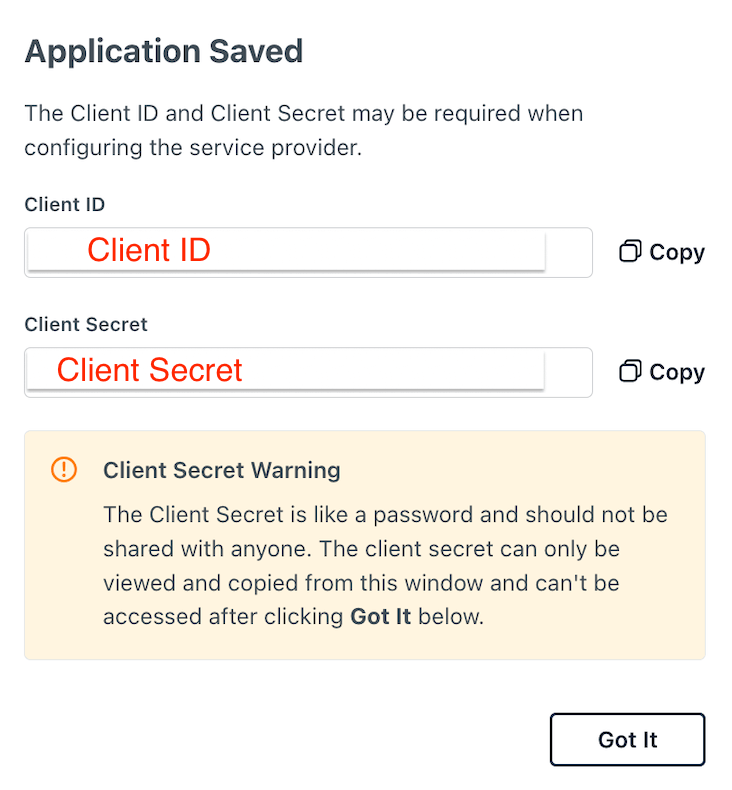
You need to keep the Client Secret somewhere safe, as you will not have access to it again.
Conduktor Console Configuration
On the Conduktor Console side, you can add the snippet below to your configuration file. You will have to replace the Client ID and Client Secret, as shown in steps 3 and 4.
You can find the opendid issuer at: https://oauth.id.jumpcloud.com/ as shown here
sso:
  oauth2:
    - name: "jumpcloud"
      client-id: "<Client ID>"
      client-secret: "<Client Secret>"
      groups-claim: "groups" #if wanting to use groups mapping
      openid:
        issuer: "https://oauth.id.jumpcloud.com/"
Or using environment variables:
CDK_SSO_OAUTH2_0_NAME="jumpcloud"
CDK_SSO_OAUTH2_0_DEFAULT=true
CDK_SSO_OAUTH2_0_CLIENT-ID="<Client ID>"
CDK_SSO_OAUTH2_0_CLIENT-SECRET="<Client Secret>"
CDK_SSO_OAUTH2_0_GROUPS-CLAIM="groups"
CDK_SSO_OAUTH2_0_OPENID_ISSUER="https://oauth.id.jumpcloud.com/"
Groups Configuration
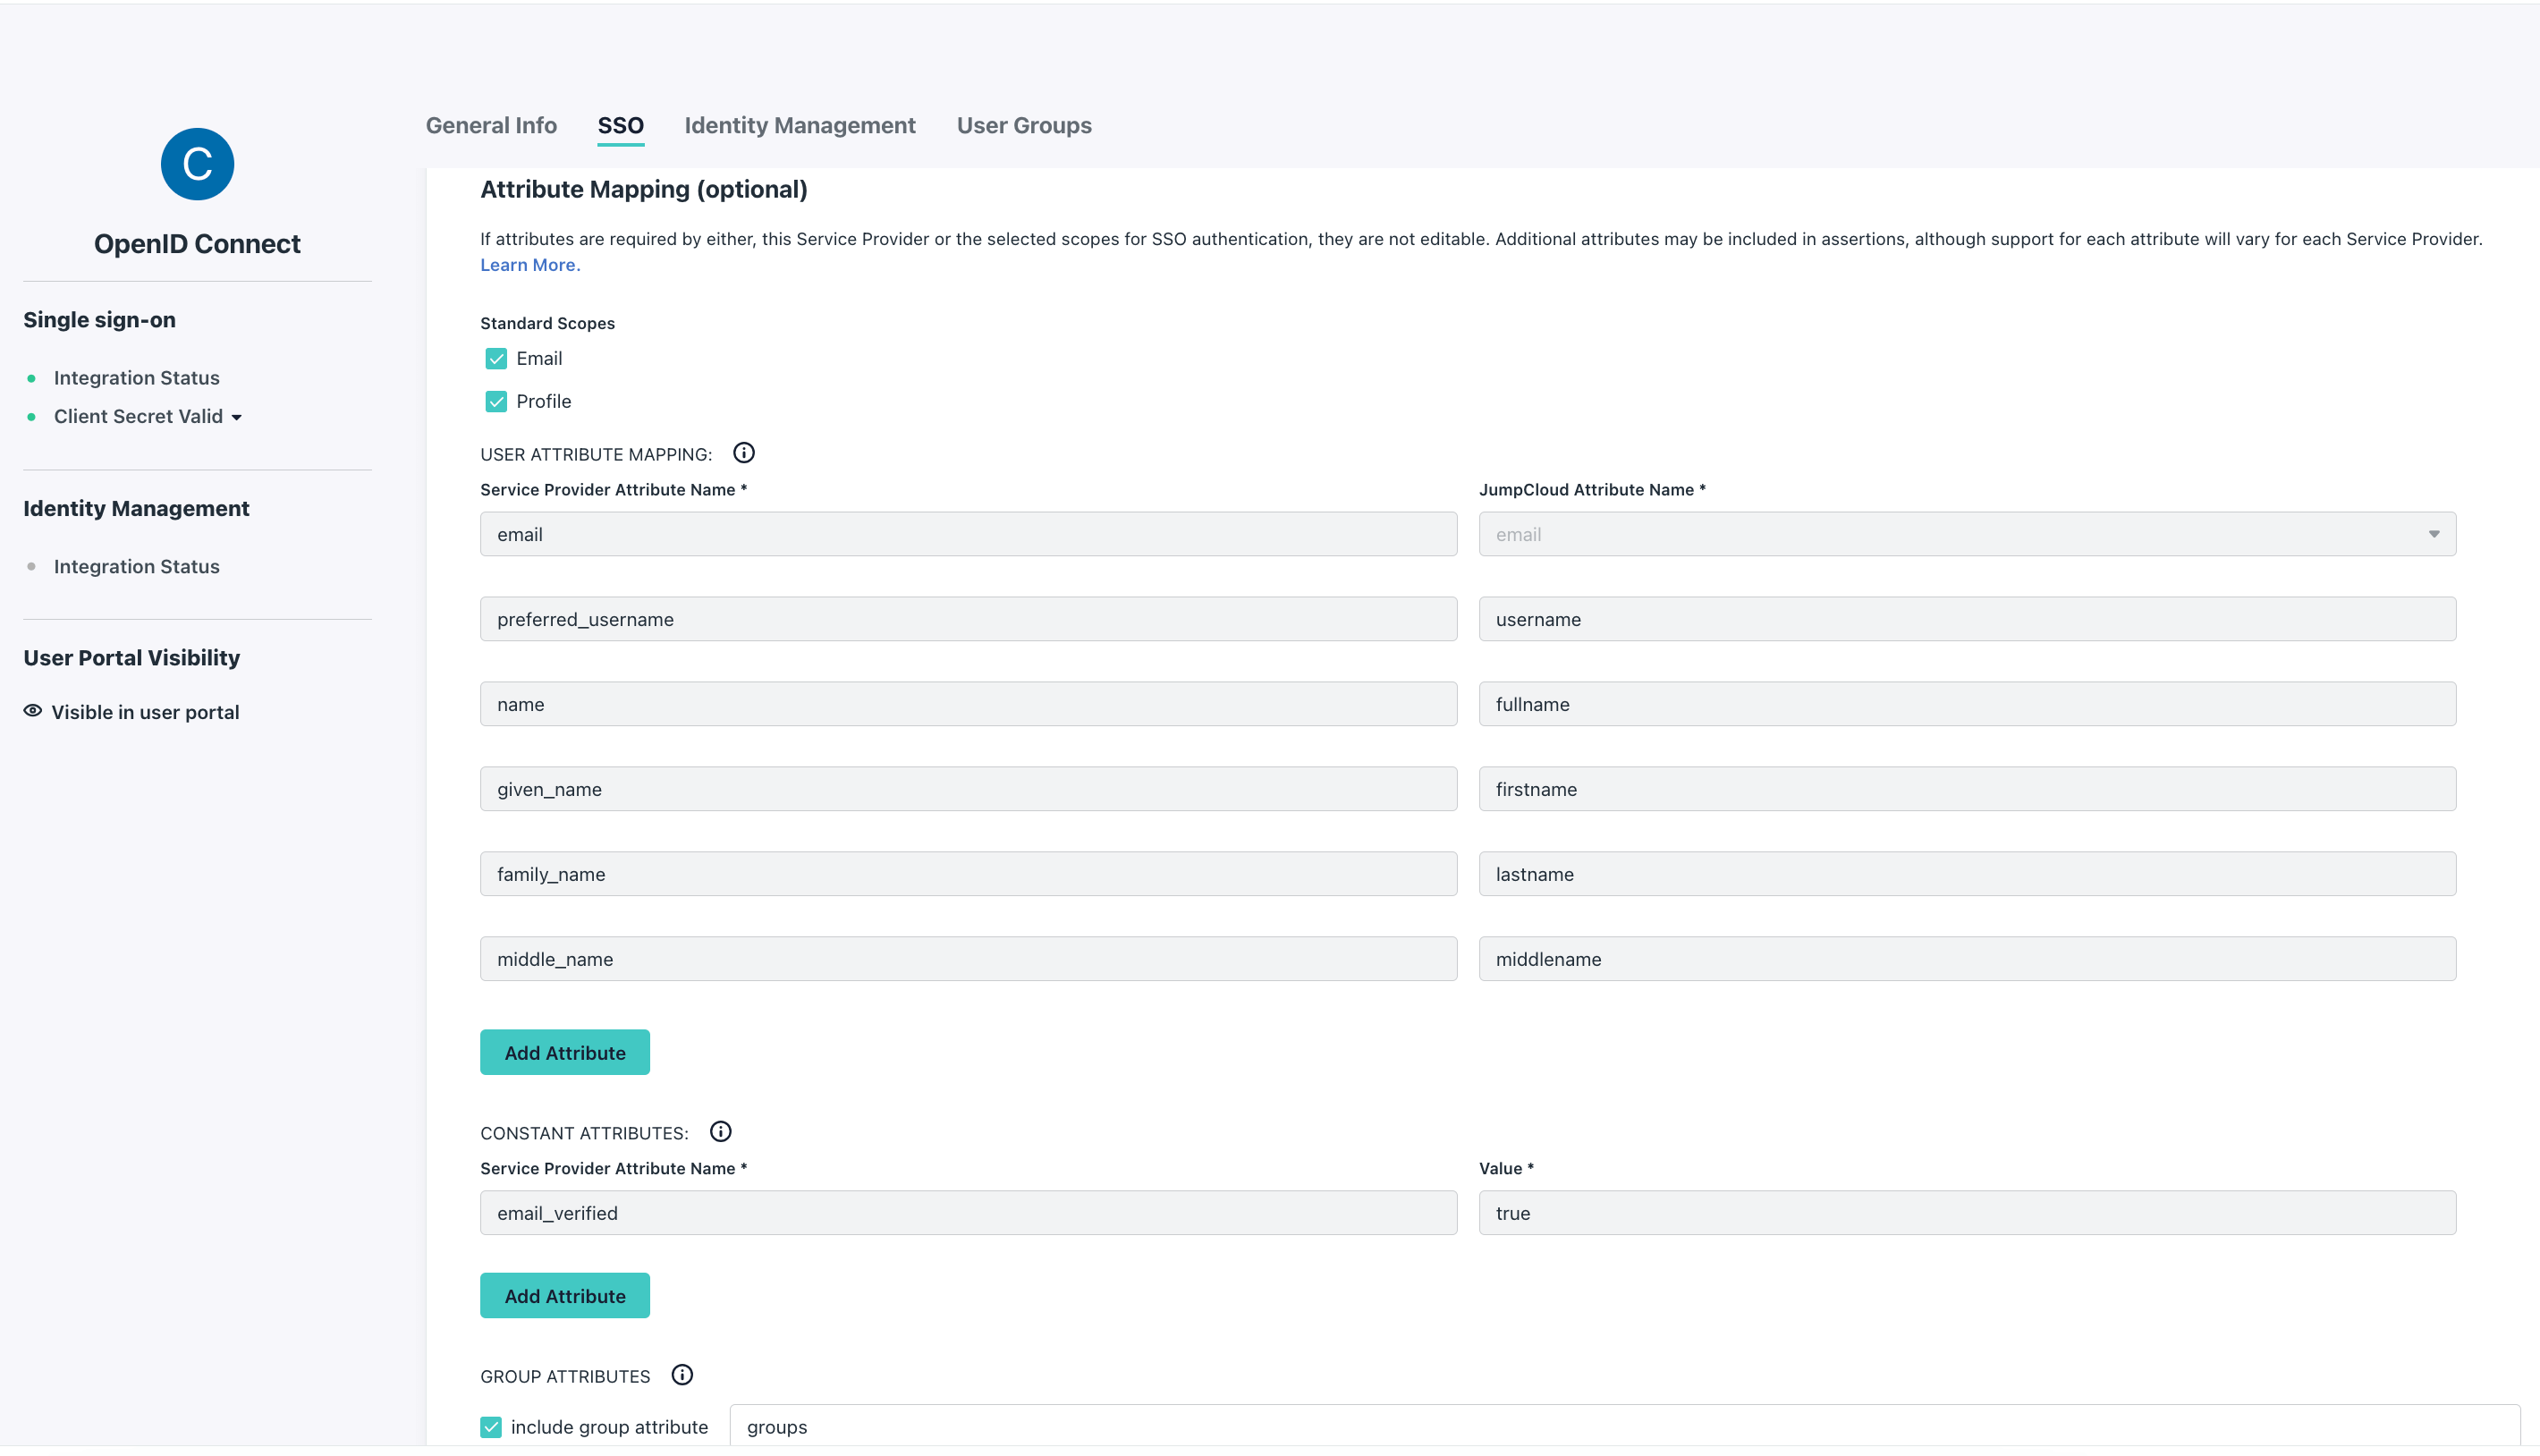
If you want to use the external groups mapping to map groups between your Conduktor Console instance and JumpCloud:
From the JumpCloud side, ensure you have:
- Checked
EmailandProfileunder the standard scopes - Set the
email_verifiedto true - The same value in
group attributeas in thegroups-claimorCDK_SSO_OAUTH2_0_GROUPS-CLAIMvalue of your Console's configuration
See the example screenshot shown below.
From the Conduktor Console side, you must set the property groups-claim to "groups" in the Console configuration file.
Below is the full snippet for your configuration file:
sso:
  oauth2:
    - name: "jumpcloud"
      client-id: "<Client ID>"
      client-secret: "<Client Secret>"
      groups-claim: "groups"
      openid:
        issuer: "https://oauth.id.jumpcloud.com/"
Or using environment variables:
CDK_SSO_OAUTH2_0_NAME="jumpcloud"
CDK_SSO_OAUTH2_0_DEFAULT=true
CDK_SSO_OAUTH2_0_CLIENT-ID="<Client ID>"
CDK_SSO_OAUTH2_0_CLIENT-SECRET="<Client Secret>"
CDK_SSO_OAUTH2_0_GROUPS-CLAIM="groups"
CDK_SSO_OAUTH2_0_OPENID_ISSUER="https://oauth.id.jumpcloud.com/"
External Groups Mapping
Now that your configuration is finished, you can set up the mapping between JumpCloud and Conduktor Console groups. This way, when a user logs in, they will be automatically added to the corresponding Conduktor Console groups, based on the groups they belong to in JumpCloud.
The value you need to put as an external group is the name of the JumpCloud group.