Overview
Alerts allow you to be notified and react to Kafka infrastructure or application changes as soon as they happen. You can integrate alerts with Slack, MS Teams and email to receive real-time notifications. Alternatively, set up arbitrary webhook destinations with any URL and custom headers. See how to configure integrations. Alerts are periodically checked for every minute.Alert metrics
When creating alerts in Console, you can choose from several metrics depending on the resource type. These metrics are calculated using Prometheus queries that run against the data Console collects from your Kafka clusters.Topic metrics
Broker metrics
Consumer group metrics
Kafka Connect metrics
Create alerts
Alerts can be created for most resources (e.g. brokers or topics) in Conduktor Console. To create an alert:- Navigate to the required resource.
- Click on the Alerts tab.
- Click the + button to create an alert.

- a unique name
- a metric you want to measure (e.g. MessageCount, MessageIn, MessageSize). See available metrics.
- an operator and value for the threshold
- an owner. This can be a group, an application instance or an individual user. The ownership will determine who can edit the alert.
- (optional) a description explaining what the alert does or why you created it. This is useful if you’re creating an external alert.
- a destination: internal (Conduktor Console) or external (Slack, Teams, email or Webhook). Each alert can have only one external destination. To verify that it works, click Send test.
Alert destinations
Once you’ve configured your integrations, you can choose from several alert destinations:Slack
- Destination channel: select from available Slack channels (your Slack app has to be invited to the channel first).
Microsoft Teams
- Webhook URL: use the channel webhook URL from your Teams workflow configuration.
- Destination email: specify the recipient’s email - this is where the notifications will be sent.
- Subject: customize the email subject line to make them easily identifiable.
- Body: the body of the email. You can use handlebars syntax (e.g.,
{{clusterName}},{{threshold}}, for url because the template engine can escape the whole url, you will have to use{{{url}}}to not escape the url) to embed alert variables dynamically.
Webhook
- Method: select the HTTP method to use for the webhook request (POST, PUT).
- URL: any webhook endpoint that accepts POST requests.
- Custom Headers: add custom headers, as needed.
- Body: receives structured JSON payload with alert details and metadata. You can use handlebars syntax (e.g.,
{{clusterName}},{{threshold}}, for url because the template engine can escape the whole url, you will have to use{{{url}}}to not escape the url) to embed alert variables dynamically. - Authentication: configure authentication, if required by your webhook endpoint (basic auth or bearer token).
Using environment variables in webhooks
You can reference environment variables in your webhook URL, headers, body, and authentication fields using the Mustache syntax{{env.VAR_NAME}}. Only environment variables prefixed with CDK_WEBHOOK_ are available. The prefix is stripped when referencing them in templates.
For example, if you set CDK_WEBHOOK_API_KEY=my-secret-key as an environment variable on the Console container, you can reference it in your webhook configuration:
- Header:
Authorization: Bearer {{env.API_KEY}} - Body:
{"token": "{{env.API_KEY}}", "alert": "{{alertName}}"}
If an environment variable is not found, it will be replaced with an empty string.
Alert processing
Alert processing involves multiple components with different timing intervals:- Console metrics collection: Console’s indexer collects metrics every 30 seconds by default from your Kafka clusters
- Prometheus evaluation: alert conditions are evaluated every 15 seconds by Prometheus
- Alert manager notification: waits 30 seconds before sending notifications after an alert triggers
- Firing alert notifications: alerts with
firingstatus will trigger a notification every hour
Alert resolution criteria
Alerts will resolve (stop firing) when the metric value no longer meets the configured threshold condition.The actual timing between metric changes and alert notifications can vary based on when each interval aligns. In the worst case, it could take up to 75 seconds (30s metrics collection + 15s Prometheus evaluation + 30s Alert Manager delay) for a new condition to trigger a notification.
Manage alerts
You can deactivate an alert without deleting it. Deactivated alerts won’t send notifications or record history/status until reactivated. You can also test, duplicate or delete the alert at any point. Select the event and click the three dots in the top-right corner.Alert history
Each alert will keep a history of when it was triggered and the status over time. This gives you an overview of successful or failed deliveries. Alerts with thefiring status will trigger a notification every hour.
Alert list
Go to Settings > Alerts to see all the alerts, grouped by owner. You can sort the view by name, status or destination and activate/deactivate as required. You can also customize this view to show/hide columns relevant to you.Configure integrations
Conduktor Console can integrate with Slack, MS Teams and any system that receives webhooks. Enabling the Slack integration requires creating a Slack application, installing this to your Slack workspace, inviting your app to the channel and adding the application token to Conduktor. After enabling the MS Teams integration you will need a Teams webhook URL to create alerts with this destination.Disabling an integration used by existing alerts will not delete the alerts, but will prevent them from sending notifications externally.
Slack integration
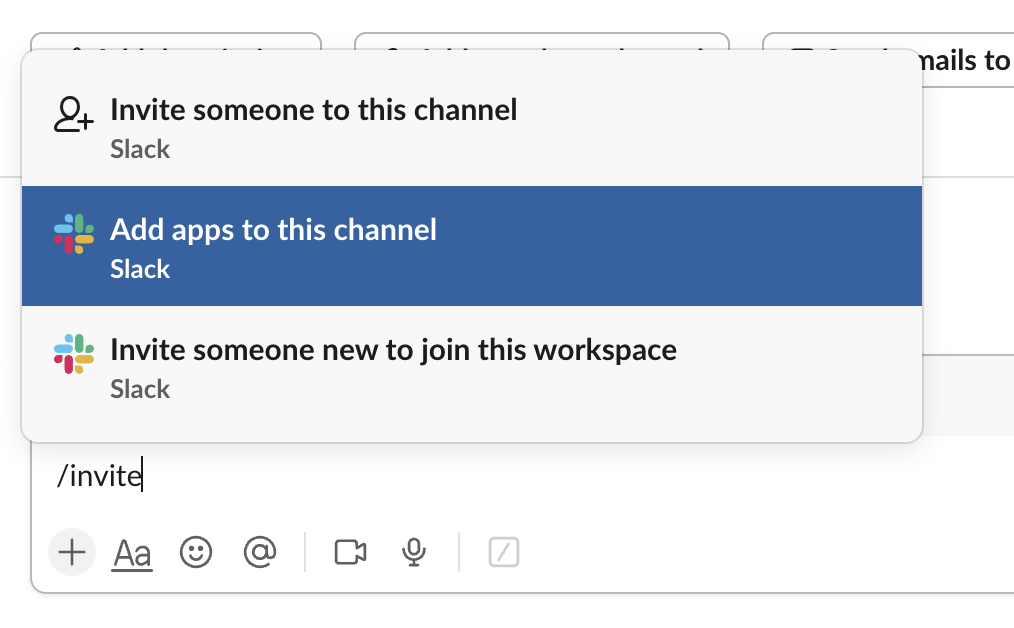
As part of configuring the Slack integration in Conduktor, you will find steps for creating a Slack application (a bot) using the app manifest template (provided in Conduktor). This app needs to be installed to your Slack workspace and the OAuth token added to the Conduktor integration. Once configured you’ll need to add the application to the Slack channels you wish to send alerts too. You can do this by typing/invite in the channel and choose the application you have just created., or through managing the app within Slack.
not_in_channel error. Once the applications is invited to the channel, you’ll be able to send alerts to that Slack channel.
Email integration
Email integration allows you to receive notifications directly to your inbox. Setting up email alerts requires configuring your SMTP server details and authentication credentials.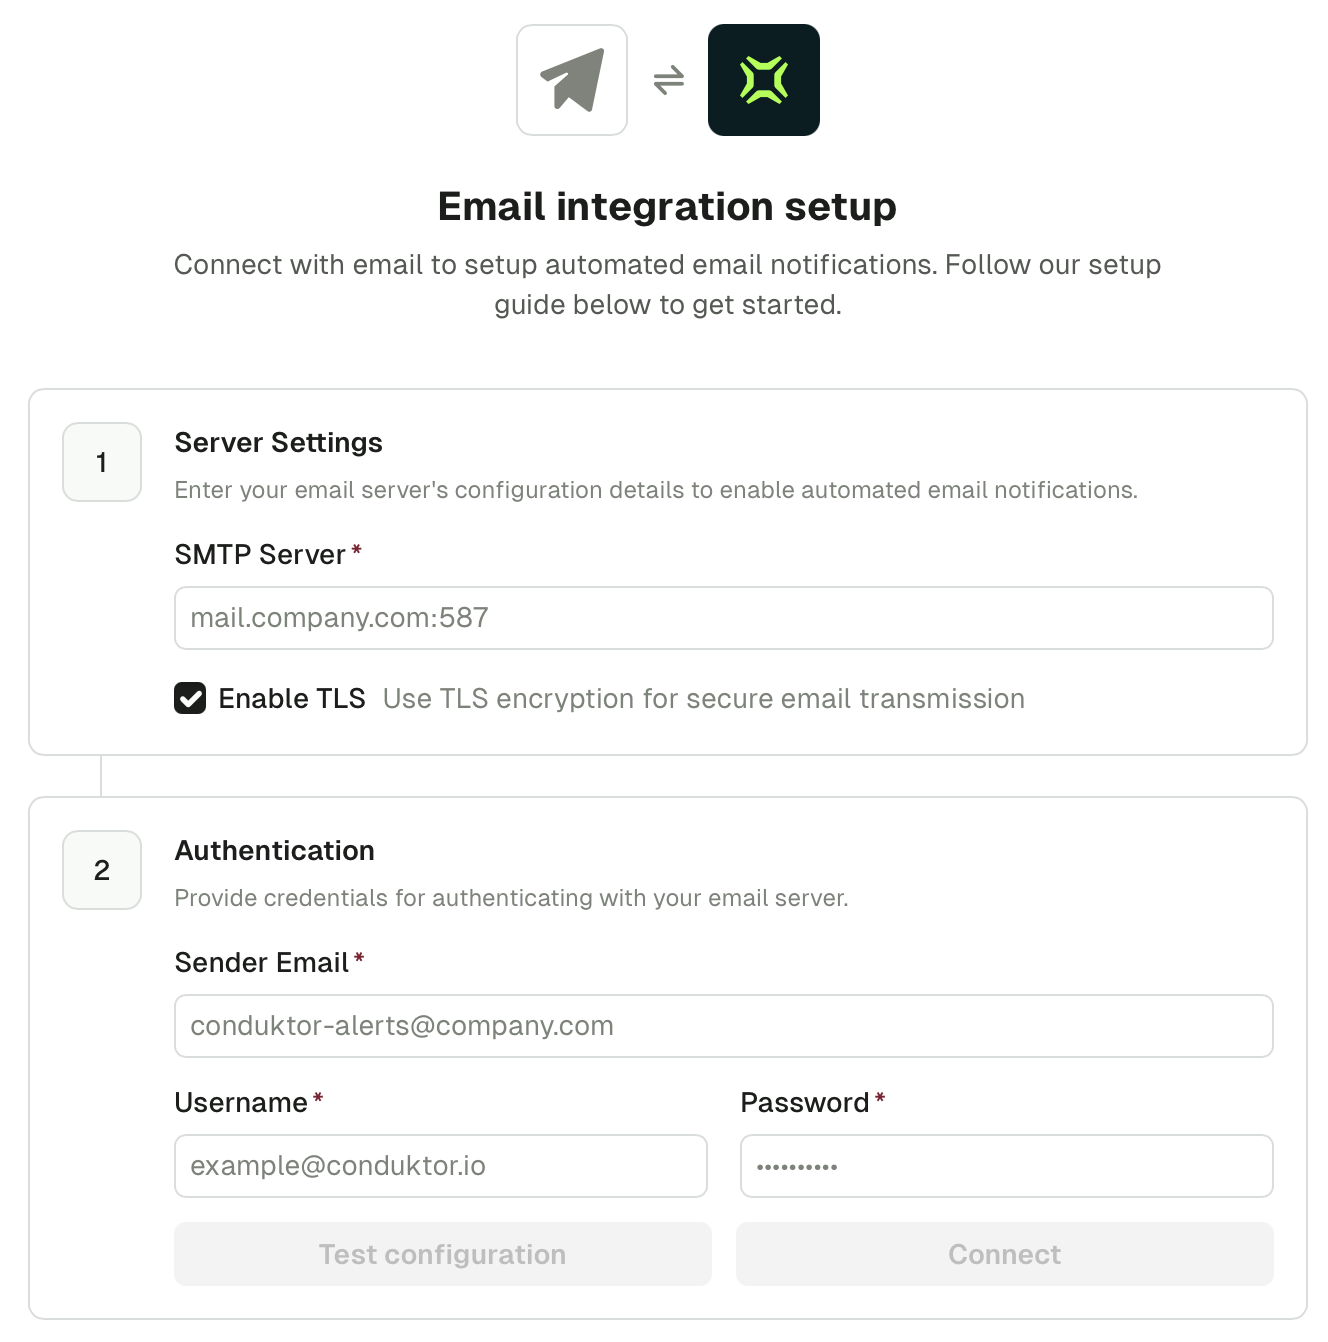
-
Server settings: configure your SMTP server details to enable email delivery
- SMTP server: enter your email server address with a port (e.g.,
mail.company.com:587) - TLS encryption: (recommended) enable TLS encryption for secure email transmission
- SSL configuration: you can skip SSL checks or upload custom certificates for enhanced security
- SMTP server: enter your email server address with a port (e.g.,
-
Authentication: provide credentials for authenticating with your email server
- Sender email: the email address that will appear as the sender for all alerts (e.g.,
conduktor-alerts@company.com) - Username and password: your email server authentication credentials
- Test configuration: click Test configuration to validate your configuration before saving changes
- Sender email: the email address that will appear as the sender for all alerts (e.g.,
{{clusterName}}, {{threshold}}) to embed alert variables dynamically in the body of the email.
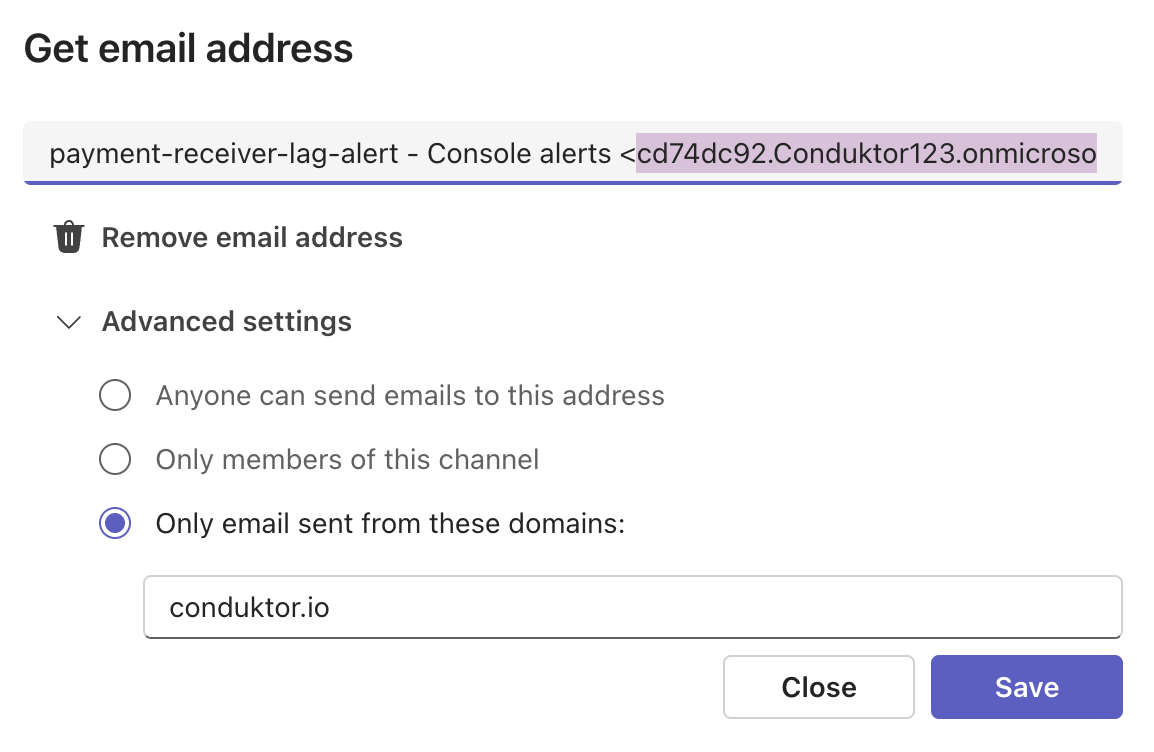
Email alerts used for Teams
We directly integrate with Microsoft Teams using Workflows. If you’re not allowed to use this feature, you can use the email integration to send alerts to Microsoft Teams channels. For this, first set up the email integration and get the channel’s email address. You can find this in the channel settings under Get email address.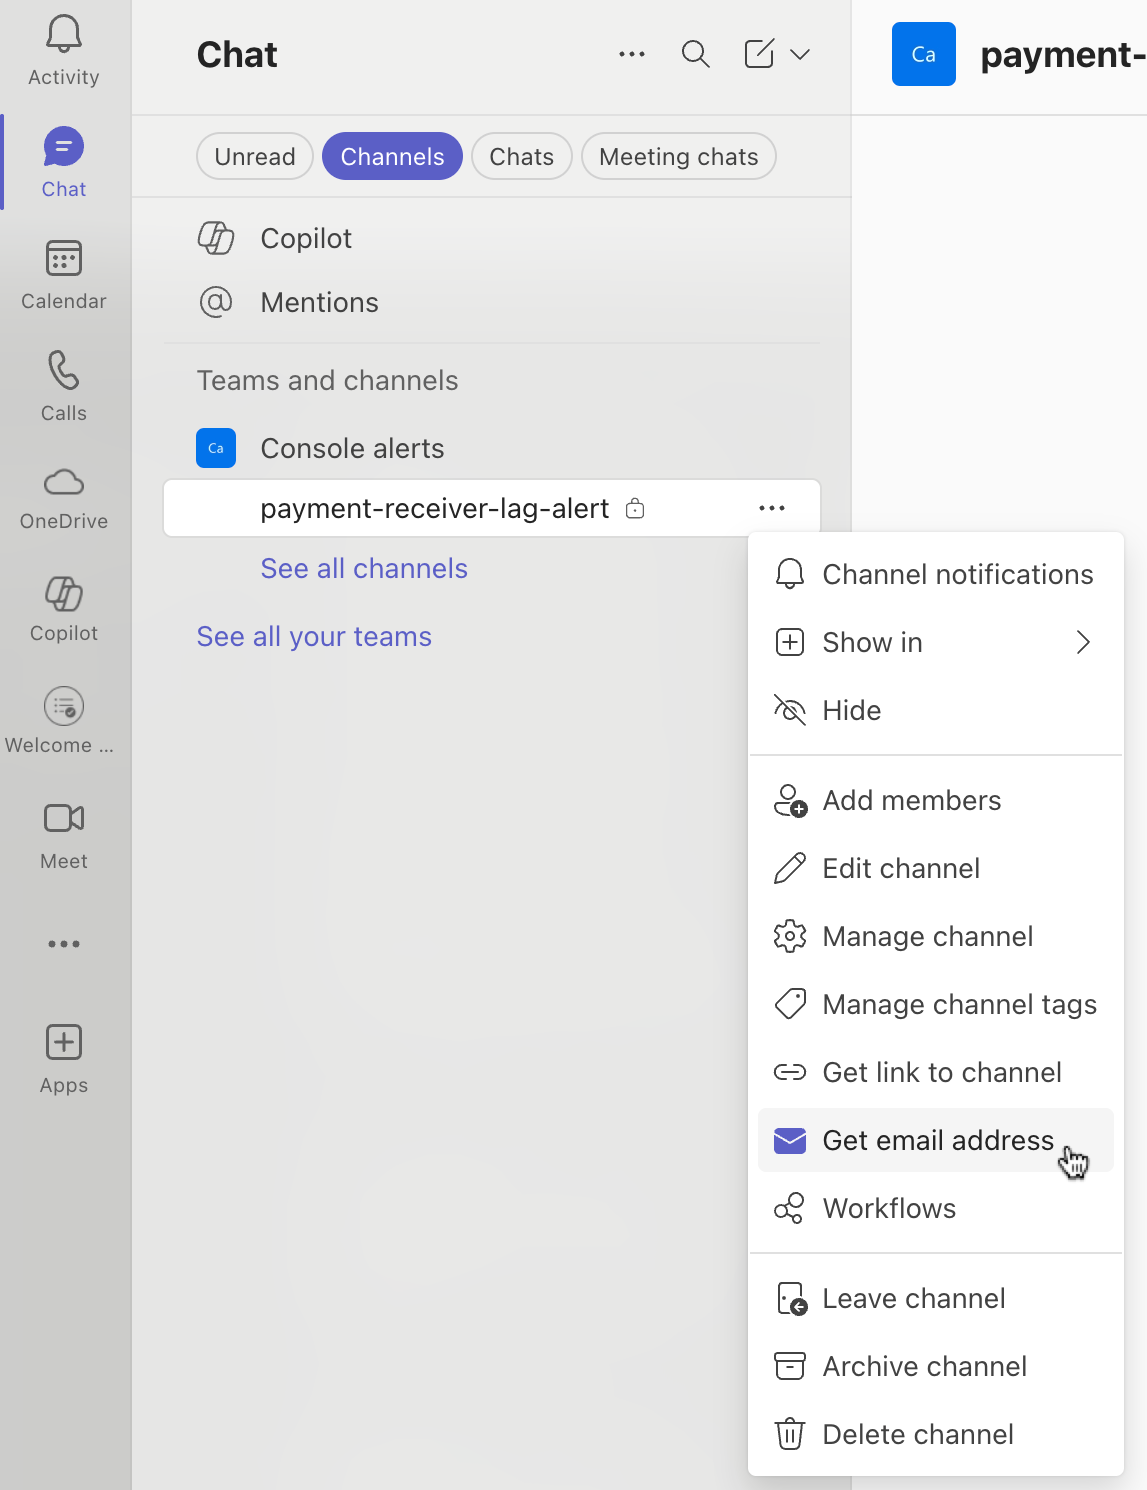
Microsoft Teams integration using Workflows
This guide focusses on the Workflows integration, rather than webhooks which are used with Microsoft teams to handle alerting from Conduktor’s monitoring. You can send notifications to different rooms for different alerts. However, this room must be a Microsoft Teams standard room and not a shared room.Workflows setup
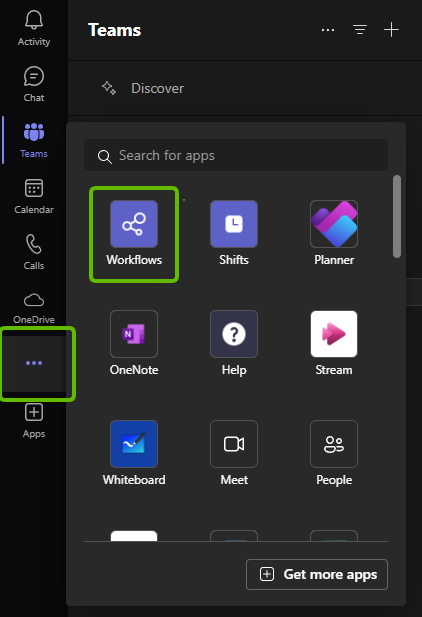
- Open the Workflows app within the chat or channel by right-clicking on the conversation or by clicking … then selecting Workflows.
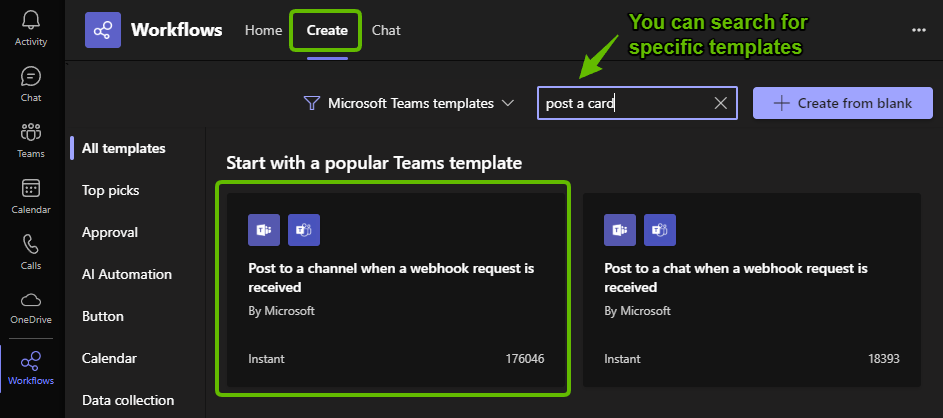
- In the Workflow app, click + New flow or select the Create tab and choose Post to a channel when a webhook request is received template.
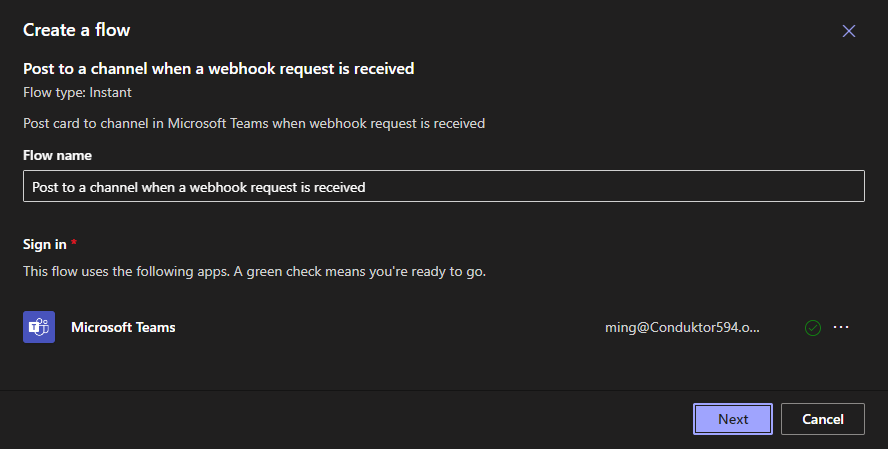
- Choose a name for this flow (or use the default Post to a channel when a webhook request is received) and choose who will own this workflow. It should default to the user logged into Teams. Click Next.
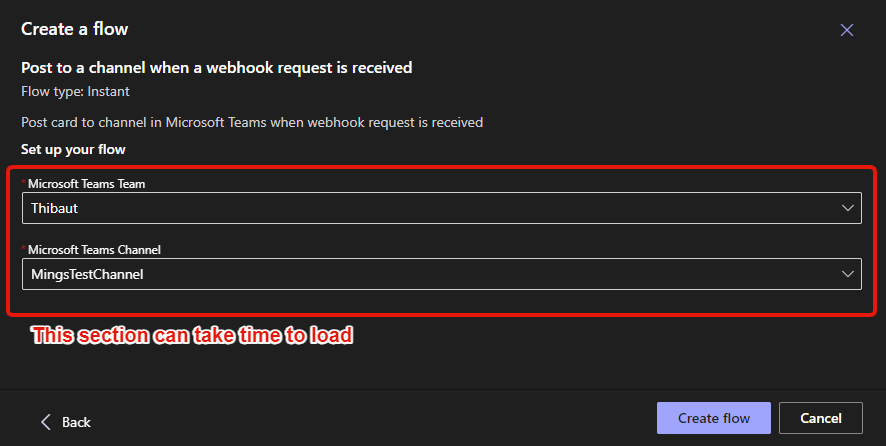
- Pick the team and channel you want to post to, then click Create flow. This page may take some time to load.
- Once you click on Create flow in the previous step, the next page should show you the URL for the webhook associated with the workflow you just created. Copy and paste this somewhere as it will be used in a later step and click Done.
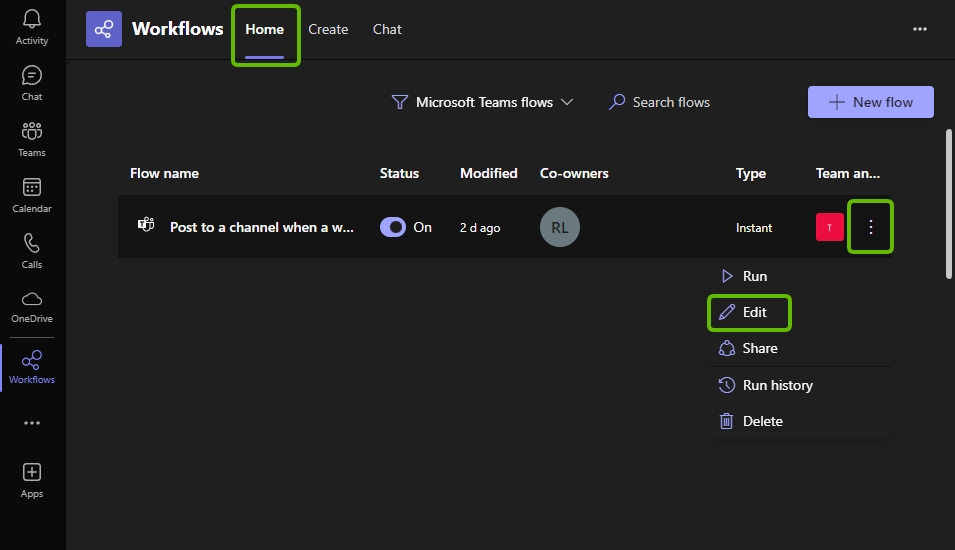
- Go back to the Home tab in Workflows and edit the newly created workflow by clicking … then Edit.
- On this page:
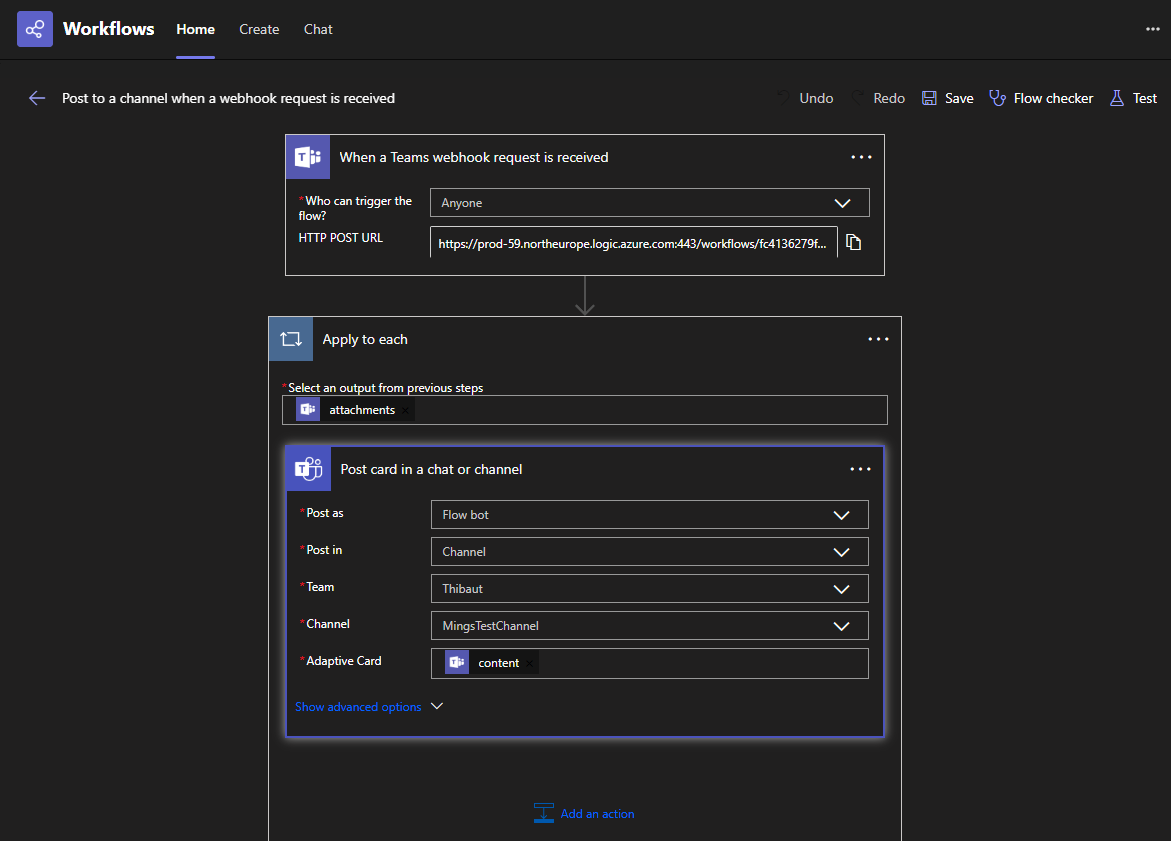
- Expand When a Teams webhook request is received to see the URL endpoint again, if you’ve not saved it from the previous step. You can also change who can trigger the flow. In this example we’ll use Anyone.
- Expand the second step and for Select an output from previous steps, pick Attachments. For Adoptive Card select content. The rest of the form should be filled in but you can change the channel and team here.
- Open Console and create a new alert or go to an existing one. In the Alert destination page select Teams. Paste the webhook URL and click Save. You can test your connection by clicking Send test.
- Fire some alerts and you should now see alert messages being posted in Microsoft Teams under the specified channel:
