Prerequisites
Set up Flink
1
Create a Global Cloud API key
In Confluent Cloud, create an API key and set Select key scope to Global.Console calls both the Confluent Cloud control plane (organization, environments, compute pools and Kafka clusters) and the regional Flink SQL endpoints with this key. Only a Global key authenticates on both: a key scoped to a single resource type, such as Flink region or Cloud resource management, doesn’t. The key’s principal also needs access to the environments, compute pools and topics your users will query in Confluent Cloud.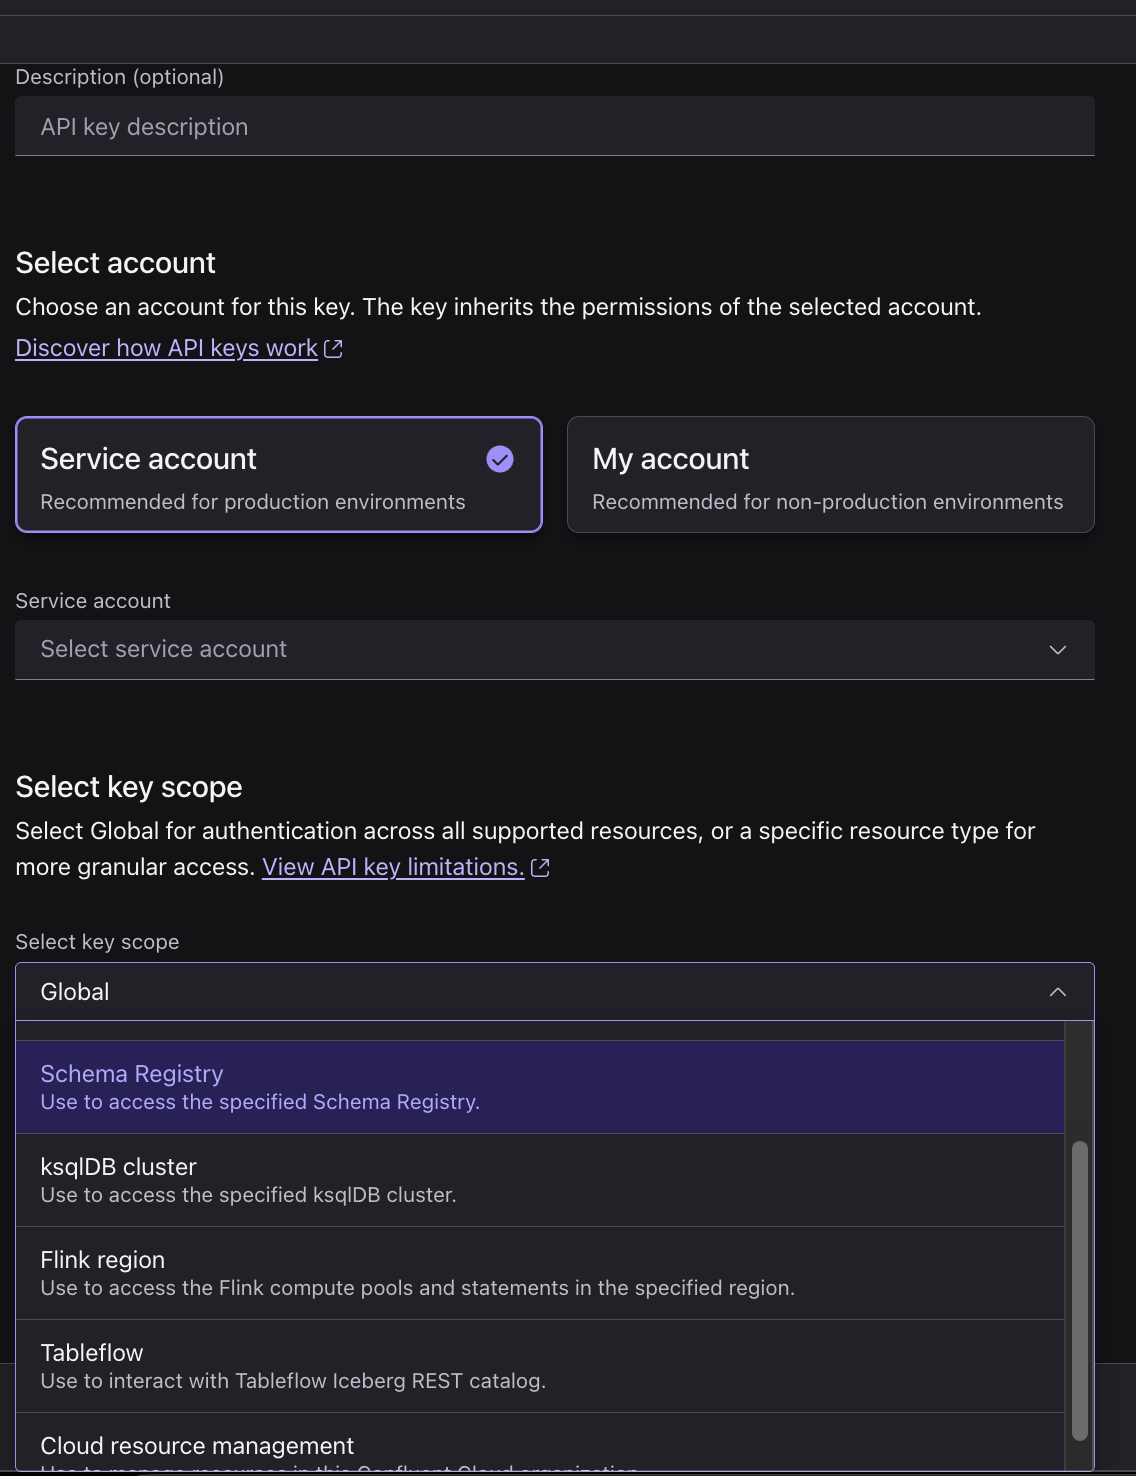
2
Register your Confluent Cloud organization
In Console, go to Settings > Confluent Cloud and click + Organization.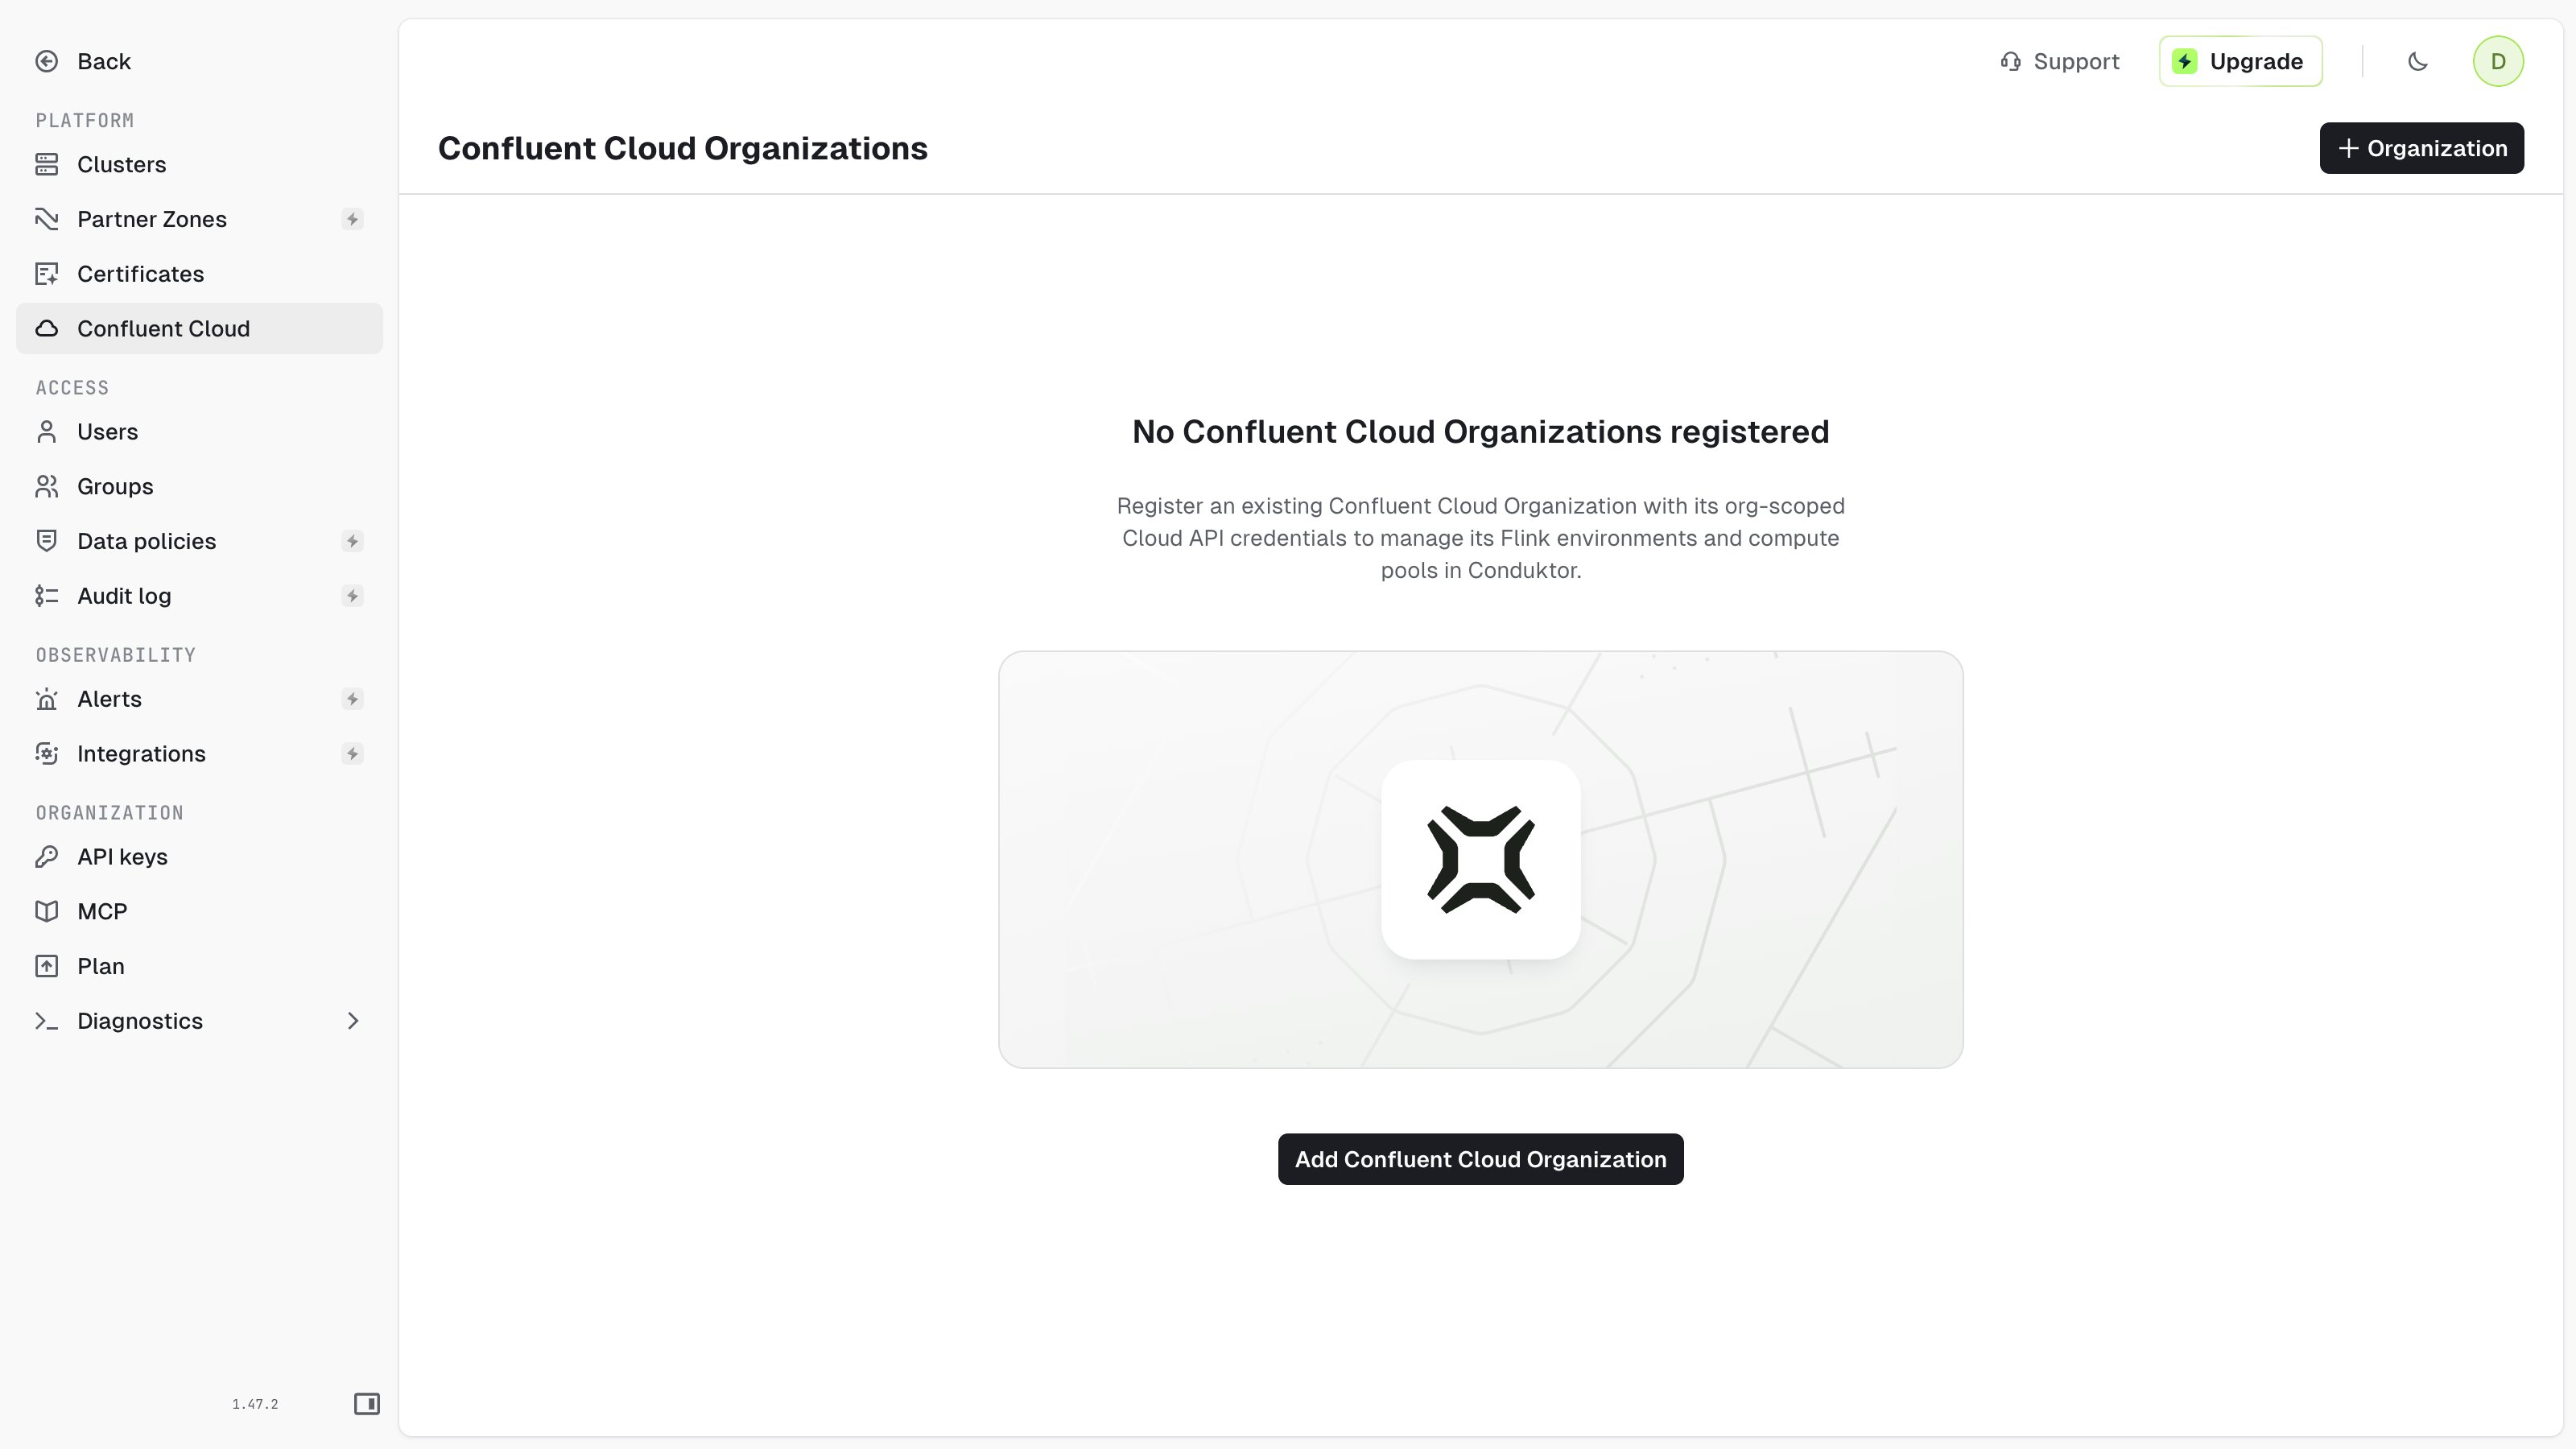
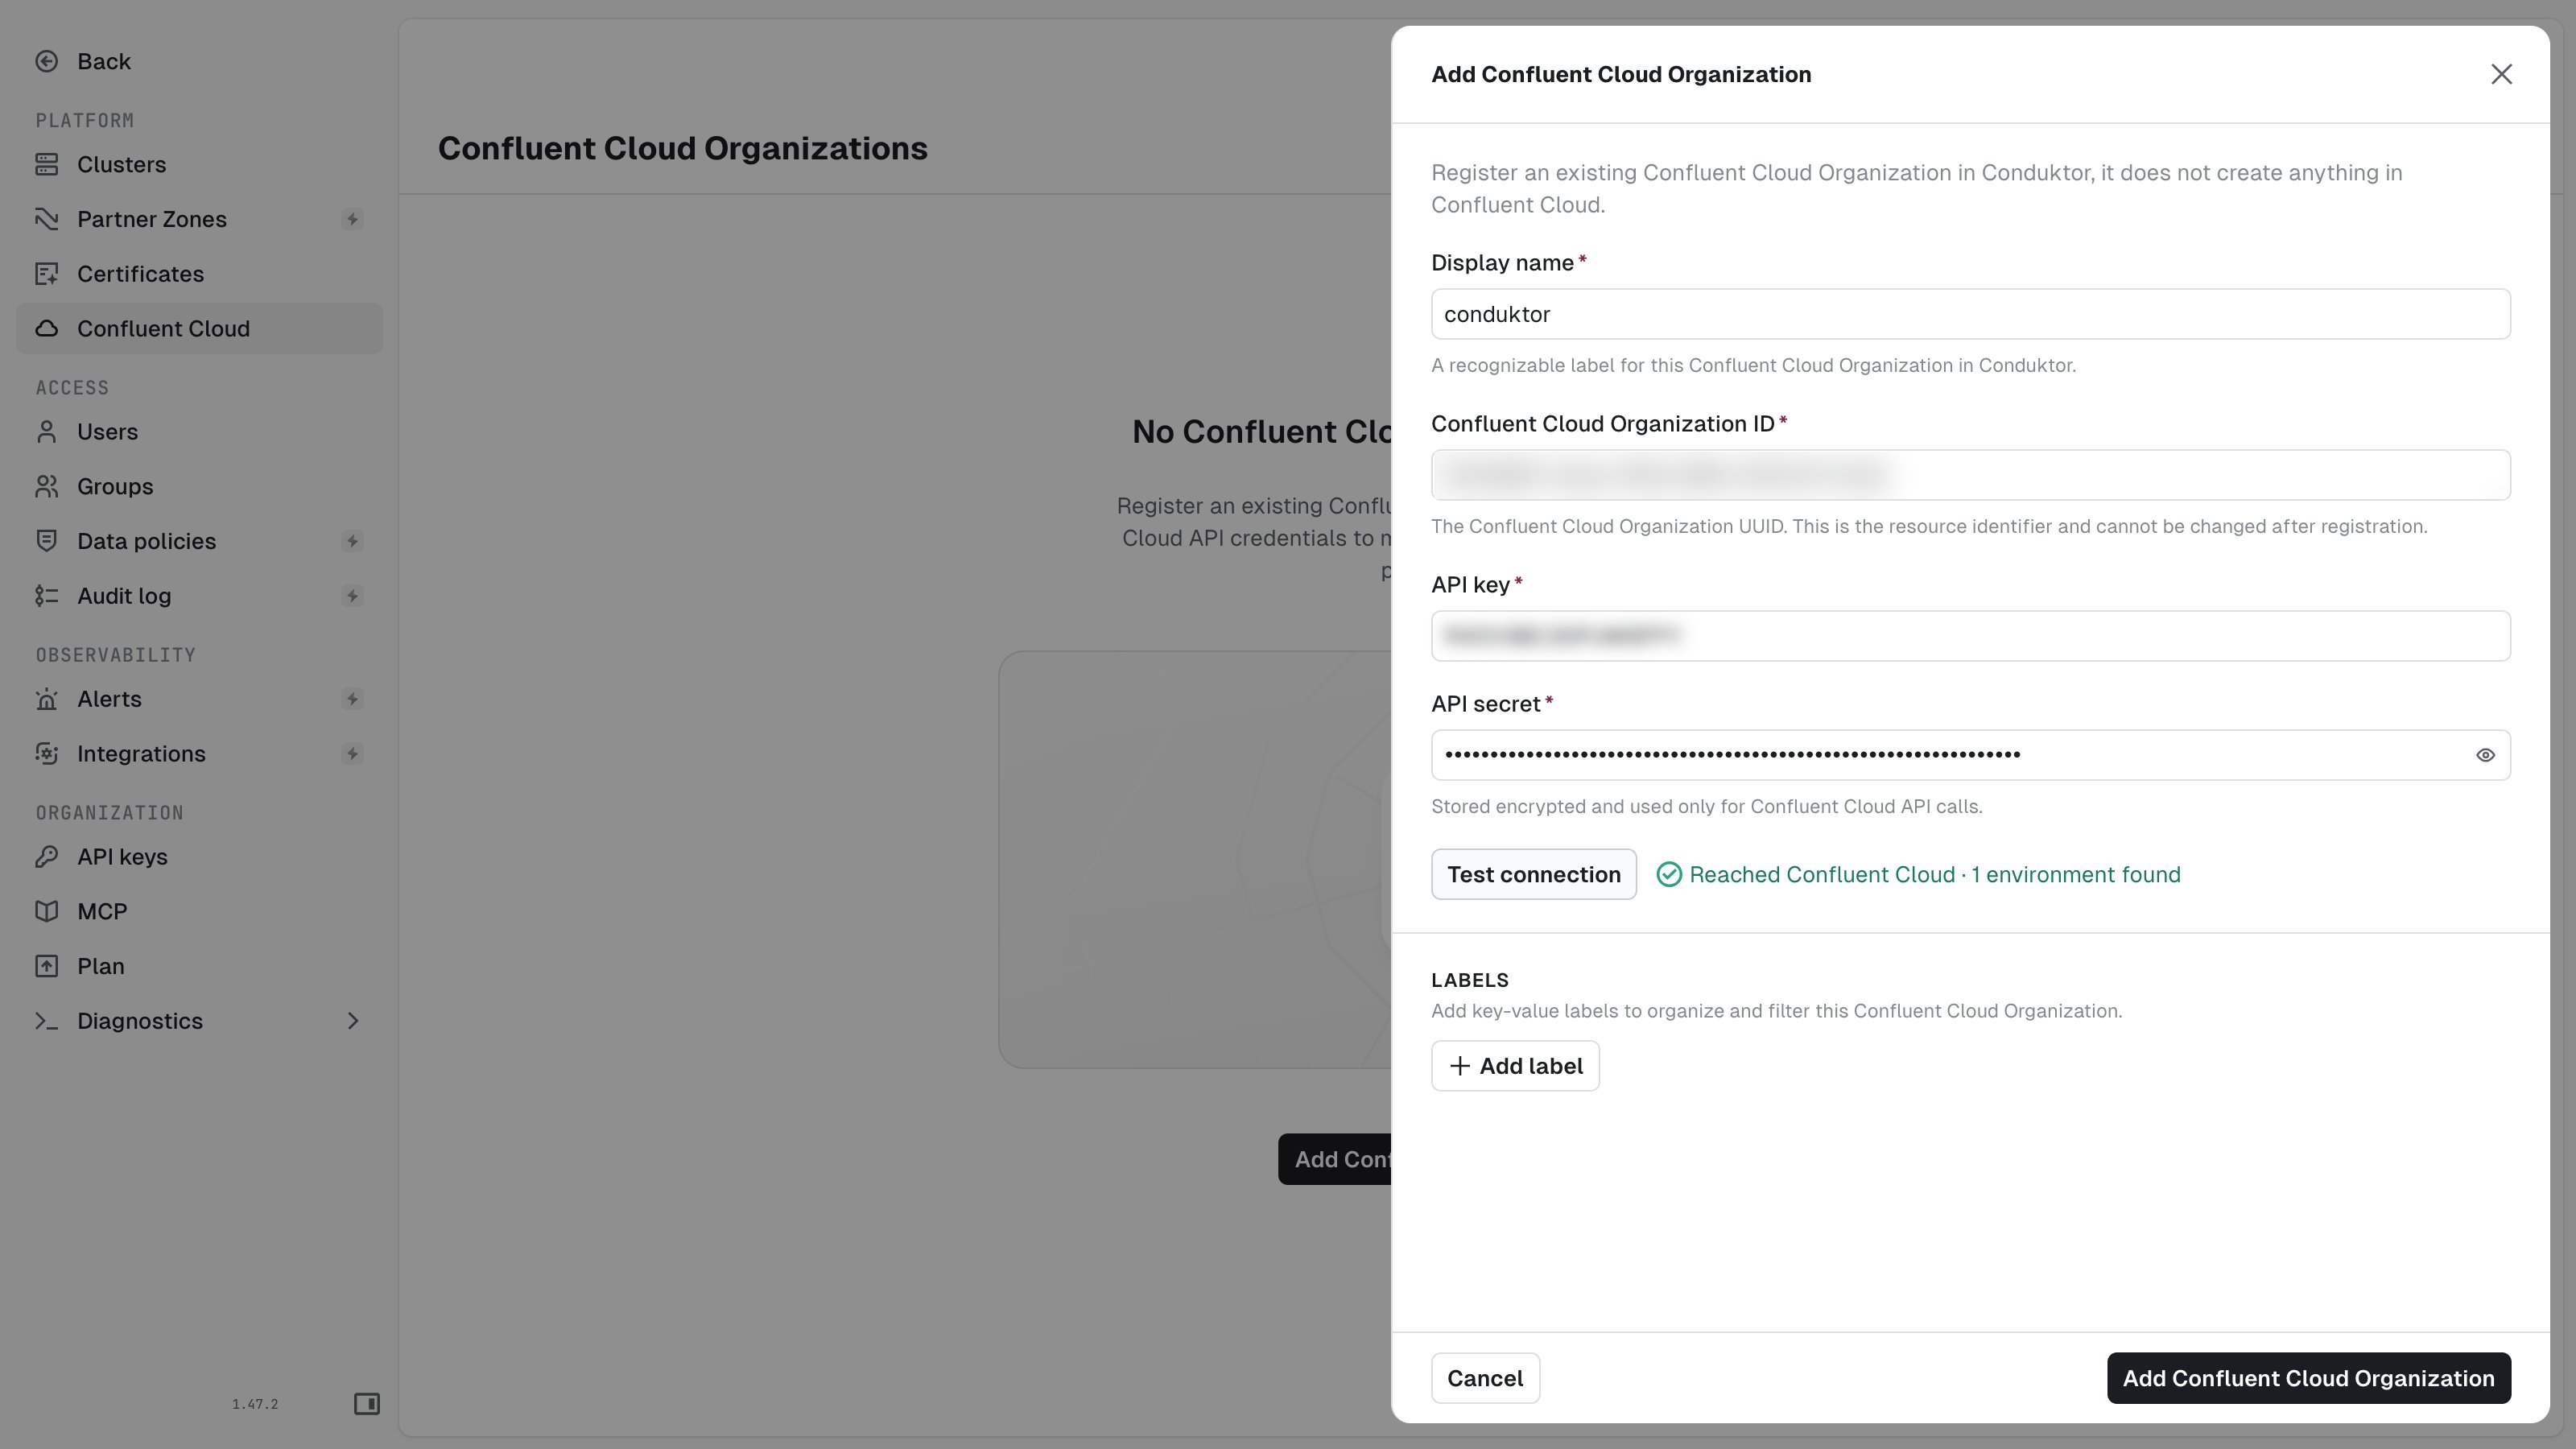
- Display name: a label for this organization in Console.
- Confluent Cloud Organization ID: the organization UUID, from your Confluent Cloud organization settings. You can’t change it after registration.
- API key and API secret: the Global key from the previous step. Console stores the secret encrypted.
Confluent Cloud denied access with these credentials, check that the key has the Global scope.3
Give users access
Admins can run Flink on every compute pool. For other users and groups: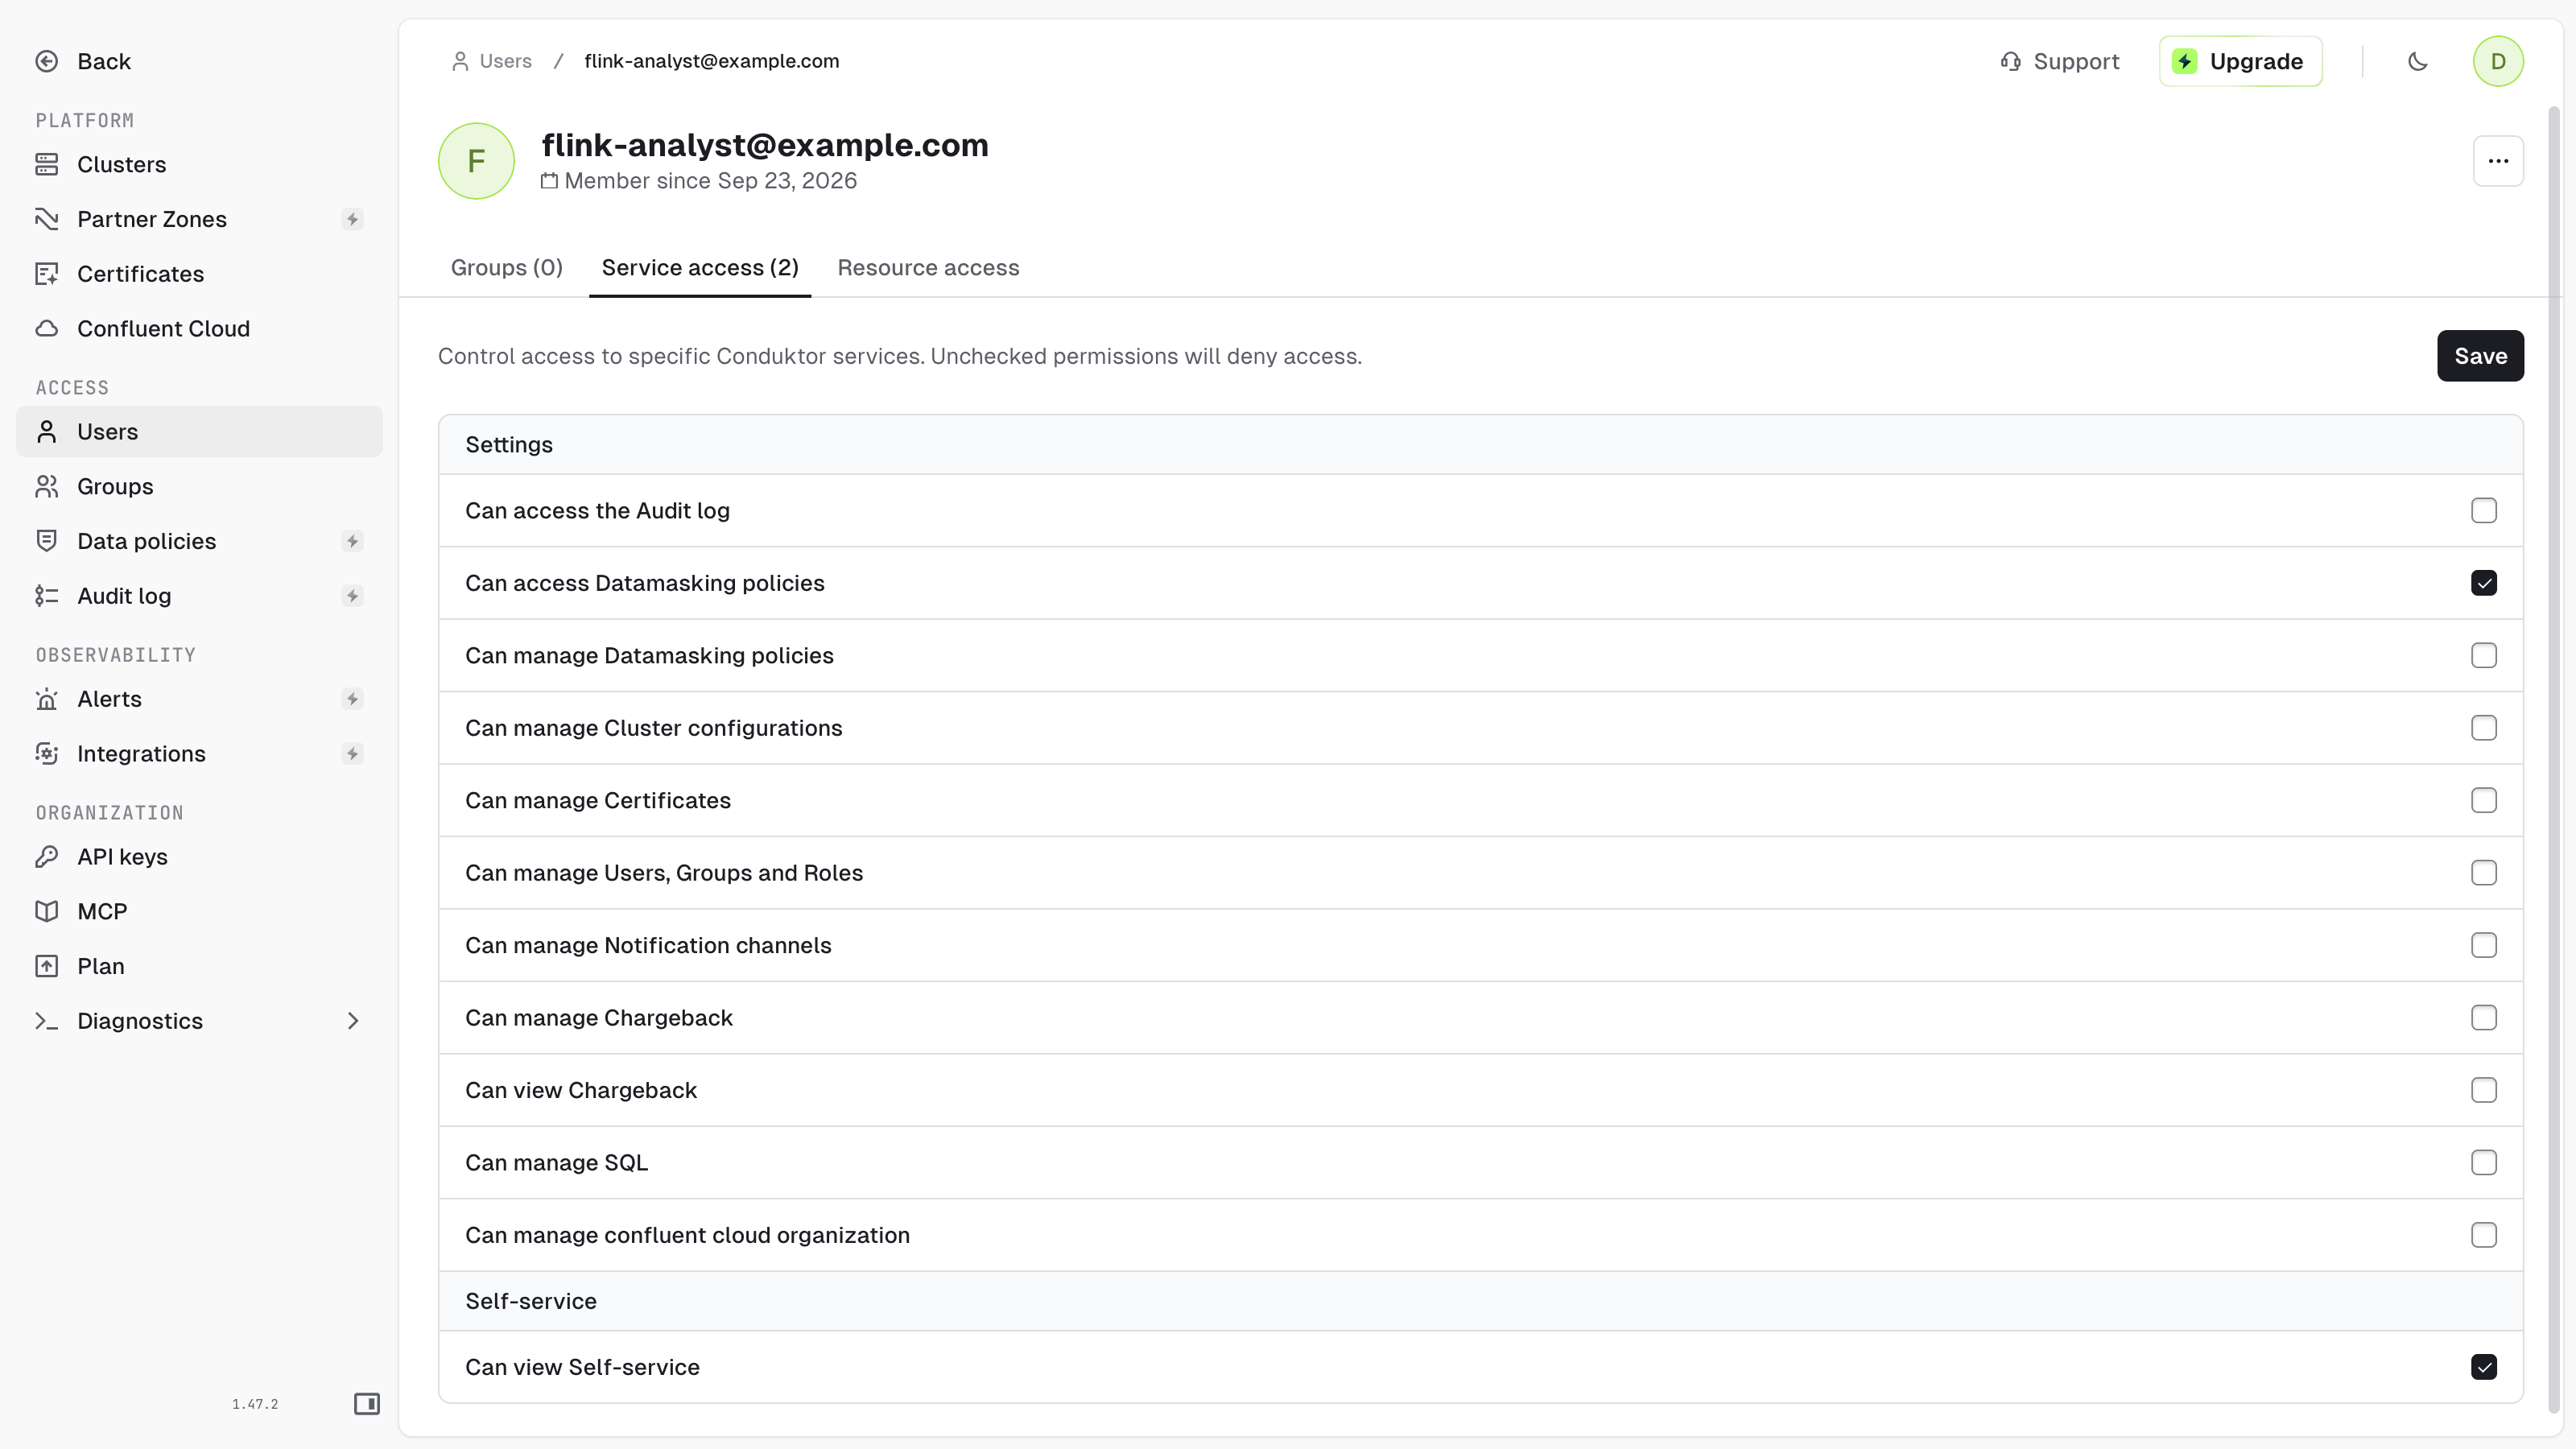
- Open the user or group, then the Resource access tab.
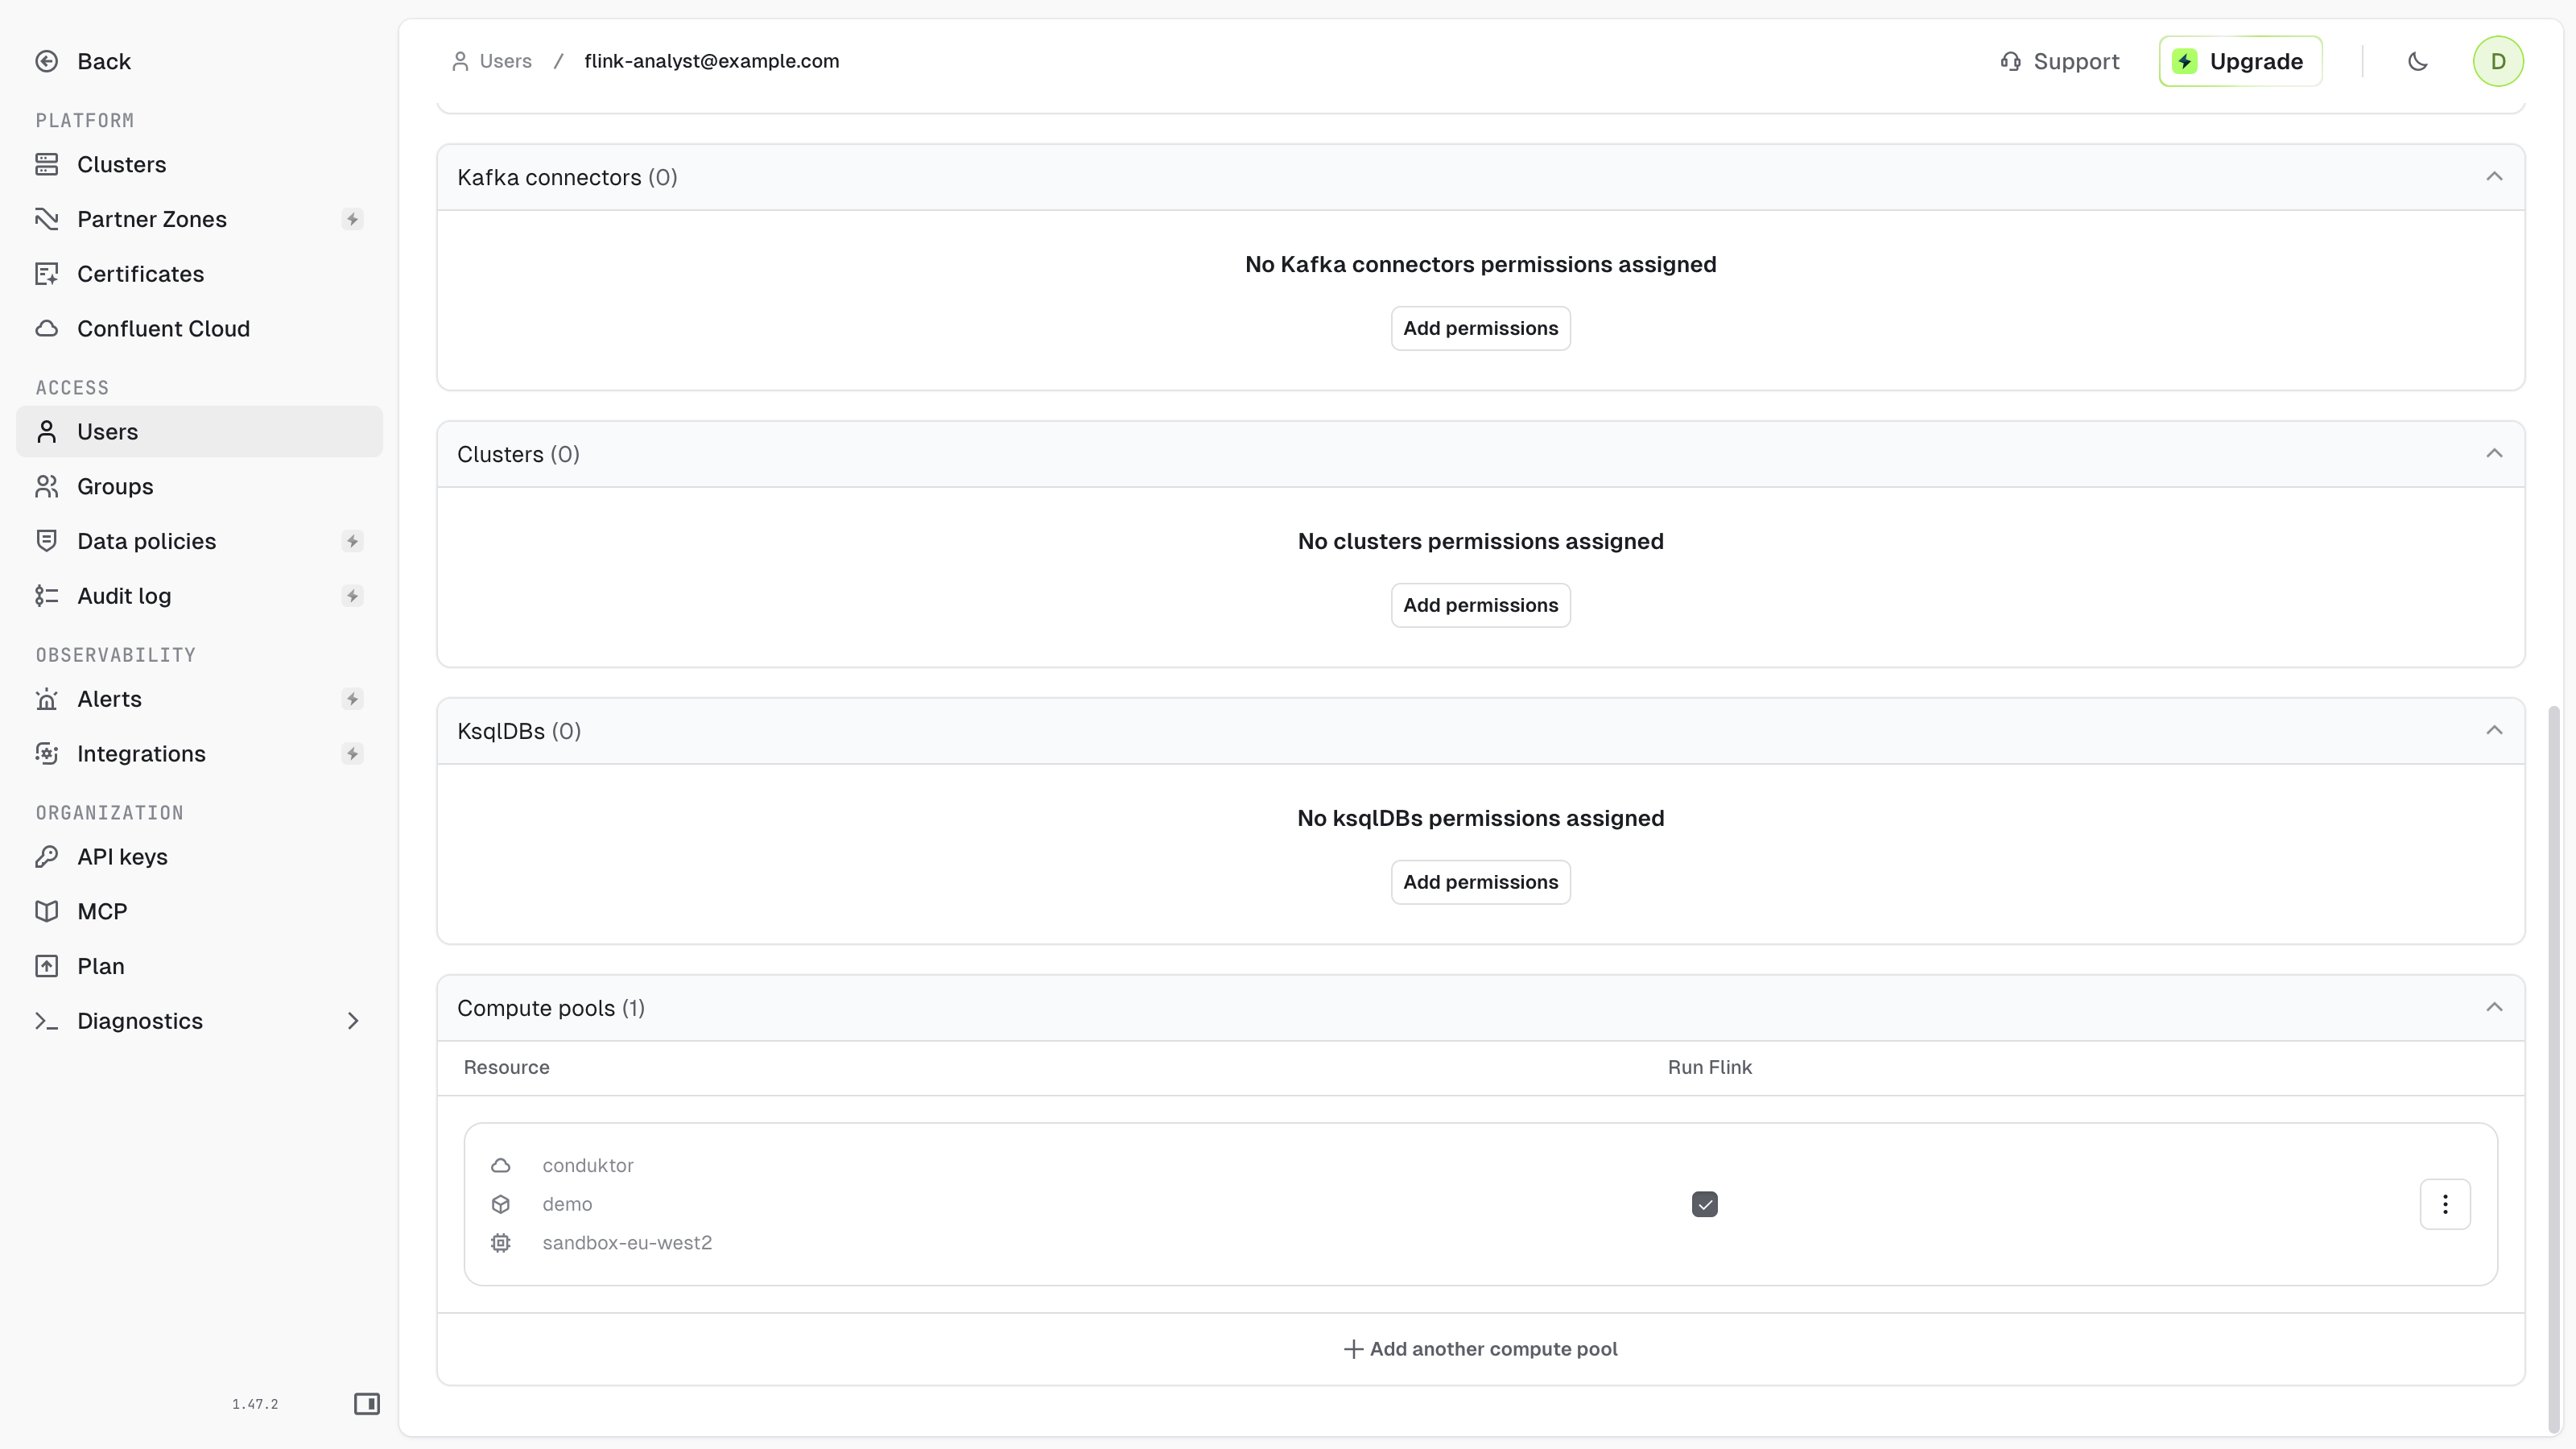
- Under Compute pools, click Add permissions and pick the organization, the environment and a compute pool (or All compute pools).
-
Select Run Flink, then click Save changes.
Run a statement
Go to Flink, click + New statement, then:- Pick the Catalog (your Confluent Cloud environment) and the Compute pool. Check the compute pool before you run: Console preselects a default compute pool, which can be in a different region from the cluster you query.
- Write your statement. The Catalog panel lists the clusters and topics you can query, with the columns of each topic’s value schema.
- Pick the Result mode, then click Run.
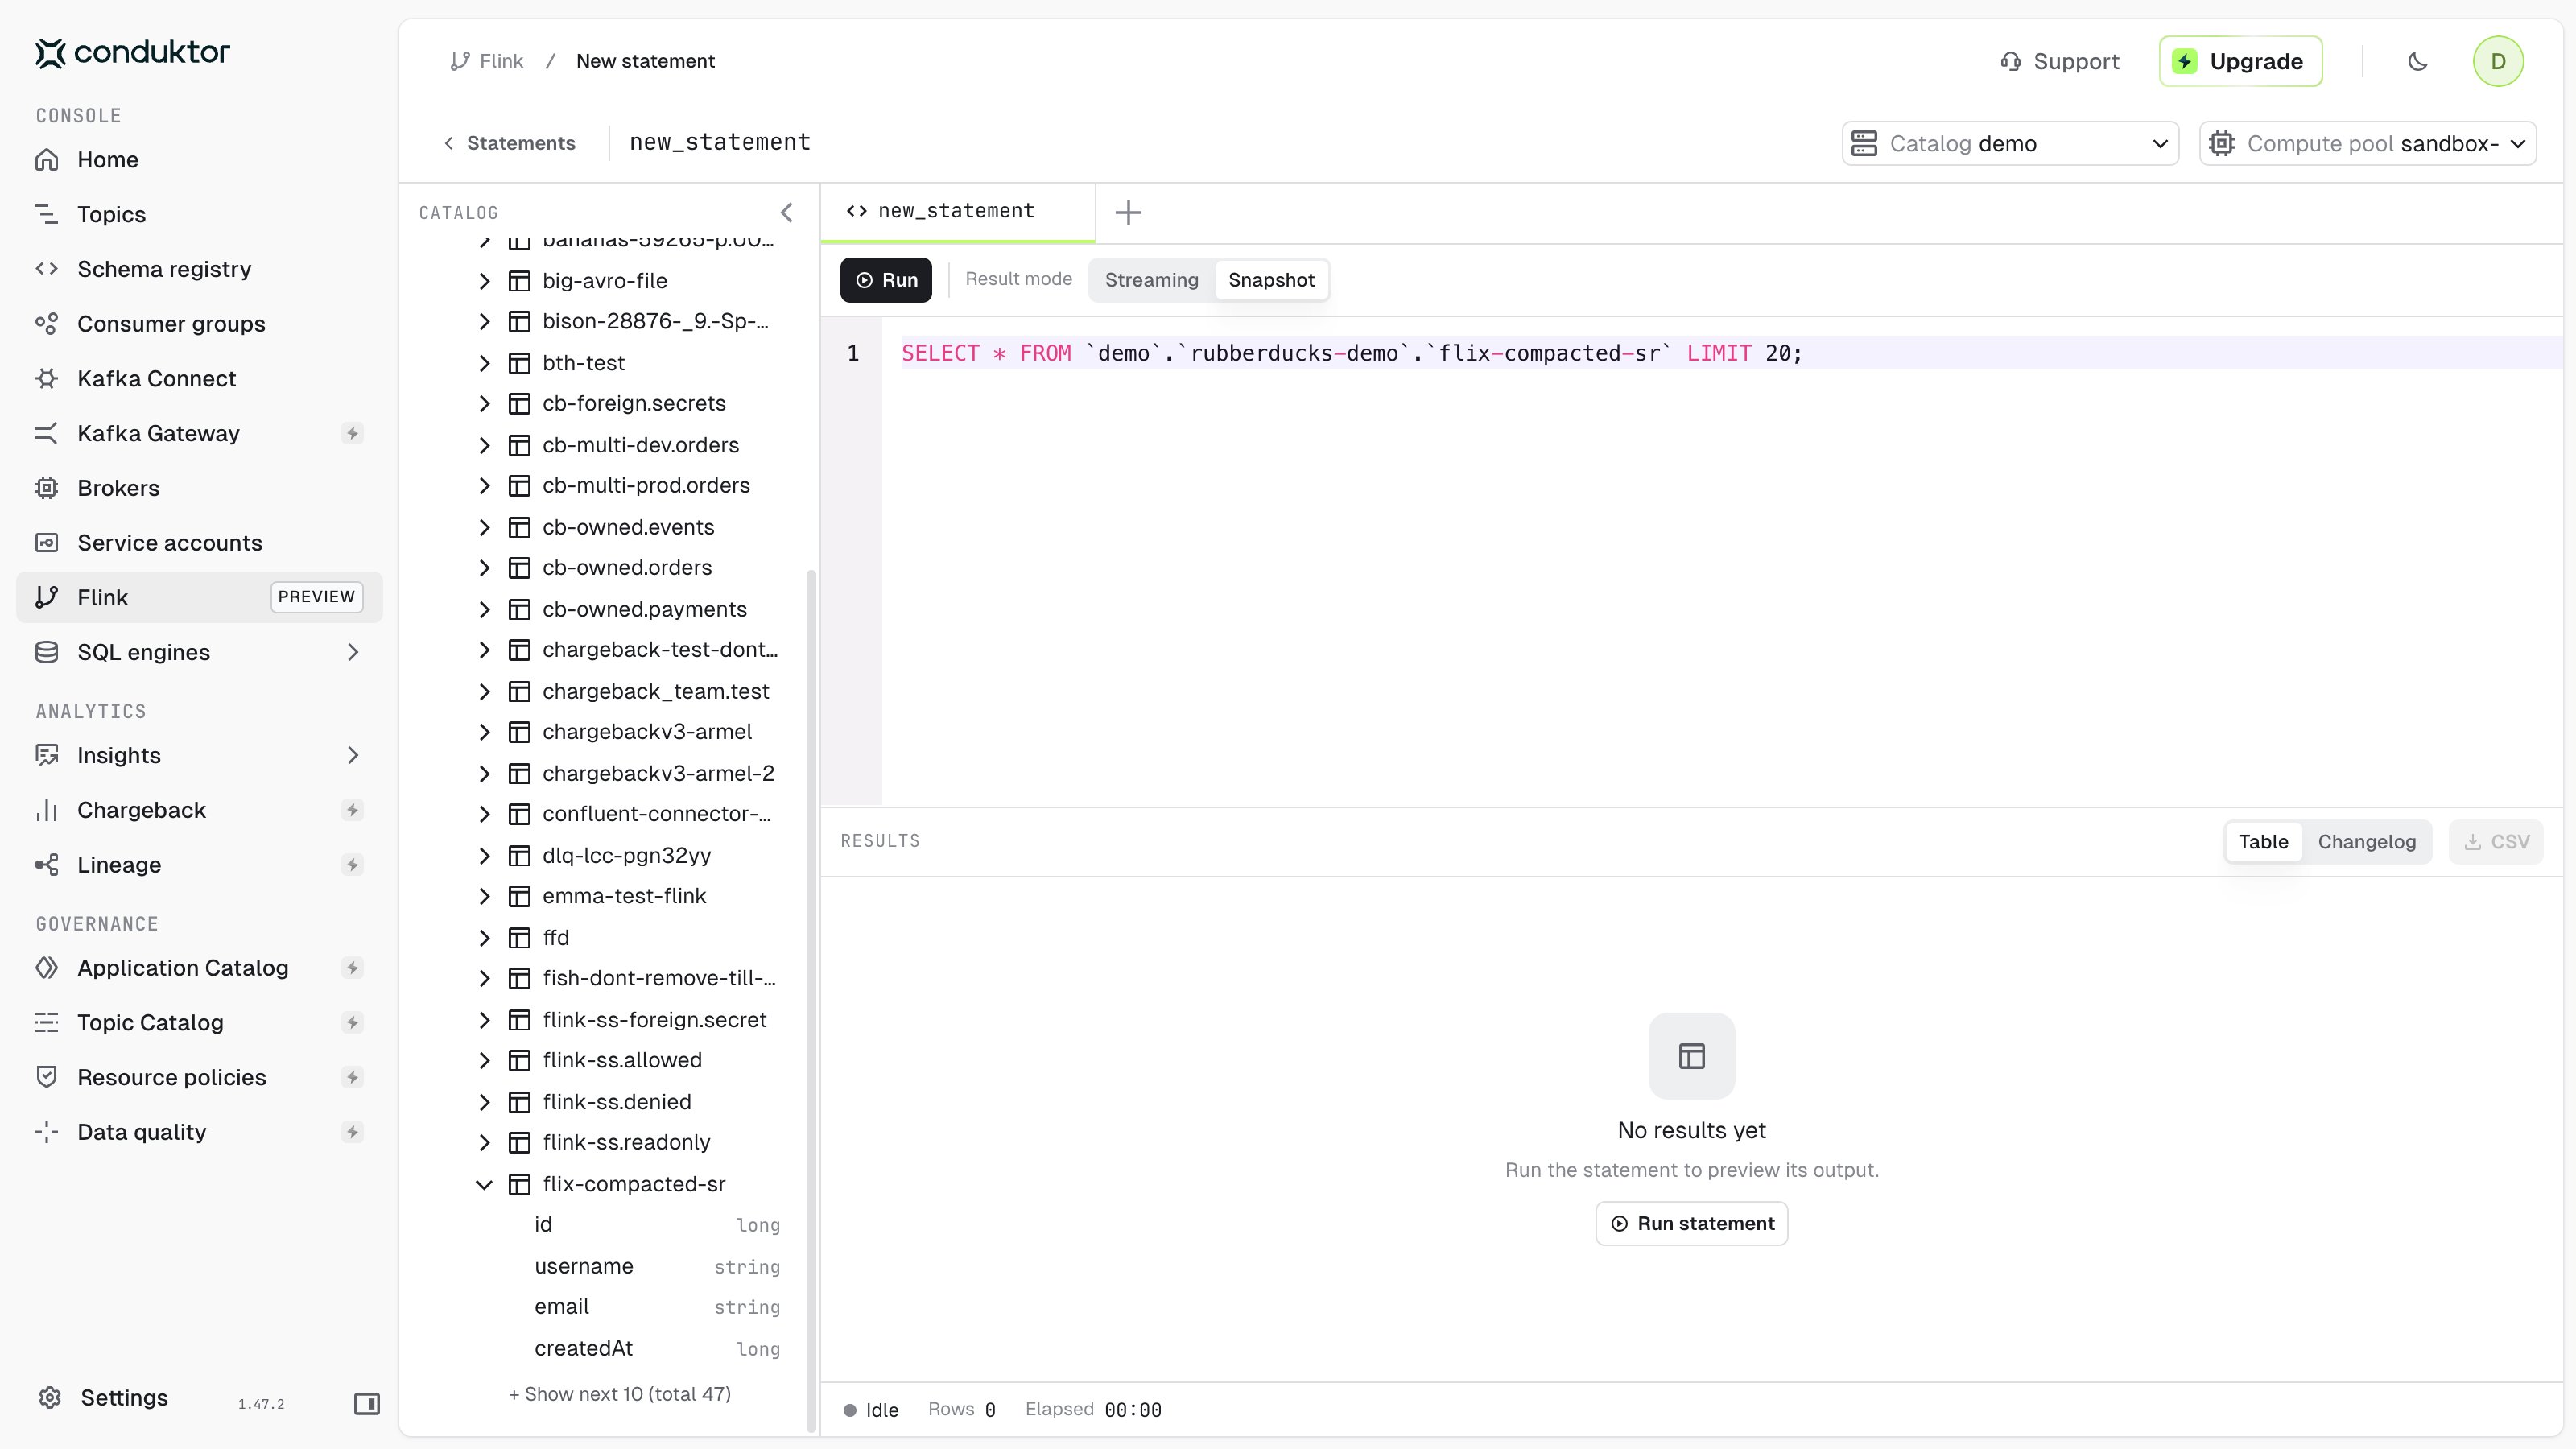
`<environment>`.`<cluster>`.`<topic>` or `<cluster>`.`<topic>`, where the cluster is its Confluent display name or its lkc- ID. For example:
Result modes
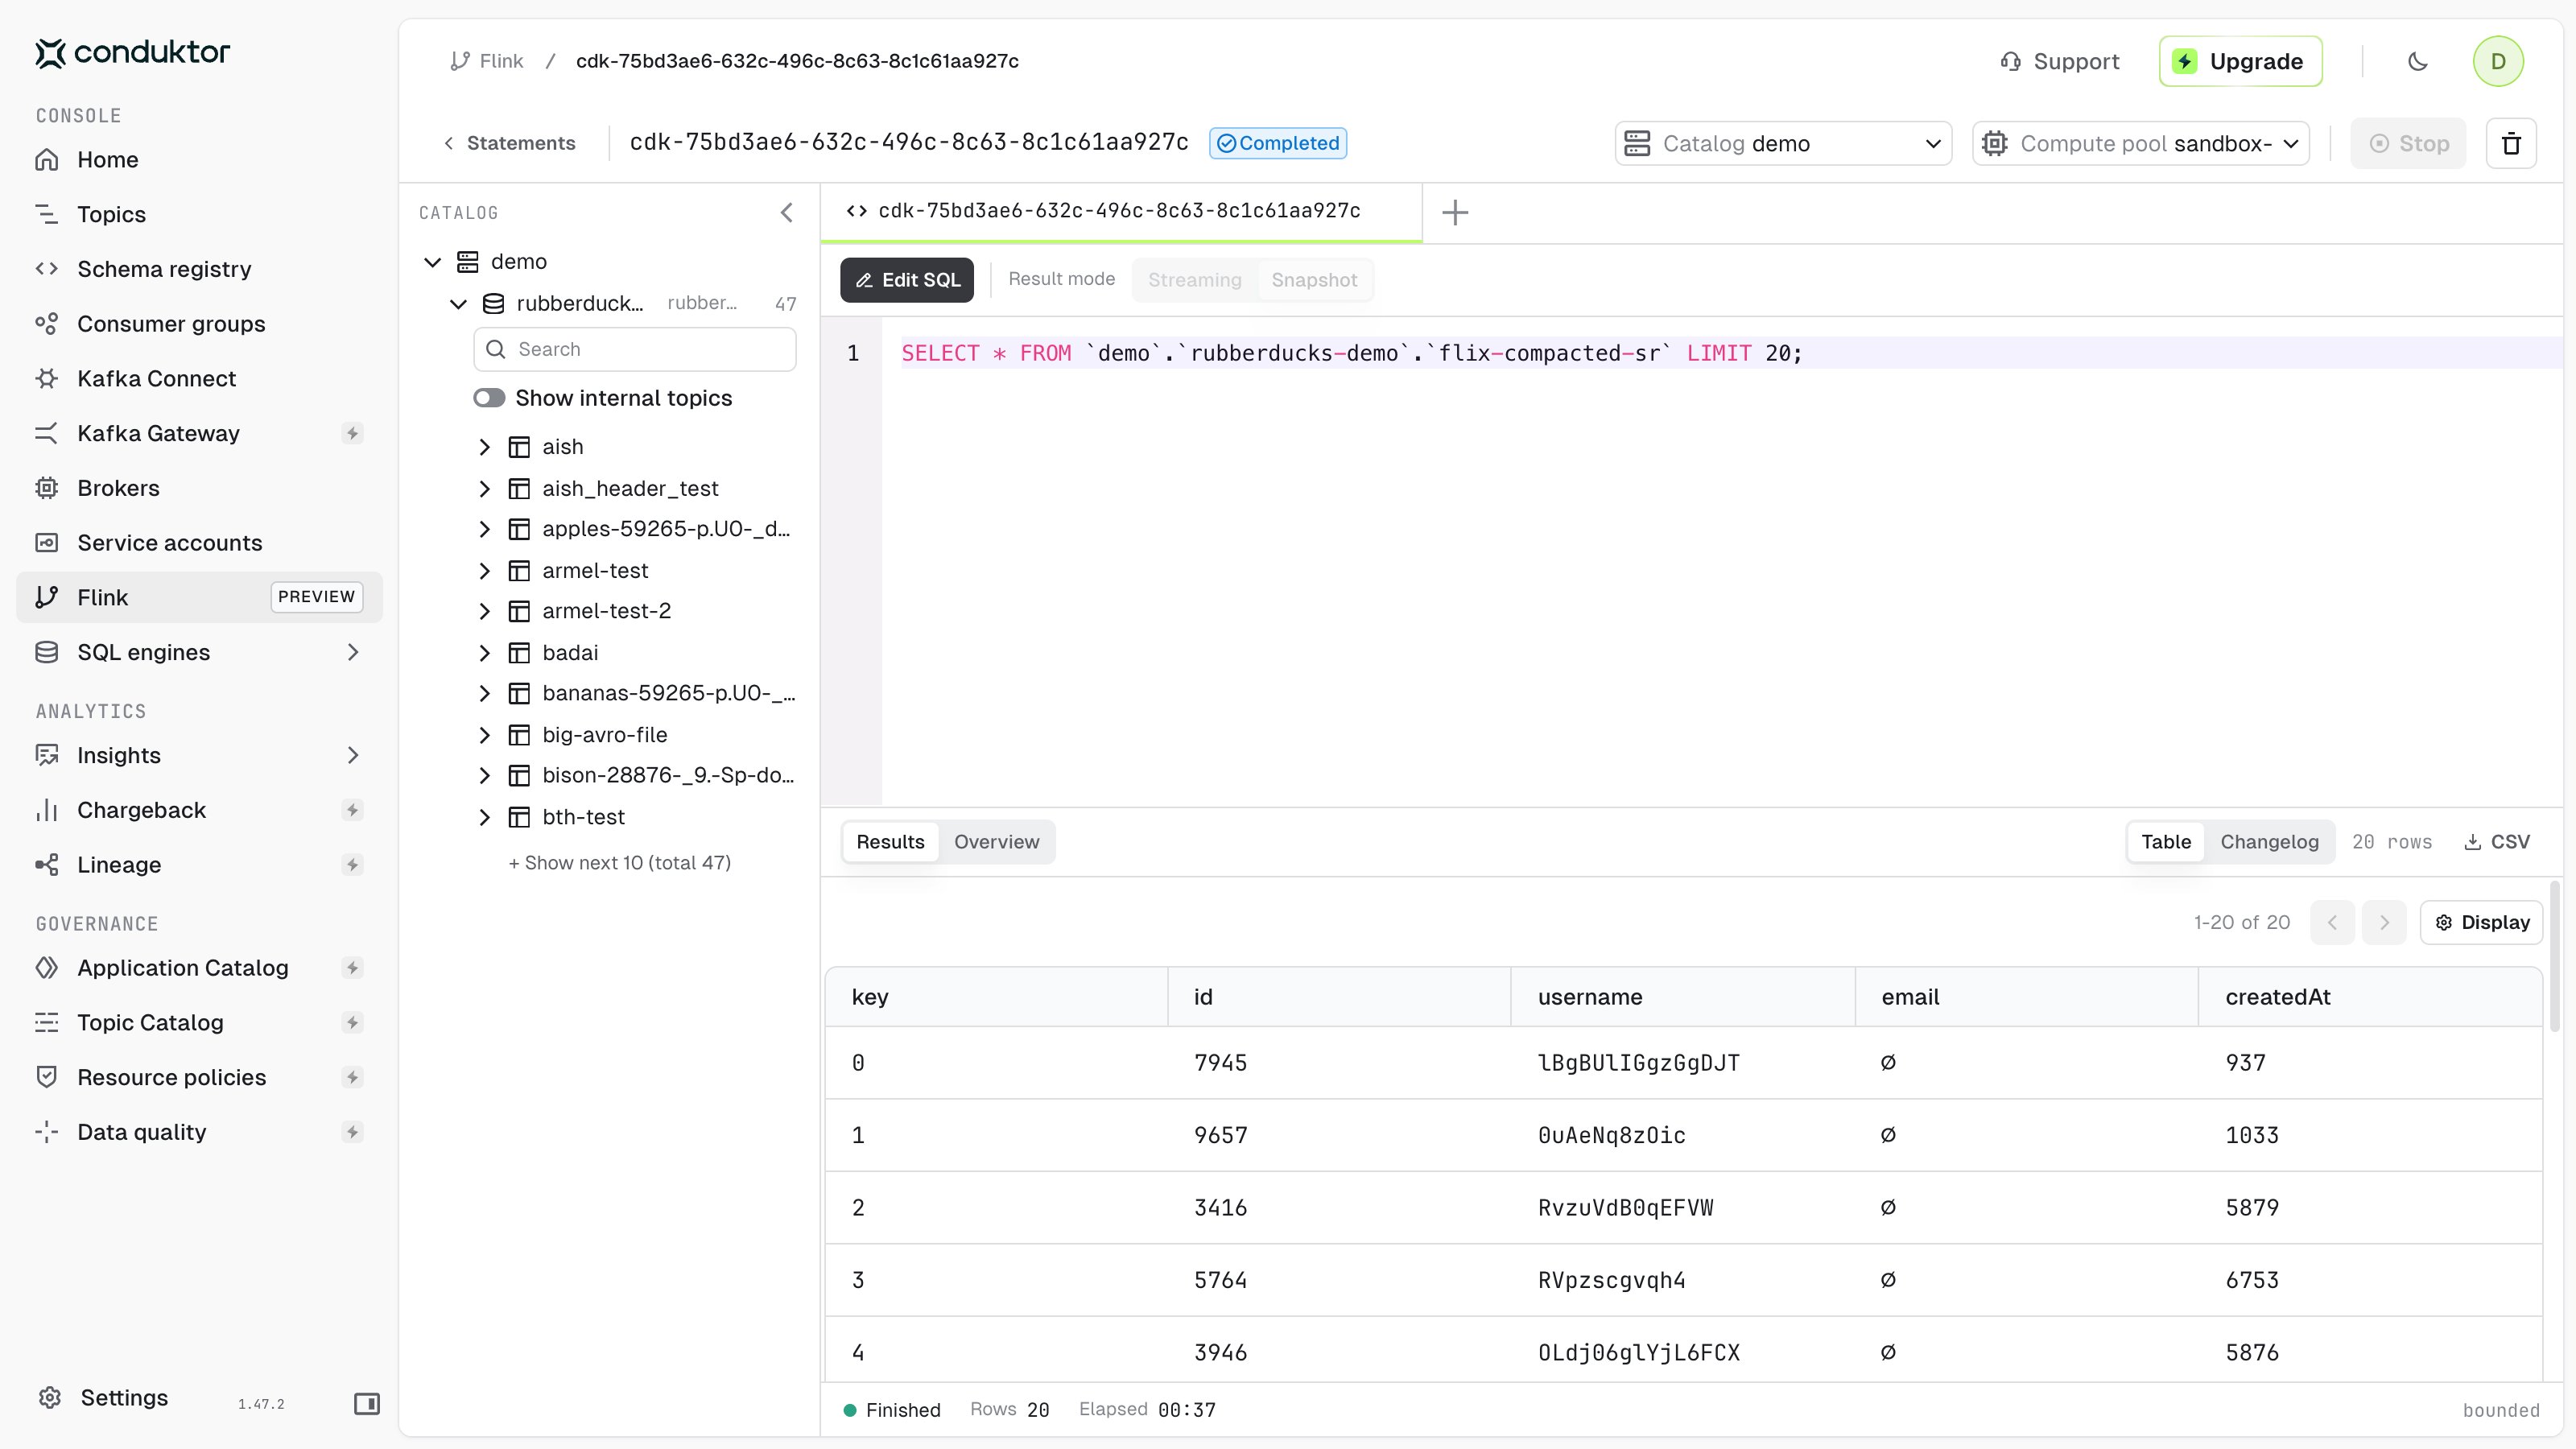
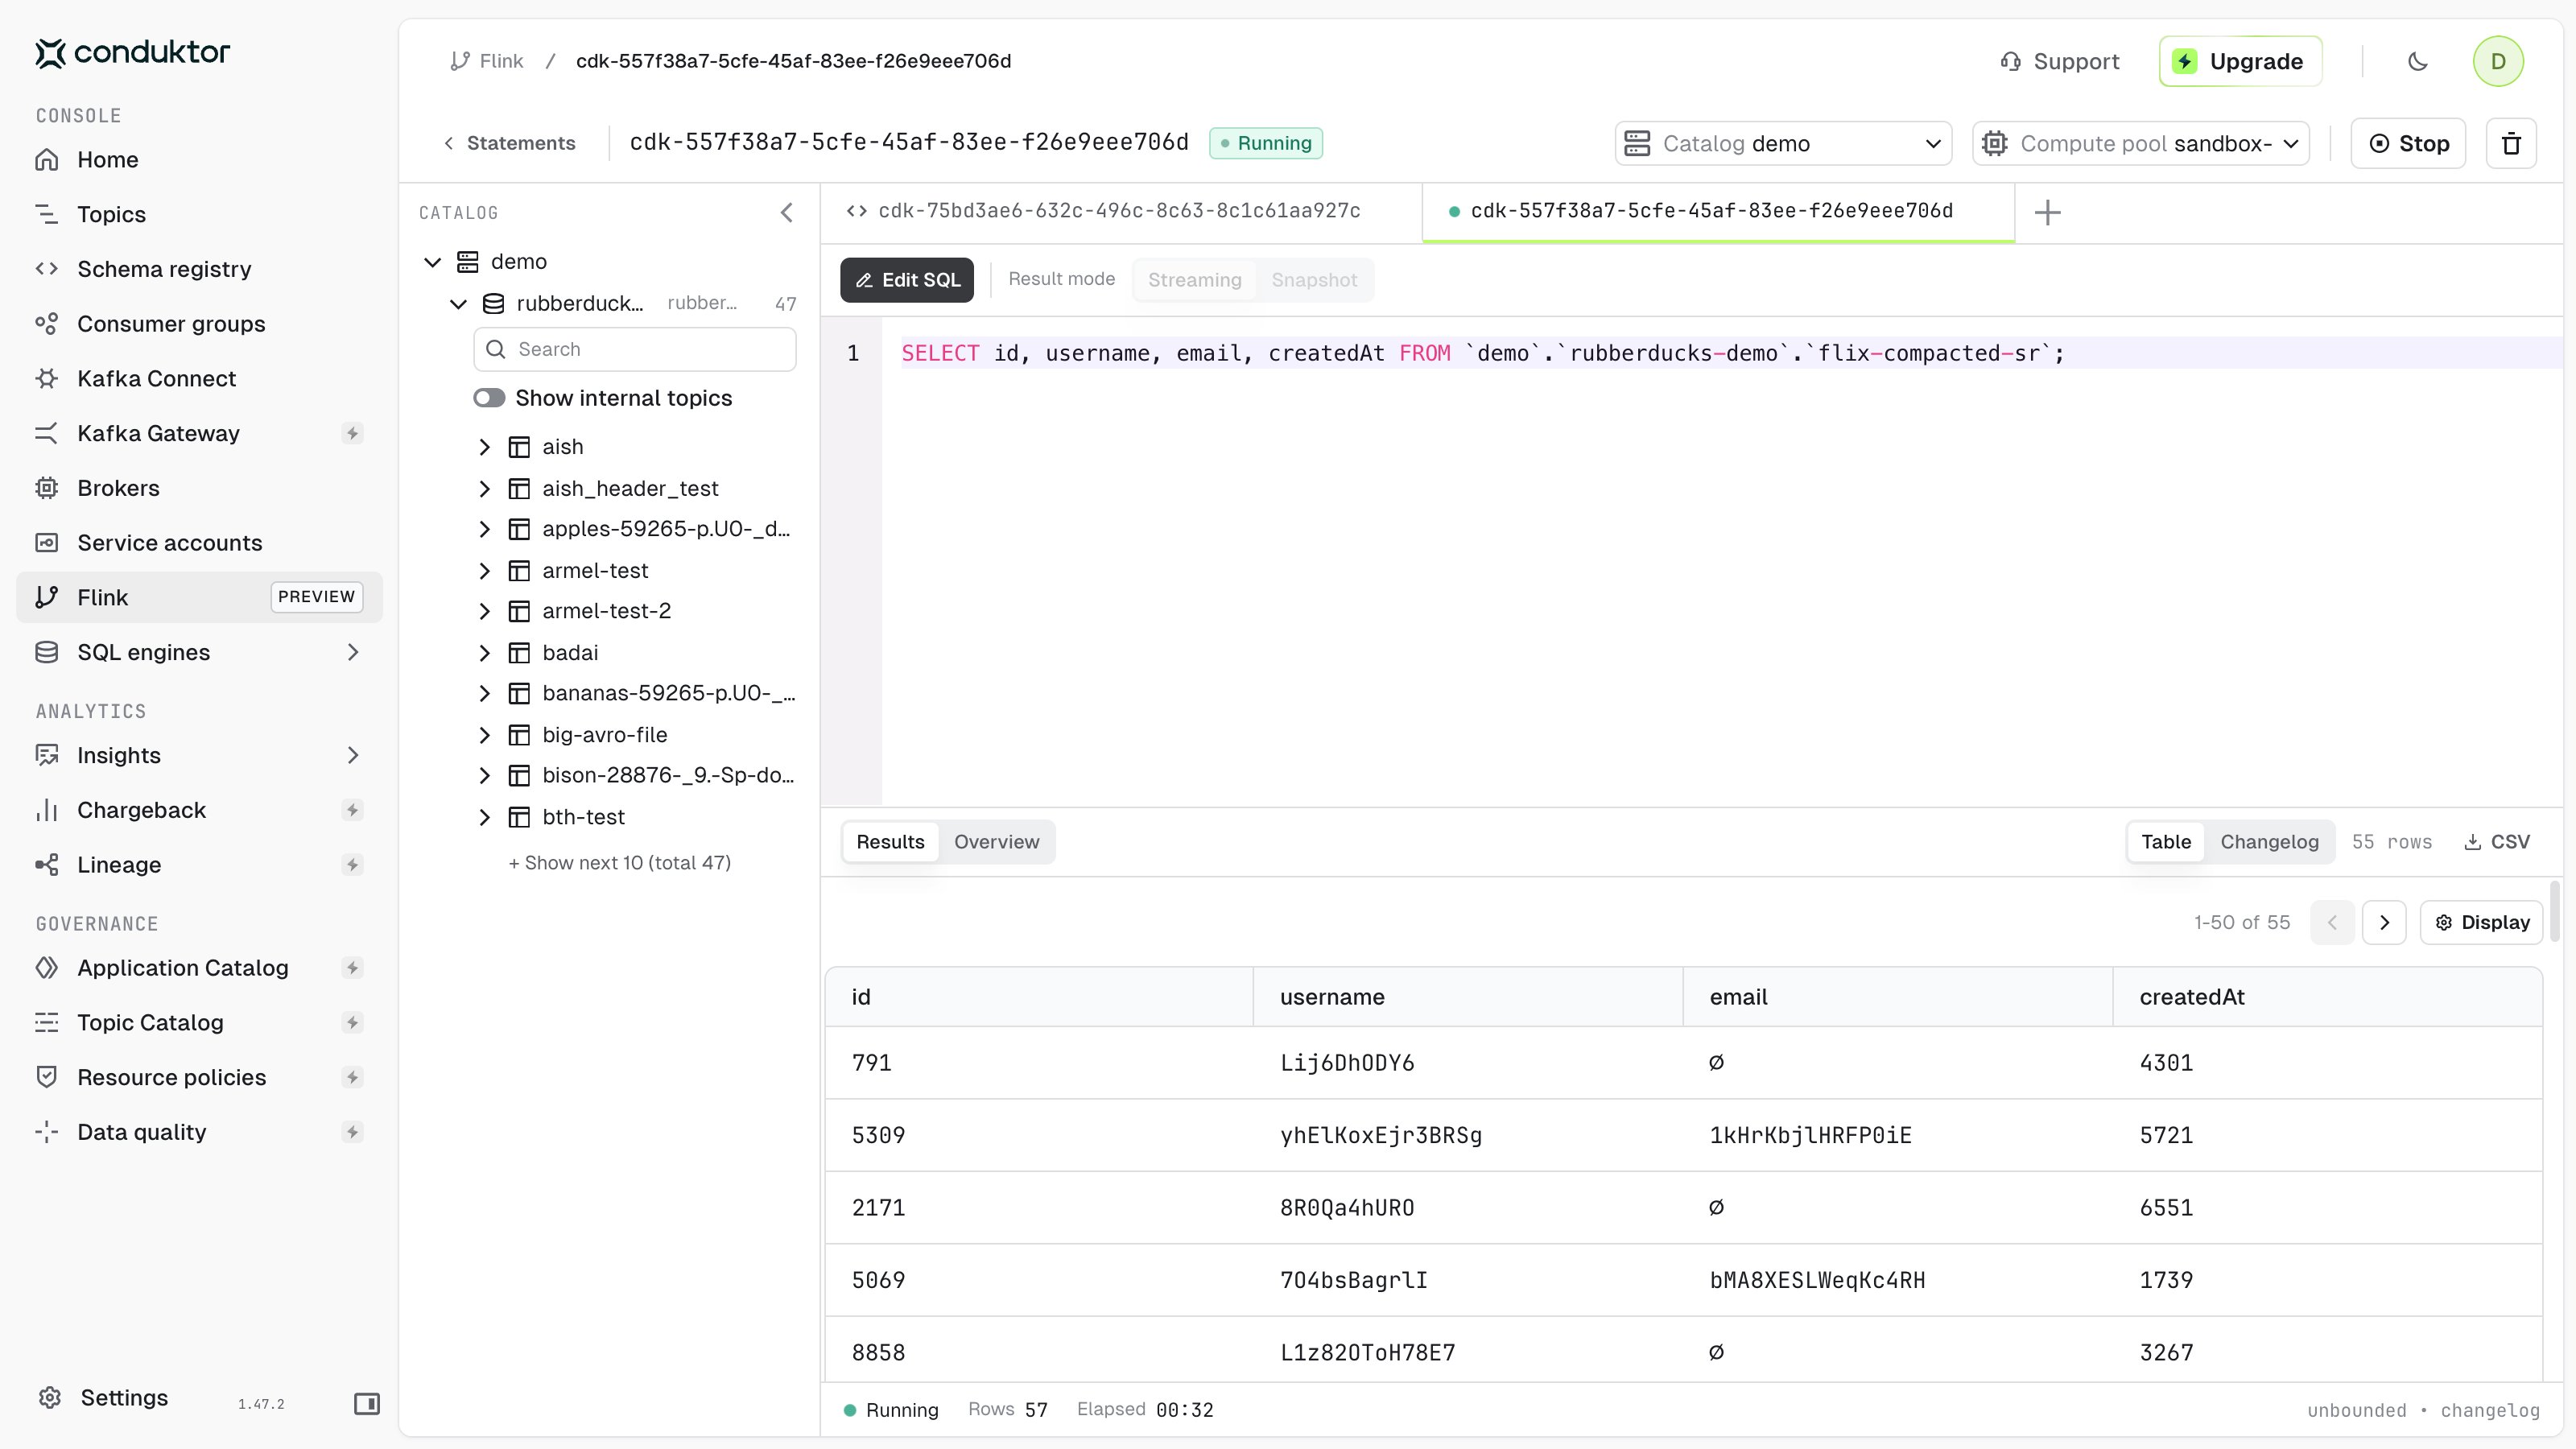
- Streaming (default) shows rows as the statement produces them, until you click Stop. Switch between the Table view and the Changelog view, which adds the change type of each row.
- Snapshot runs a bounded query on the current data and shows the result when it completes.
Write and DDL statements
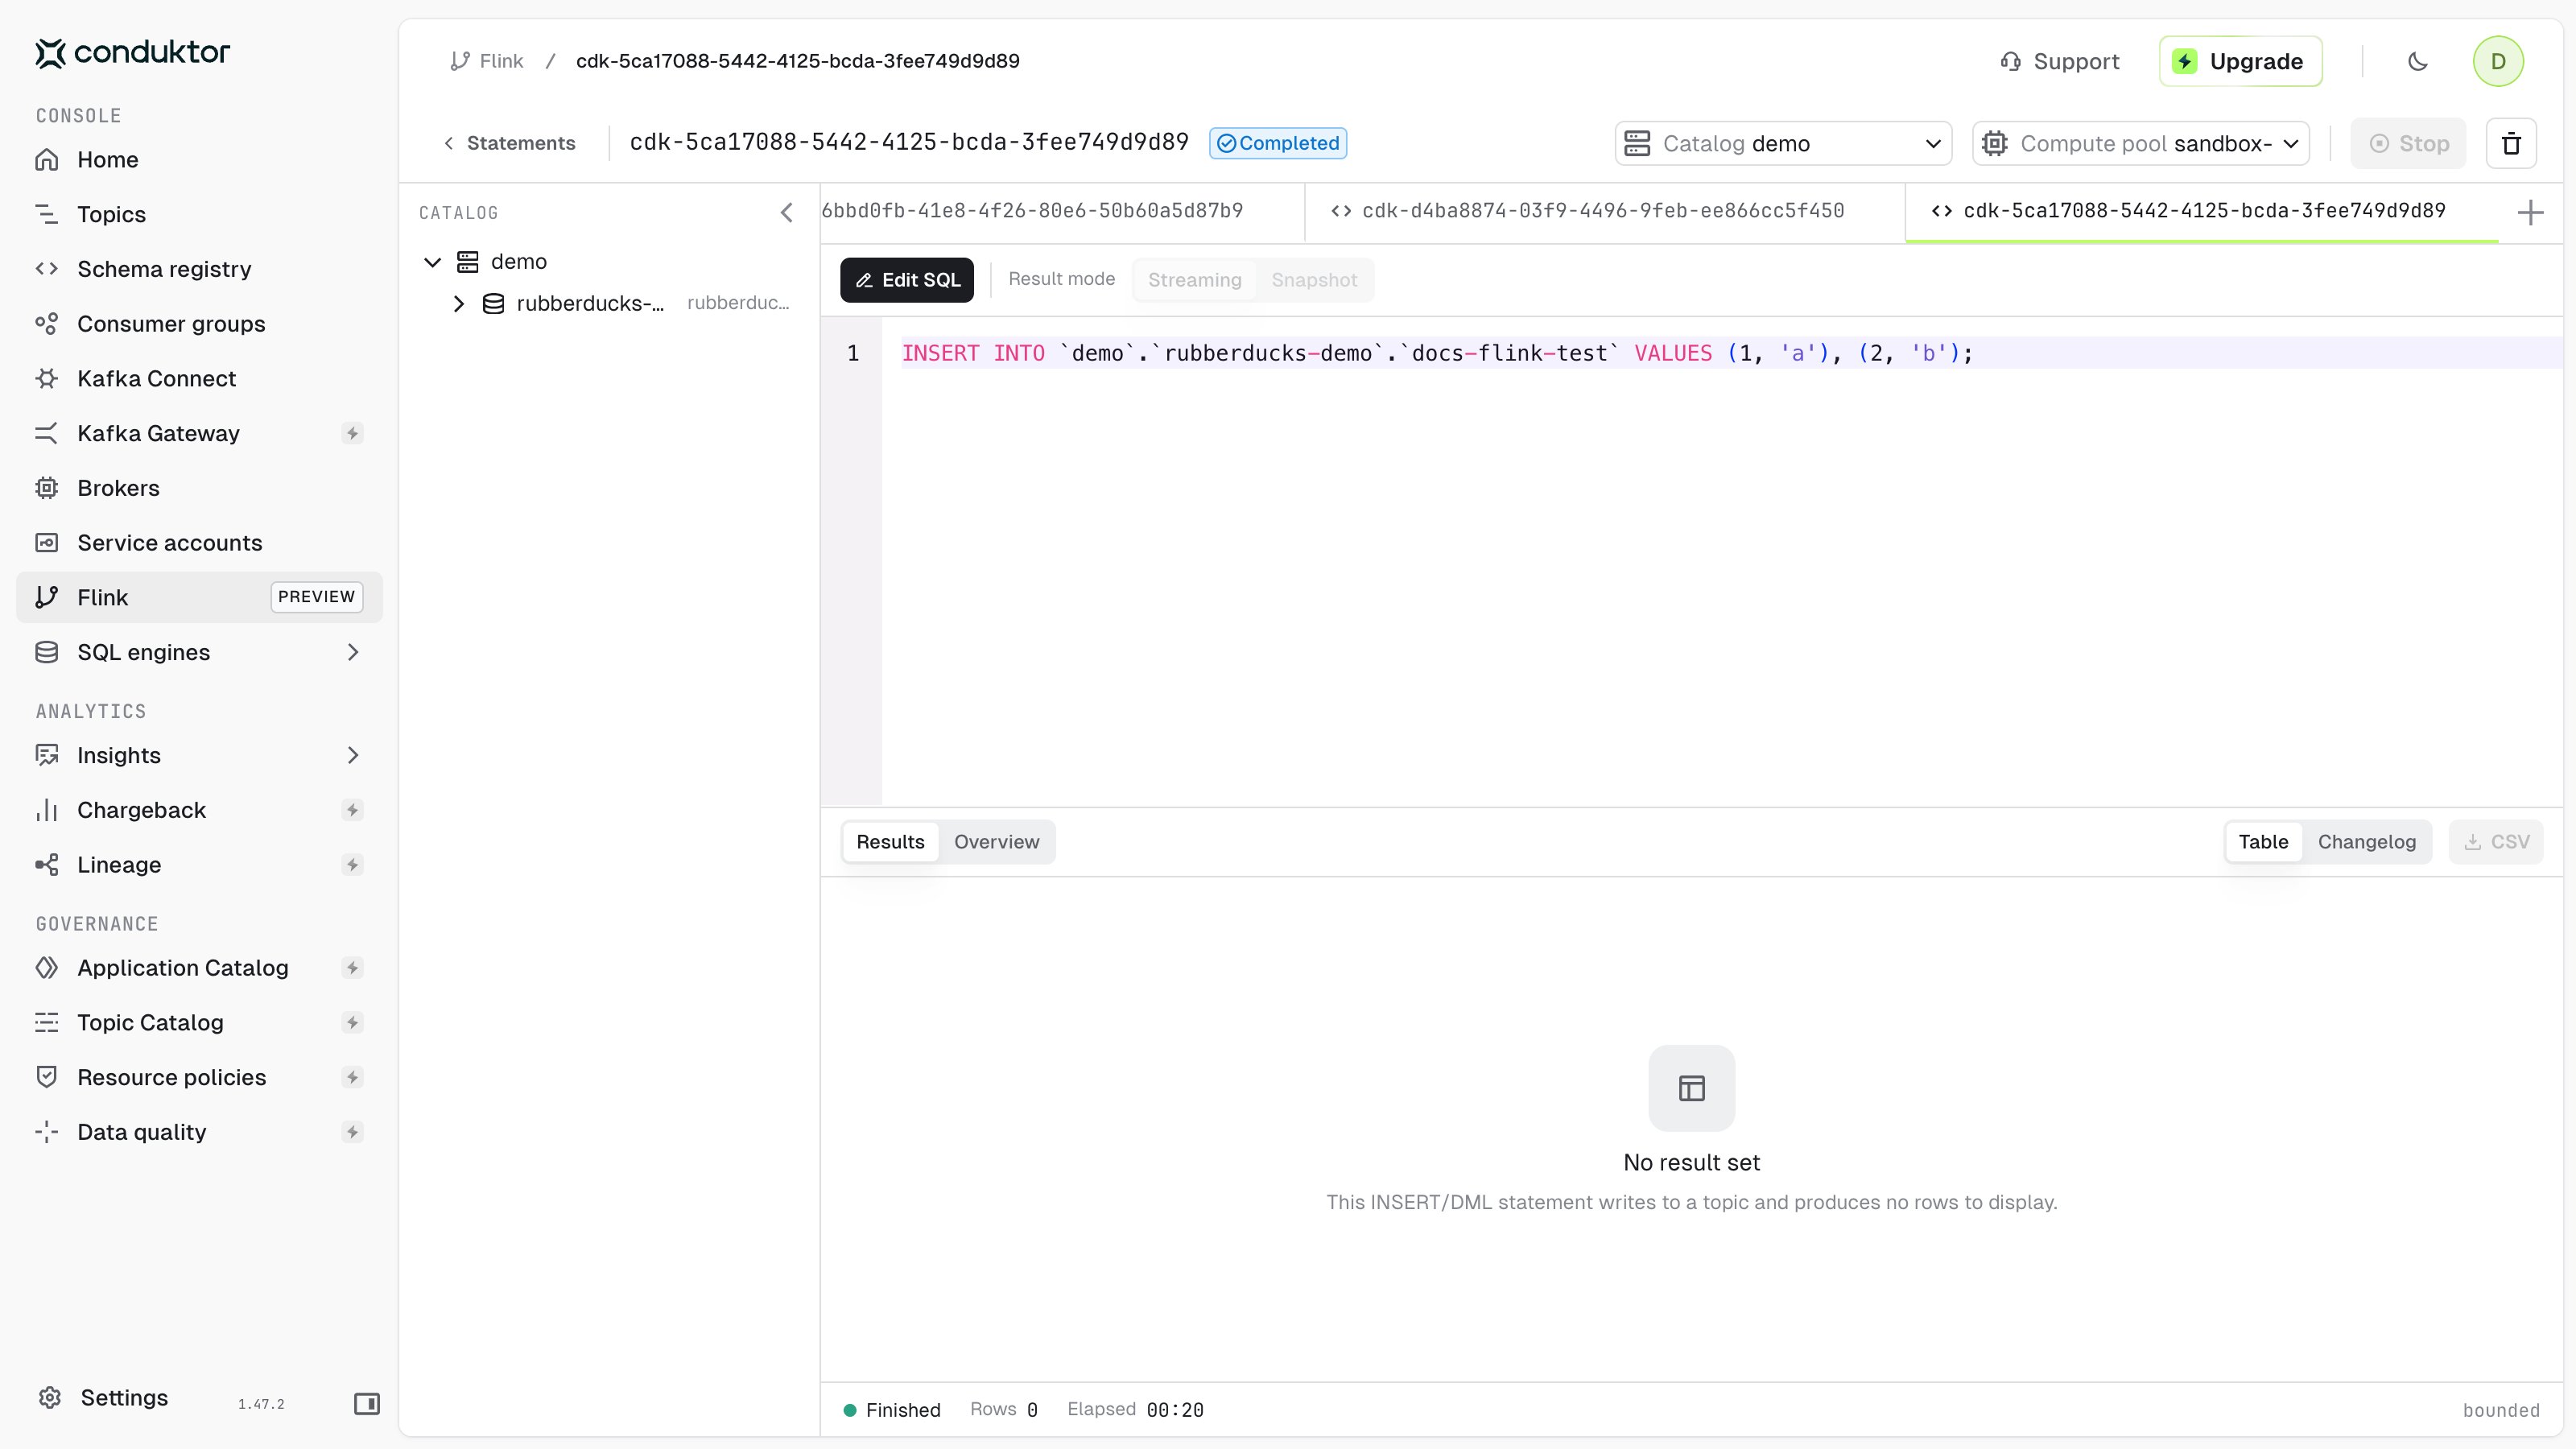
INSERT, CREATE TABLE, CREATE VIEW and DROP statements don’t return rows: the results pane shows No result set. CREATE TABLE creates the topic and its value schema in Confluent Cloud.
CREATE TABLE ASandINSERT INTO ... SELECTkeep running until you stop them, like any statement that reads a topic continuously. Check the status badge next to the statement name: the footer of the results pane can show Finished as soon as the statement is submitted, while the statement is still running.DROP TABLEsoft-deletes the Schema Registry subjects of the table. Delete them permanently in Schema Registry if you want to reuse the name with a different schema.- The output of
SHOW CREATE TABLEcan’t be run as is: it containsWITHoptions, such asconnectororkafka.retention.time, that Console refuses. See statements Console refuses.
Manage statements
The Flink statements page lists the statements running in the selected organization and catalog, with their status, creation date, compute pool and account. You only see statements on compute pools where you have Run Flink, and only if you have every topic permission they require.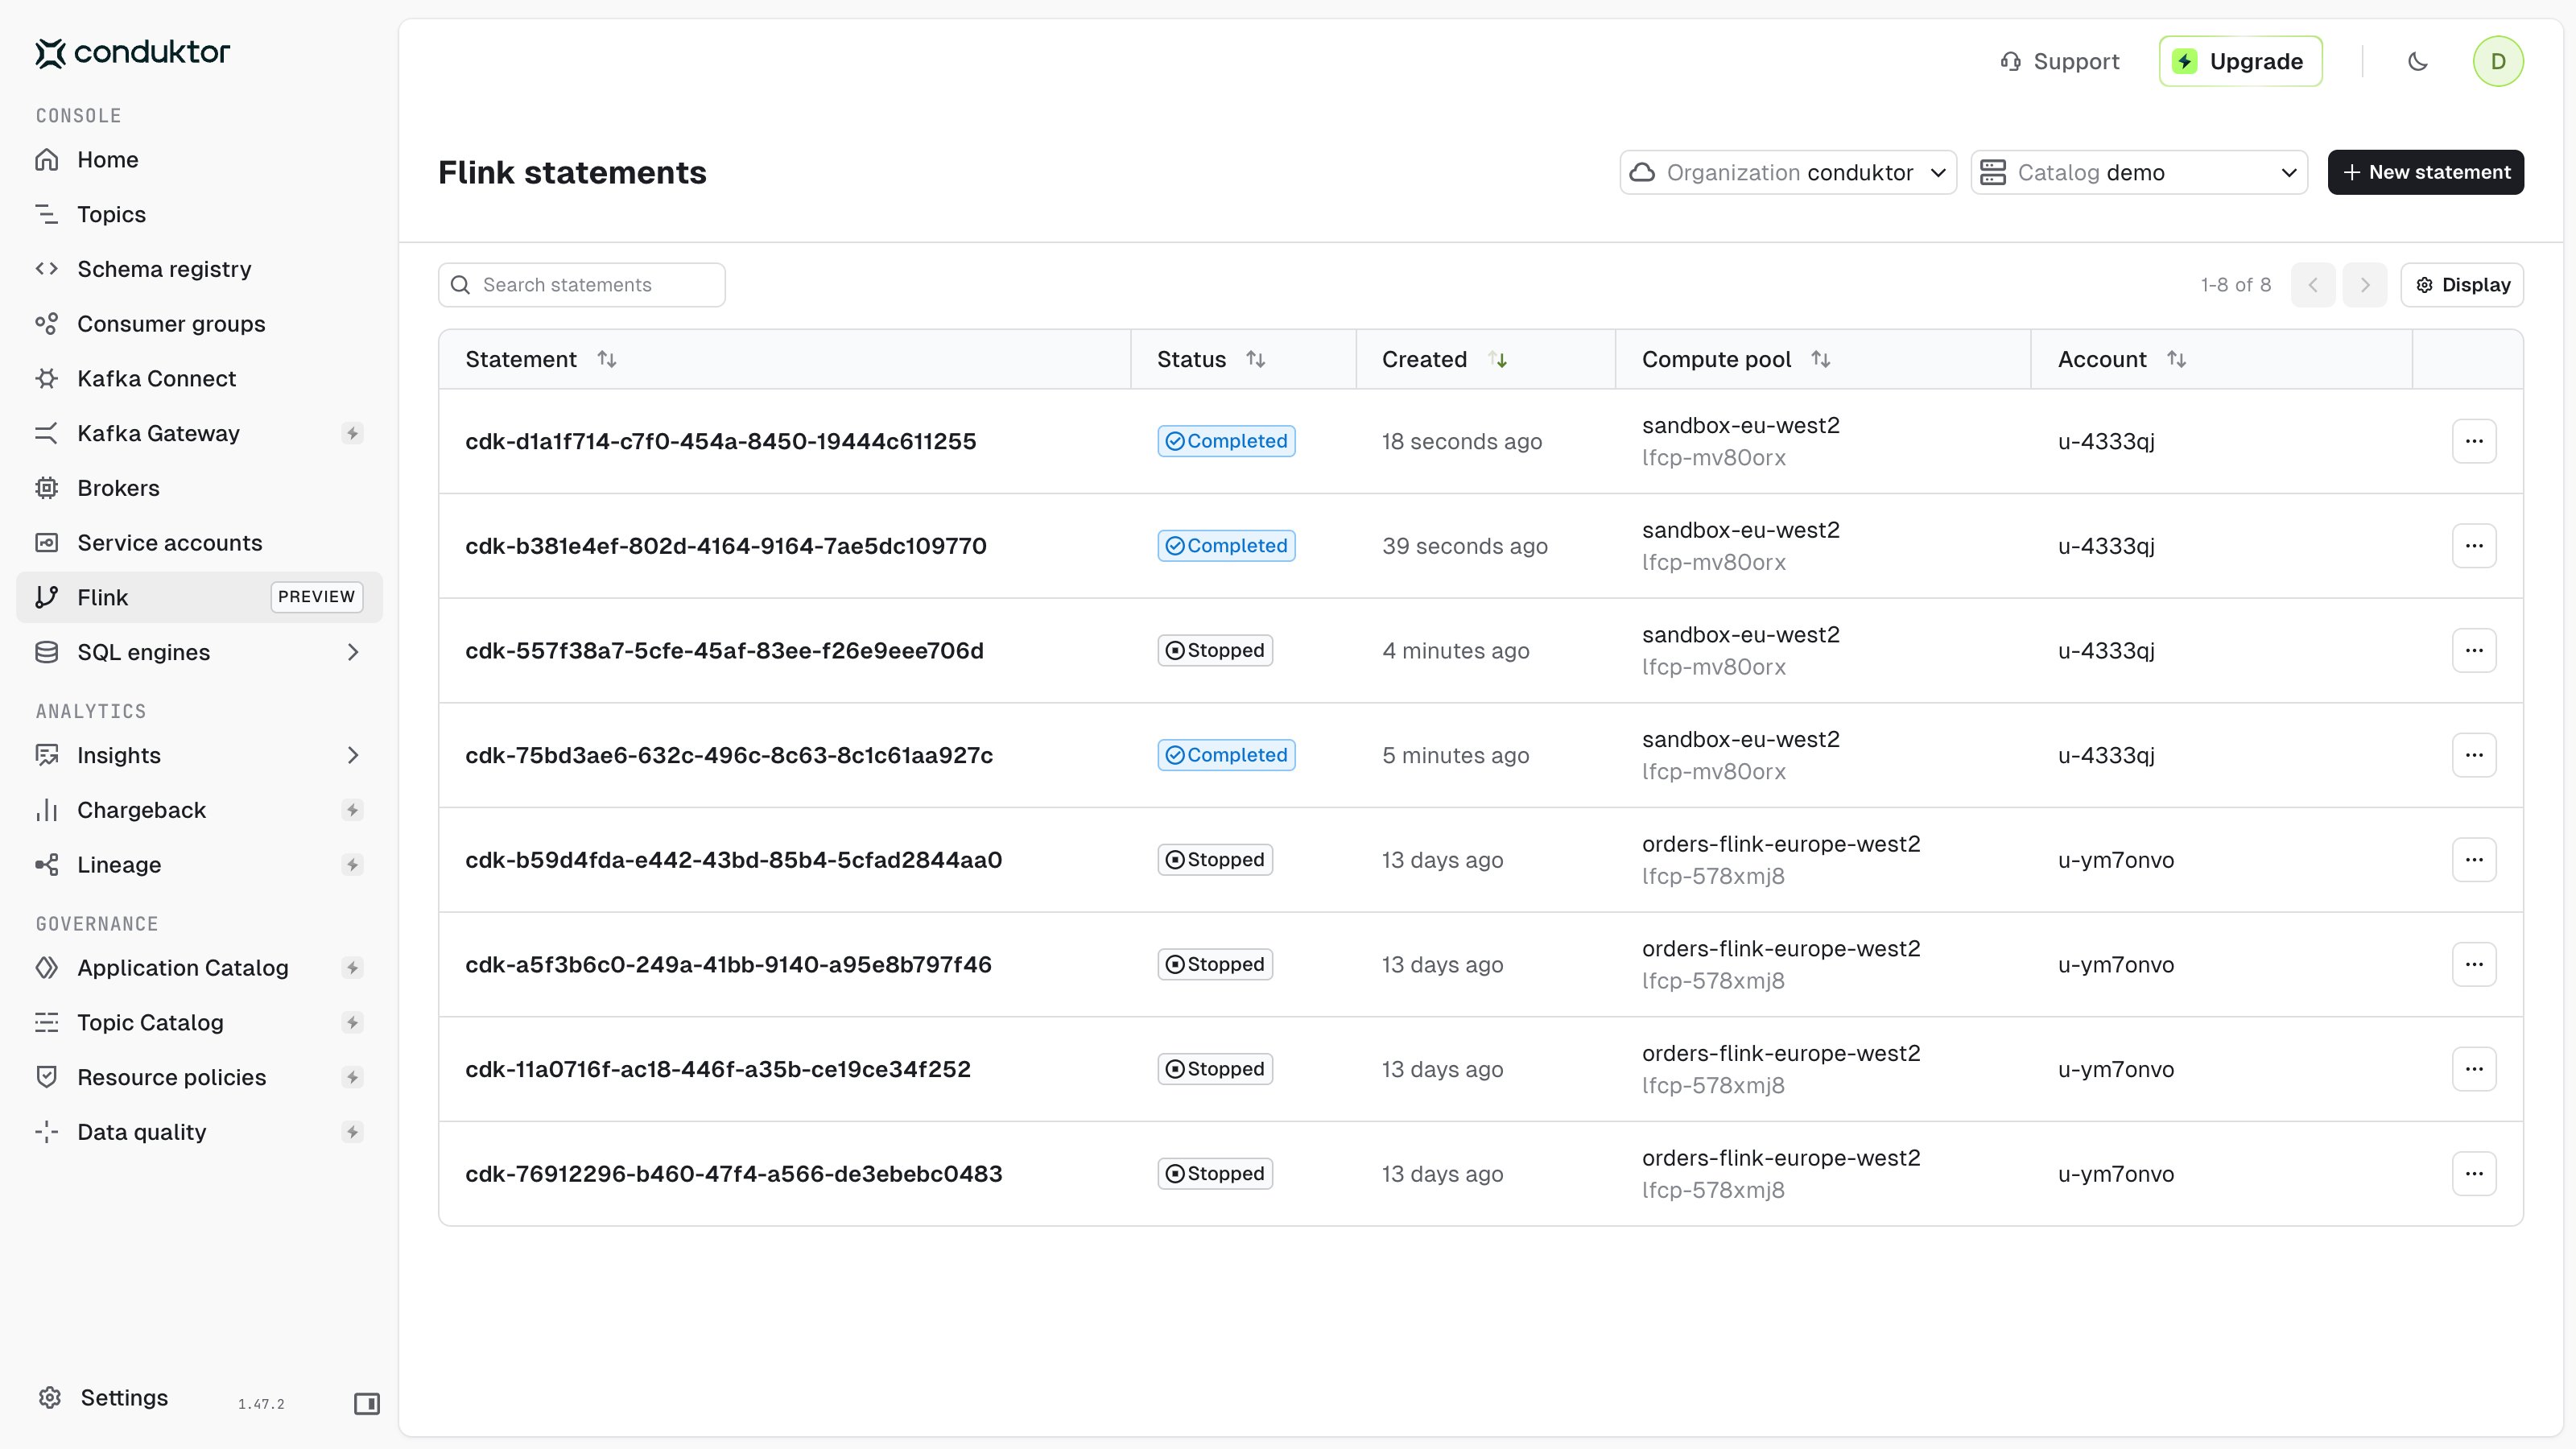
- Stop a running statement. You can’t resume it.
- Delete a statement. This is permanent: type
DELETEto confirm.
Topic permissions
Console parses each statement and checks the user’s topic permissions before it submits it to Confluent Cloud. In the Resource access tab, read is the Consume permission, write is Produce, create is Create and delete is Delete:
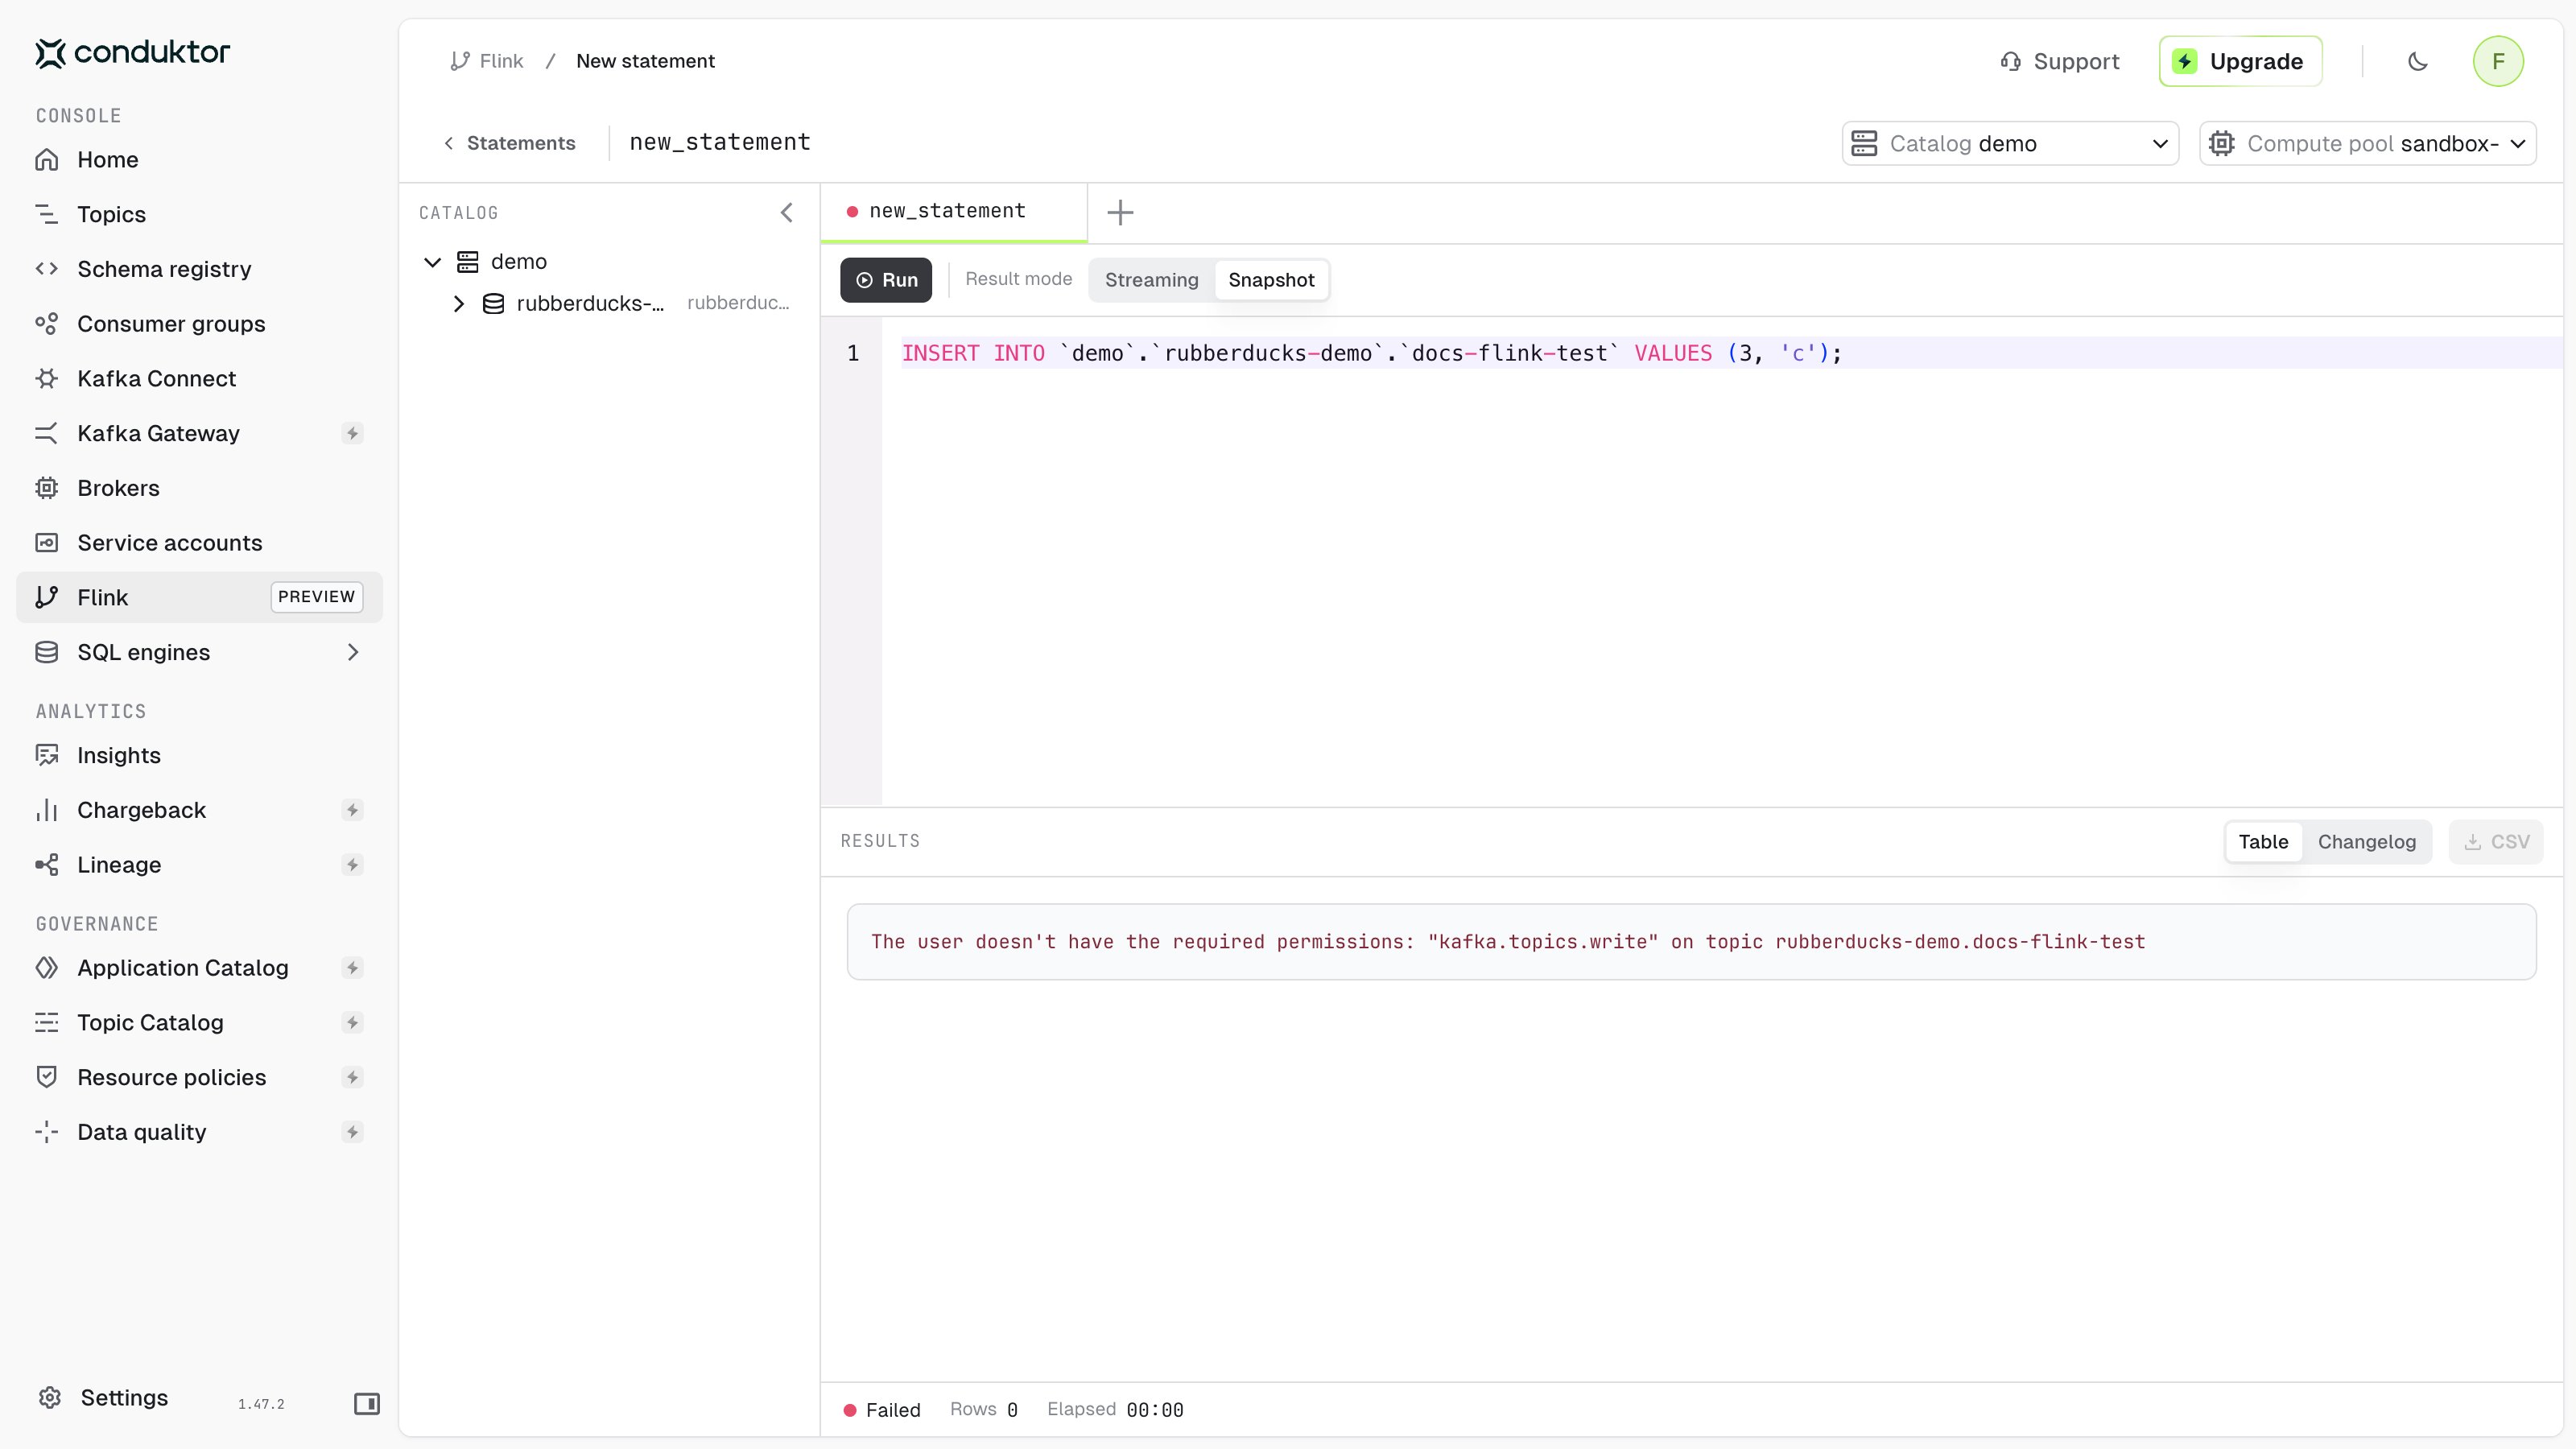
If permissions are missing, Console lists them all, for example
The user doesn't have the required permissions: "kafka.topics.write" on topic orders-cluster.orders. To let users create tables, grant Create on a topic prefix, such as team-a-*. This prefix doesn’t cover a topic named team-a.
Statements Console refuses
Console refuses statements when it can’t determine which topics they touch. The statement fails in Console and isn’t sent to Confluent Cloud: