

Prerequisites
Set up the connection
1
Open the MCP setup page
In Console, go to Settings > MCP.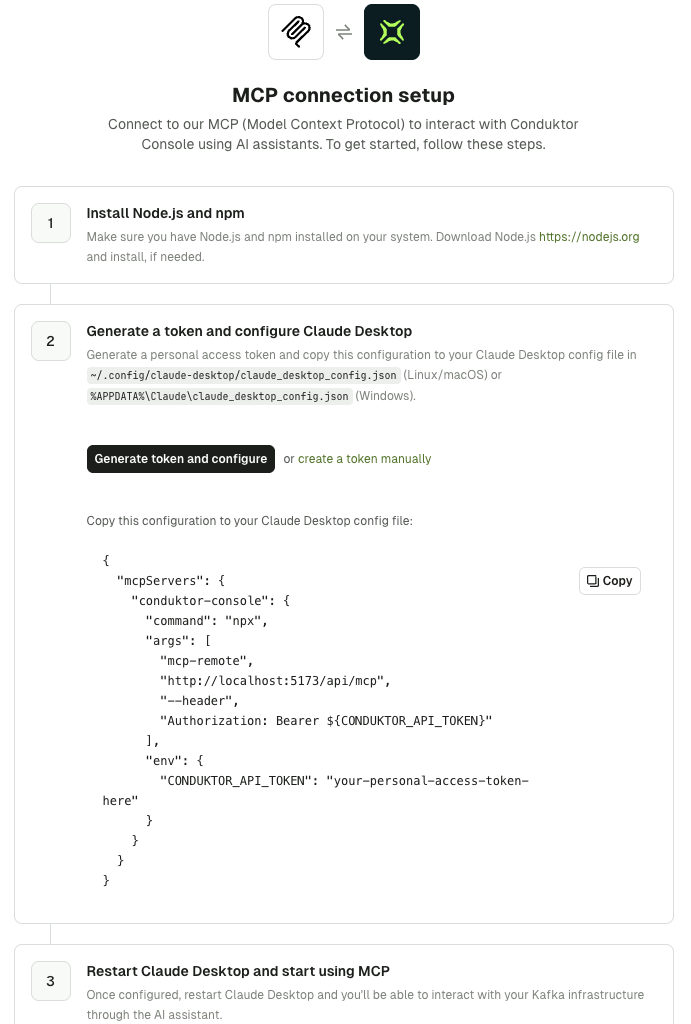
2
Generate a token
Click Generate token and configure. Console creates a personal access token named
MCP Token - <date> and adds it to the configuration shown on the page.Copy the configuration straight away: the token won’t be visible once you leave the page.To create the token yourself, click create a token manually or go to Settings > API Keys. Find out more about personal access tokens.3
Add the configuration to your MCP client
- Claude Desktop
- Other MCP clients
In Claude Desktop, go to Settings > Developer and click Edit Config to open
claude_desktop_config.json:- macOS:
~/Library/Application Support/Claude/claude_desktop_config.json - Windows:
%APPDATA%\Claude\claude_desktop_config.json
mcpServers. It looks like this:4
Restart your client and test the connection
Restart your MCP client, then ask it a question such as:The assistant calls list-clusters and lists the clusters you have access to in Console. If it does, you’re connected.
Manage access
The token you connect with decides what the assistant can see and do:- Personal access token: inherits your own permissions in Console. Use this for MCP clients.
- Admin API key: also works, but has admin access to every resource. Avoid it for AI assistants.
Troubleshoot the connection
The assistant doesn’t list some topics, consumer groups or other resources: tools that list resources leave out the ones your token can’t access, without reporting an error. Check your permissions in Console. The Insights tools, query-topics or aggregate-topics are missing: these tools are only available when Insights is enabled. Ask your admin to check theenable_insights setting. See Disable Insights.
The client can’t connect or gets an authentication error: check that the endpoint ends in /api/mcp and that the token hasn’t been revoked. If you use Claude Desktop, check that Node.js and npm are installed and that npx is on your PATH.