

Before you start
- Set up agents: enable the feature and connect a model.
- Sign in to Console as an administrator.
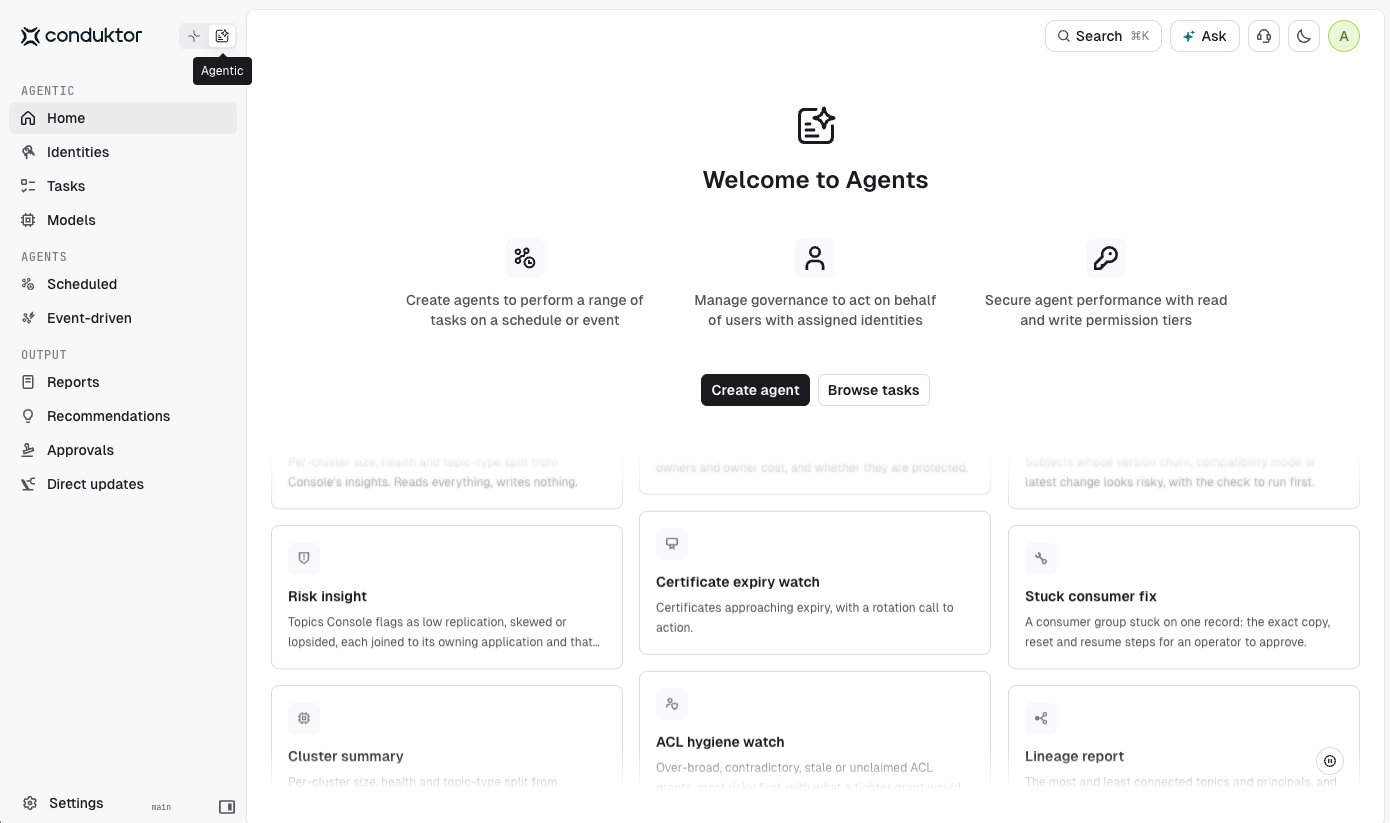
- Switch the sidebar to Agentic with the toggle at the top of the sidebar. The agents home page opens.
Create an identity
An agent runs using its own identity, not as you. The identity is a machine token: it has a name, an expiry and its own permissions, and an accountable Console user. You can create as many machine tokens as you like for agents, and we recommend one per agent to allow audit and control of what each agent is doing.1
Name it and set an expiry
Go to Identities and click Create identity.Give the identity a name. It appears in the identities list and in the audit log next to everything the agent does.Acts for is you. The identity can’t hold more permissions than this user. Administrators hold every permission, so the next two steps ask you to select what the identity needs explicitly rather than inheriting everything.Choose when the token expires. The default is 90 days. When an identity expires or is revoked, its agents stop running. An agent’s identity can’t be changed afterwards, so to move to a new identity you create a new agent.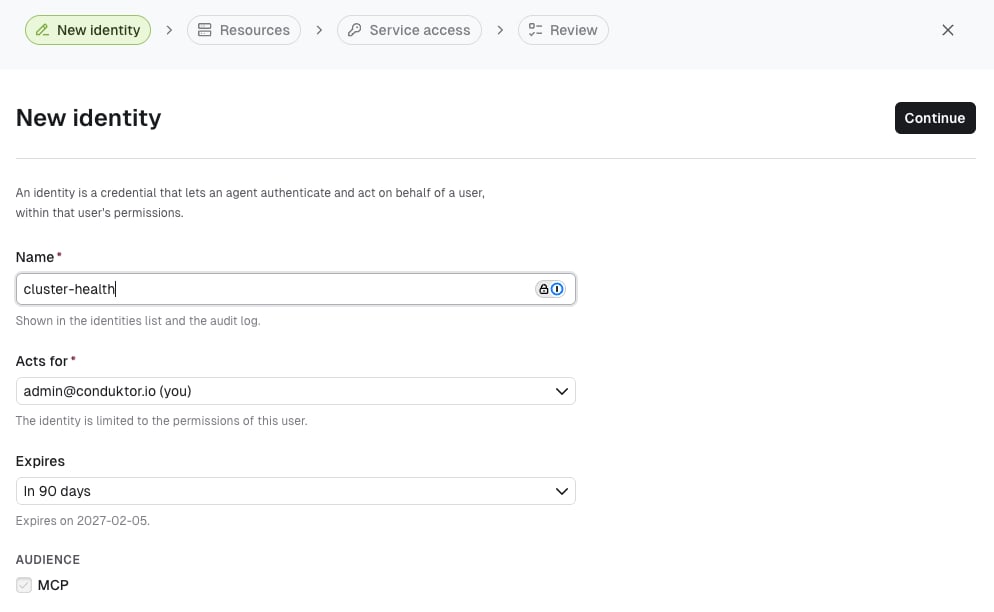
2
Pre-fill the permissions from a task
On the Resources step, use Pre-fill from a task: pick the task you plan to run, such as Cluster summary, and the cluster it should run on. Console selects the minimal set of resource permissions that task needs, scoped to that one cluster. Add more resources if the agent needs them, or remove any you don’t want it to have.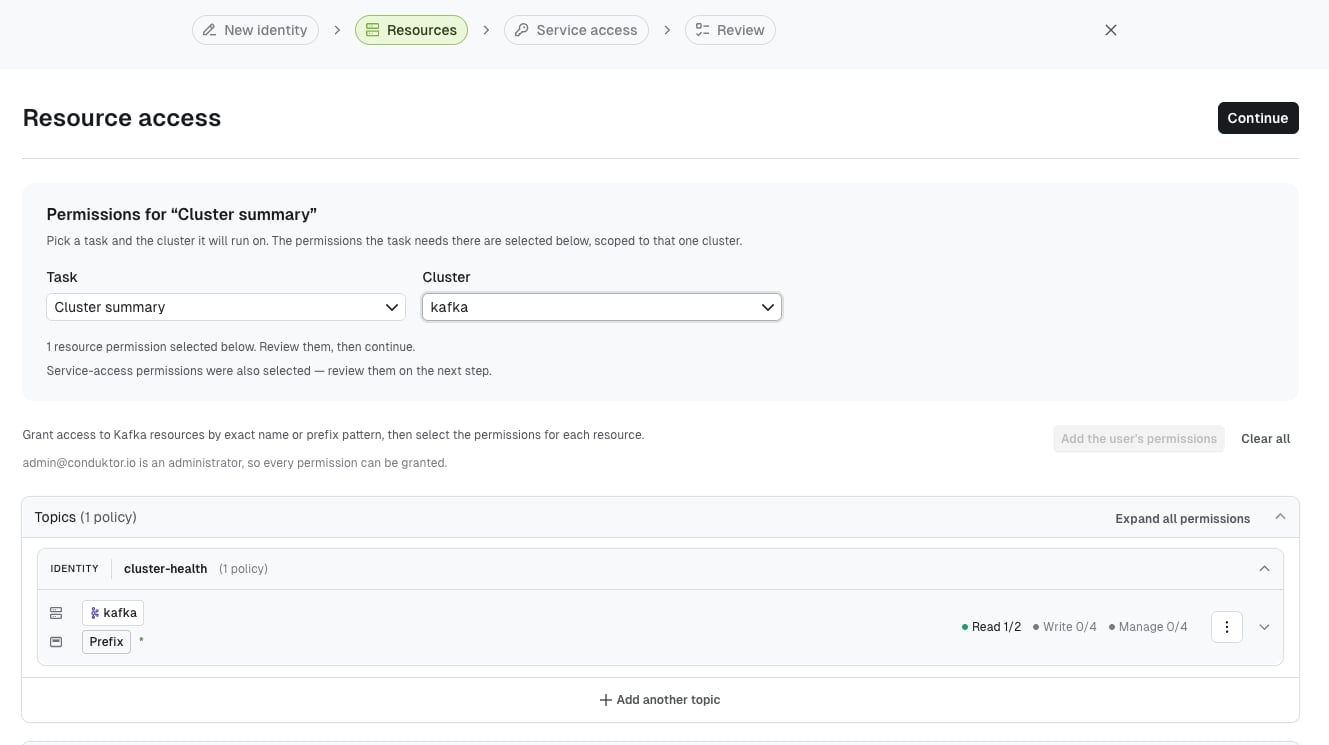
3
Review and create
Check the summary and click Create.
4
Copy the token
Console shows the token once. You don’t need it to create an agent, because you pick the identity by name, but copy it if you also want to use this identity from an MCP client. It can’t be displayed again.Click Finish. The identity appears in the Identities list as Active, with the user it acts for and when it expires.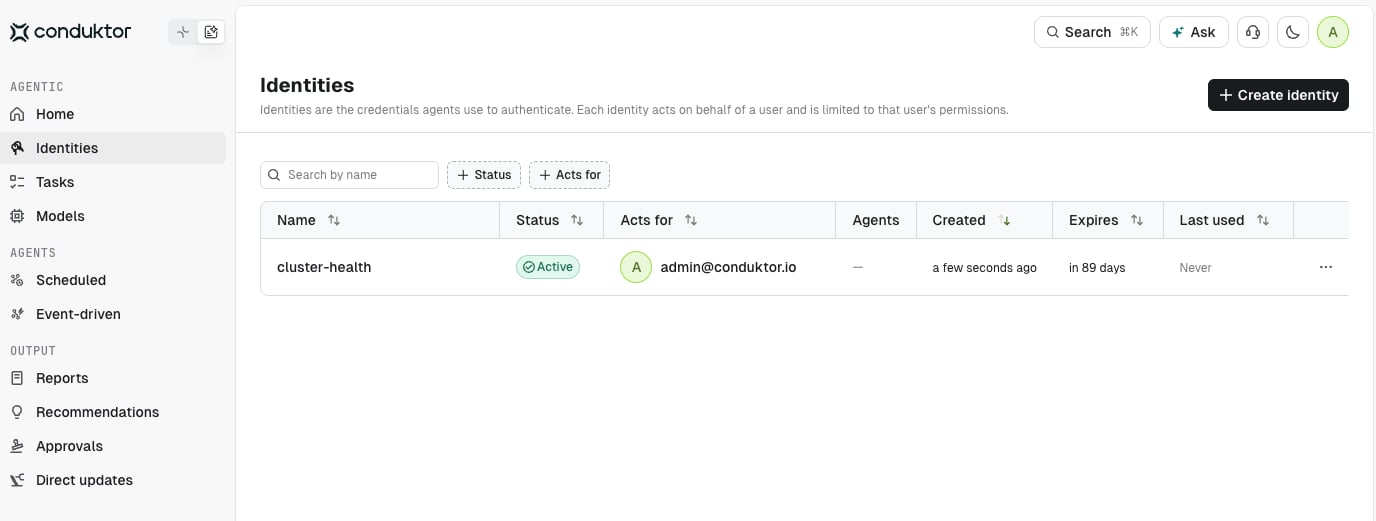
Create an agent
1
Pick the task and the model
Go to Agents > Scheduled and click Create agent.Name the agent, pick the task you created the identity for and pick the model connection that should run it. The task picker shows what the task produces, whether it runs on a schedule or on events, the permissions it needs and the tools it may use.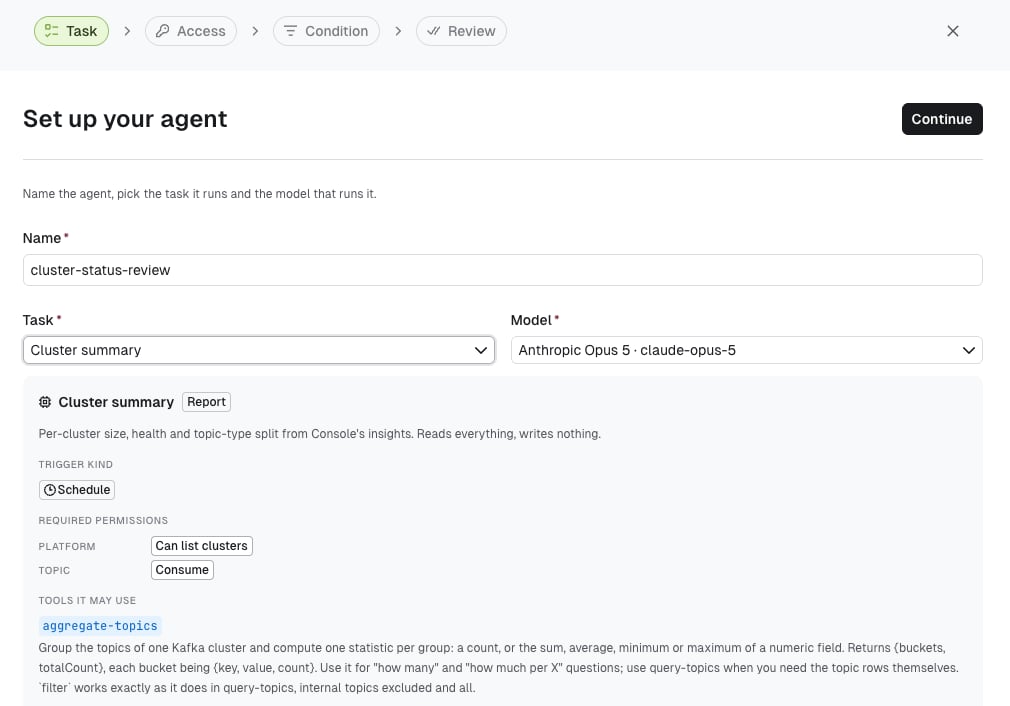
2
Pick the identity
On the Access step, select the identity you just created. The task only sees what this identity can see, and its actions are attributed to it.If you skipped the identity section, you can create one from here: pick a cluster and click Create new identity with permissions for the task. Console creates it with the permissions the task needs on that cluster.The same step sets how often the agent is allowed to run: a quiet period between runs and a maximum number of runs per hour. These guard against an event-driven agent firing on every change in a busy cluster. Leave them empty for a scheduled agent.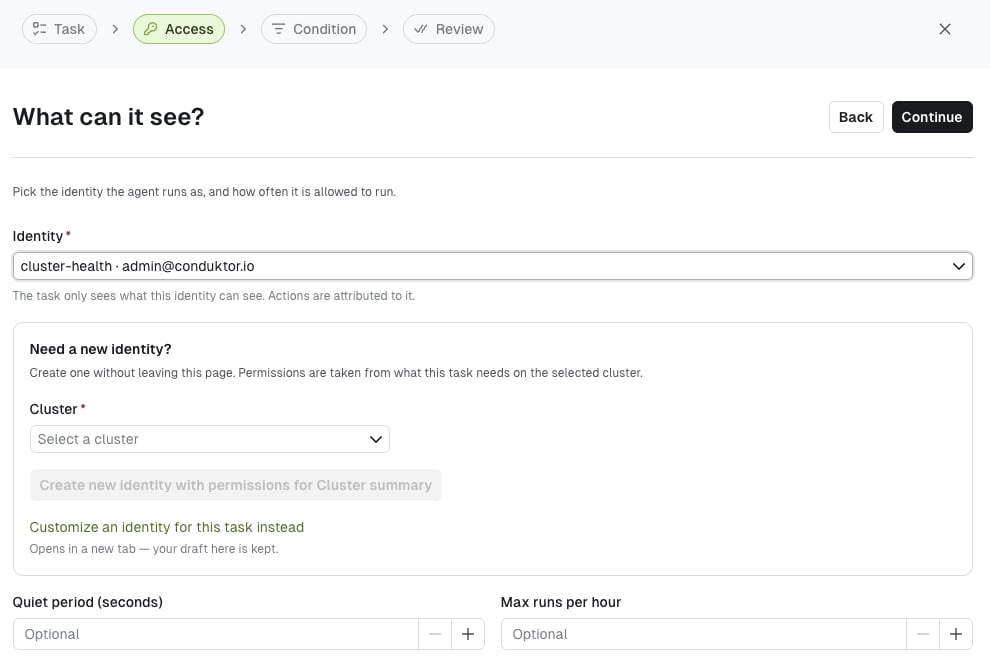
3
Choose when it runs
On the Condition step, pick On a schedule and a cadence: hourly, daily, weekly or monthly, with a time and a timezone. If a run is missed, for example because Console was restarted, choose Skip missed or Run once for when Console comes back.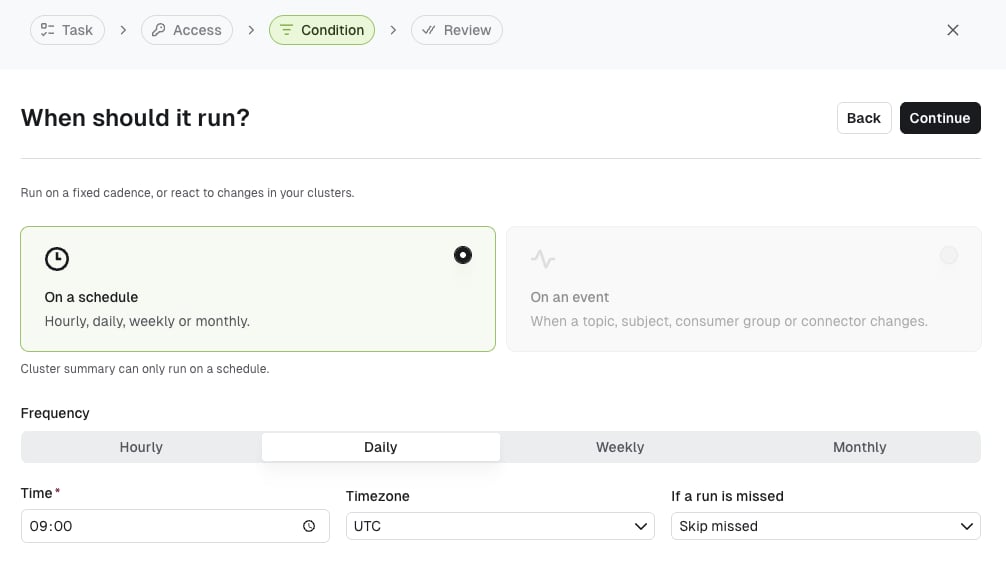
orders-* and the actions that count. Console shows a preview of the audit log events from the last seven days that would have matched. Some tasks, such as Cluster summary, only run on a schedule.4
Review and create
Check the summary. With Enable immediately on, click Create and enable: the agent runs at its next scheduled time or matching event. Turn it off to create the agent disabled and enable it later from the list or its detail page.
Run it and read the output
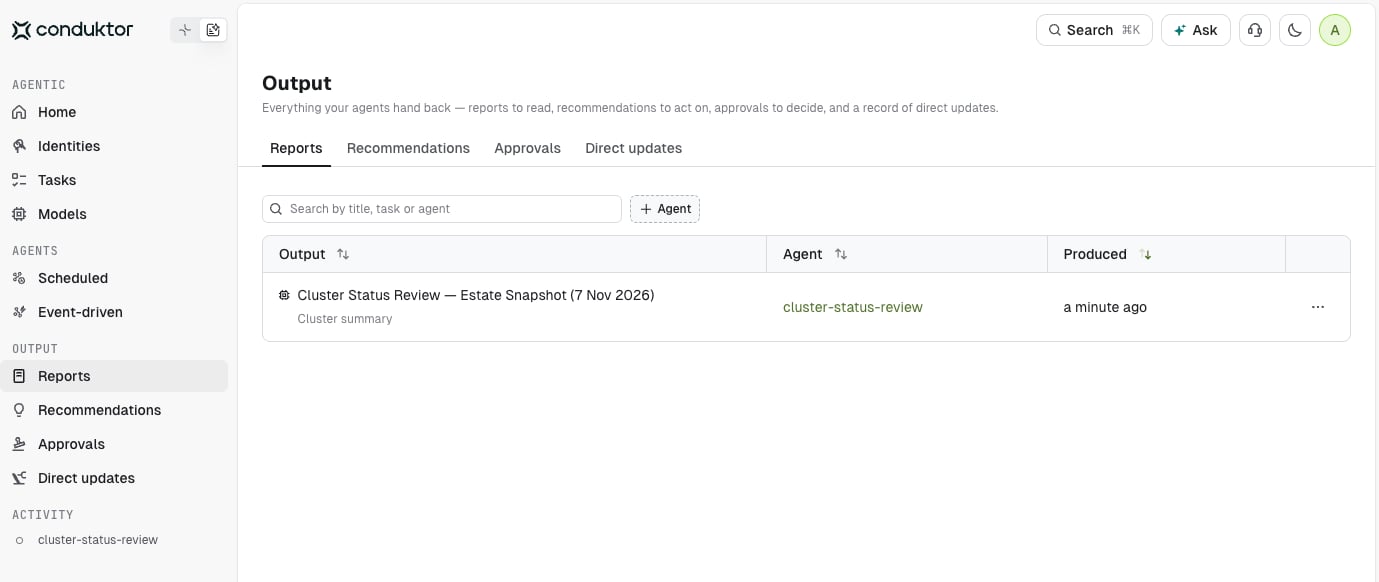
After you create the agent, Console opens its detail page. It shows the next run, the task and model, the schedule, the identity it runs as, and a History panel that fills in as it runs. You don’t have to wait for the schedule. Click Run once to start a run now.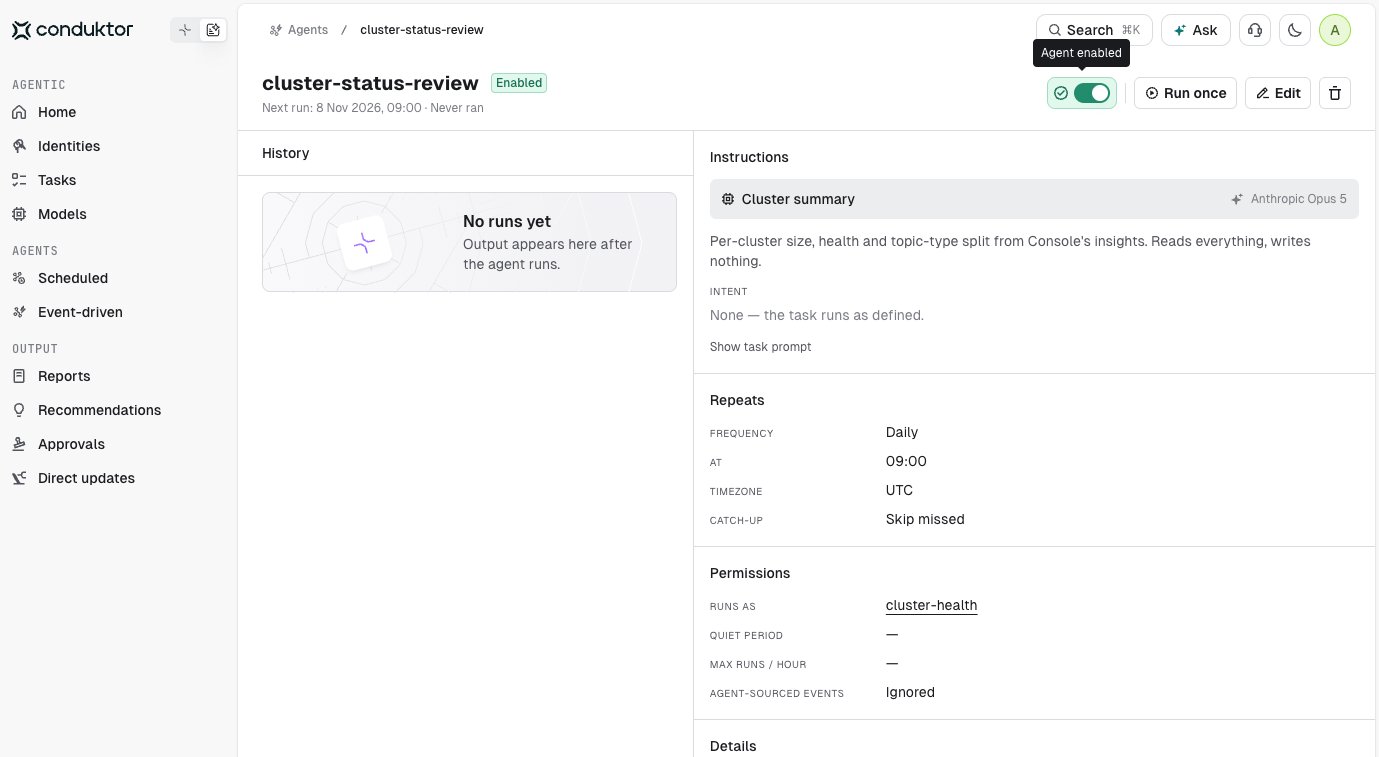
- Reports are there to read. Open one to see the result and mark it read.
- Recommendations suggest something to do. Click Mark as actioned when you’ve done it, or Dismiss it.
- Approvals propose a specific change, such as resetting a stuck consumer group. Approve or Reject it with an optional reason. Console records your decision and doesn’t execute the change in this release.
Next steps
- Adjust the schedule once you know how long a run takes and how often the result changes.
- Create more agents from the catalogue on the Tasks page, with one identity per agent so you can audit and control each one.
- Disable or delete an agent from its detail page. Disabling keeps its history; deleting removes the agent but keeps the outputs it produced.